Map tips: each color represents a different day. Click a marker to learn more about the spot, and click the star in the map header to save the entire map under Your Places in Google Maps.
Getting a permit
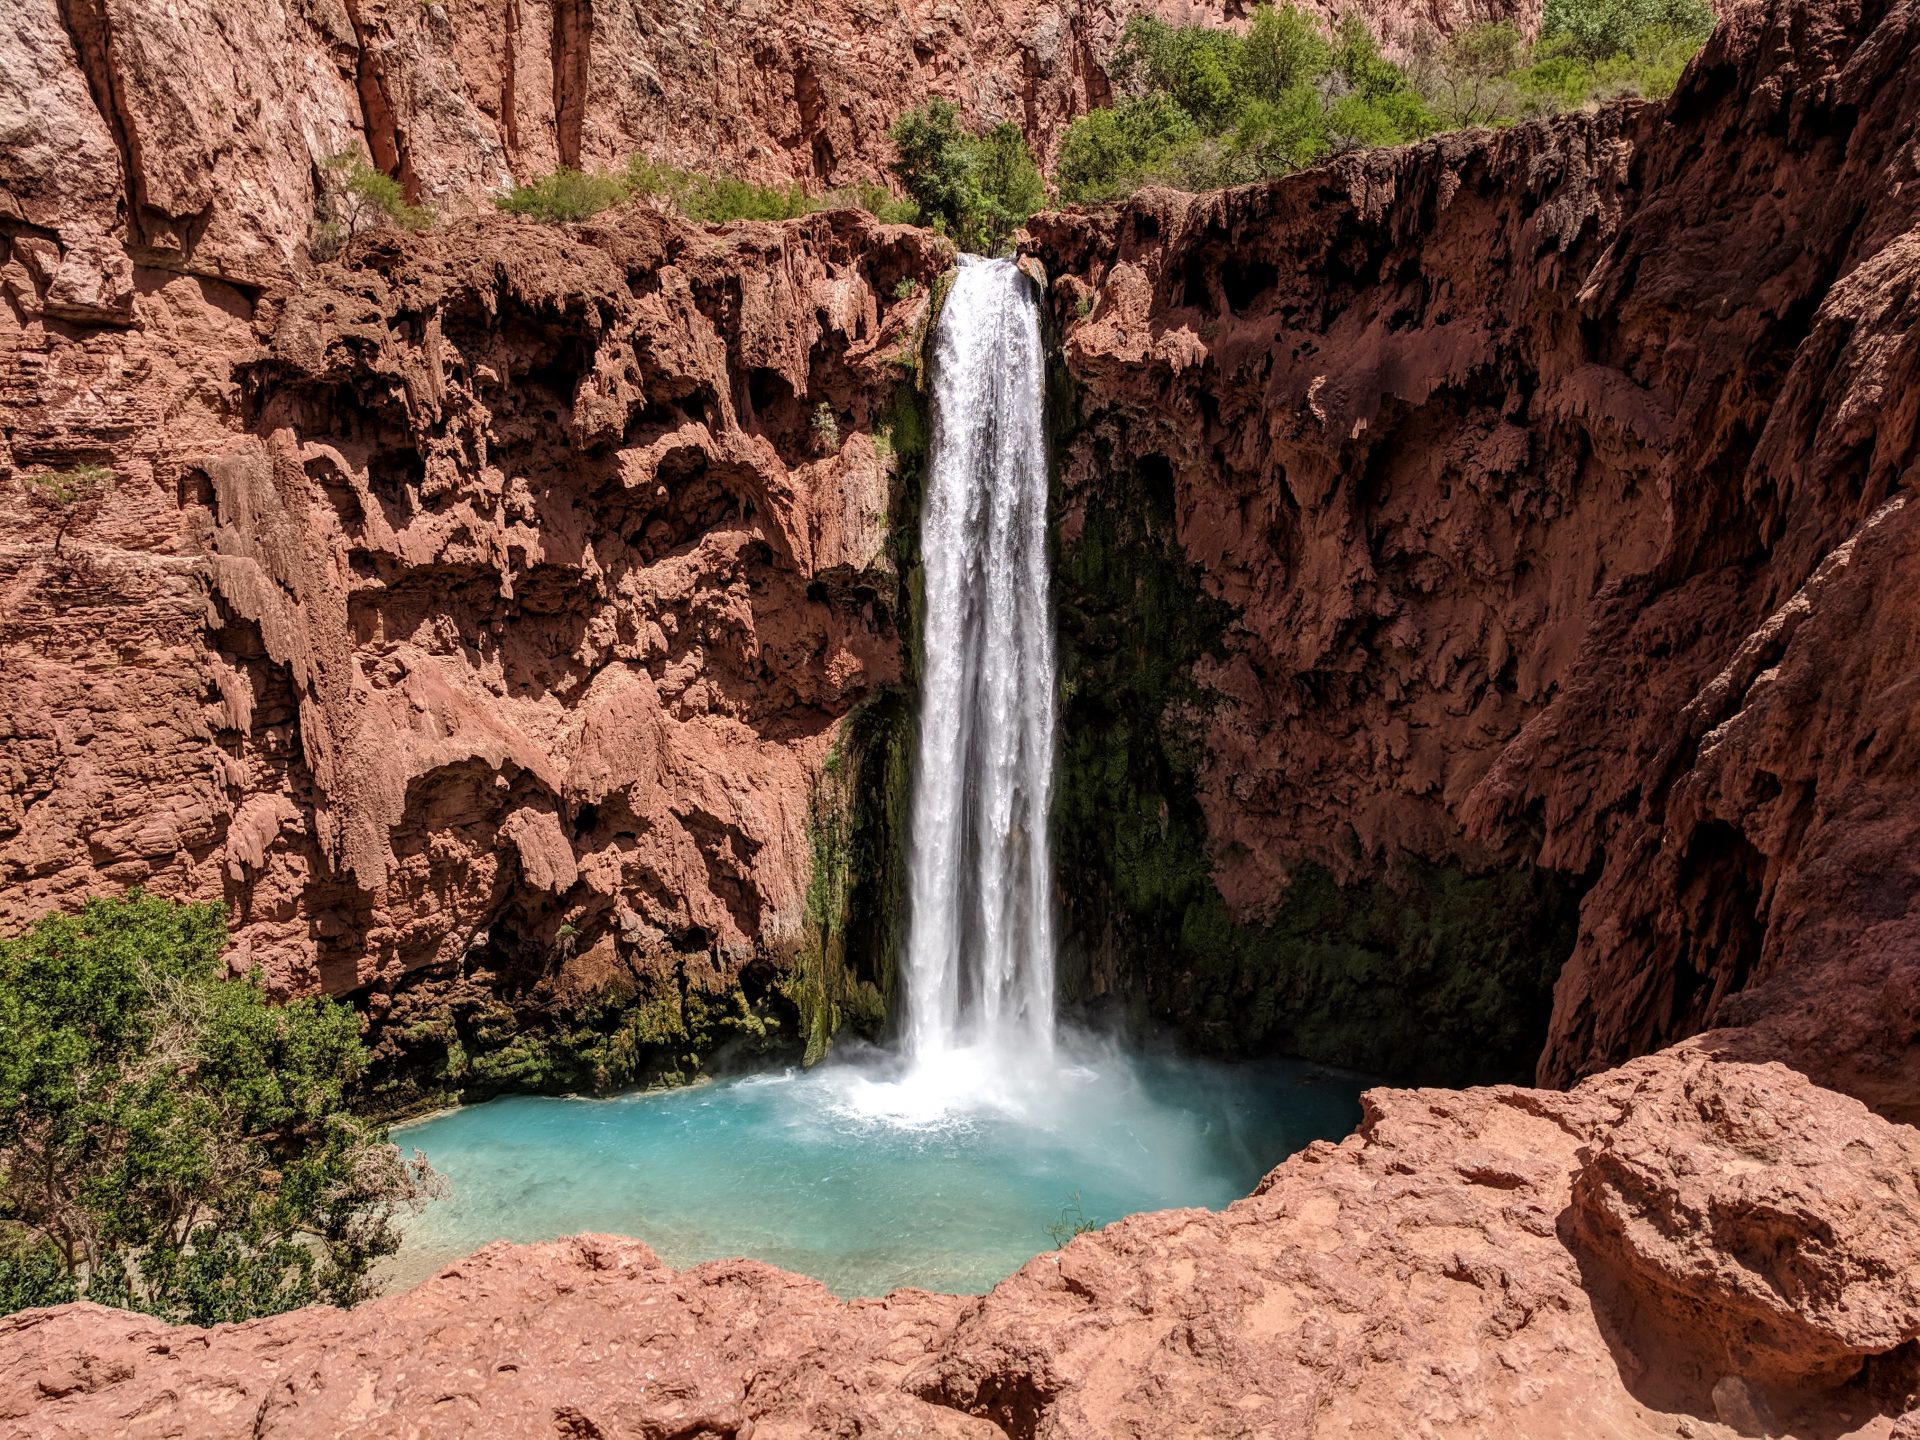
Havasu Falls is one of the most beautiful places in the world, but it takes some work to get there. You have to get a permit in order to visit the falls. No day trips or visits without one. The most common way is to get a camping permit, and starting in 2019 they are all 3-night permits. They’re ridiculously expensive just to camp ($100+ per night), but it’s 100% worth it.
The permits go on sale February 1 and sell out for the year the same day, but also starting in 2019 they allow cancellations and will repost/transfer those reservations. All reservations are made through this site: https://www.havasupaireservations.com/. You can also call the lodge to see if they have availability, but they’re usually sold out about a year in advance (they also rarely answer the phone). You might get lucky and call when there has been a recent cancellation, though, so it’s worth a shot. Staying at the lodge grants you a permit.
Getting to the parking lot
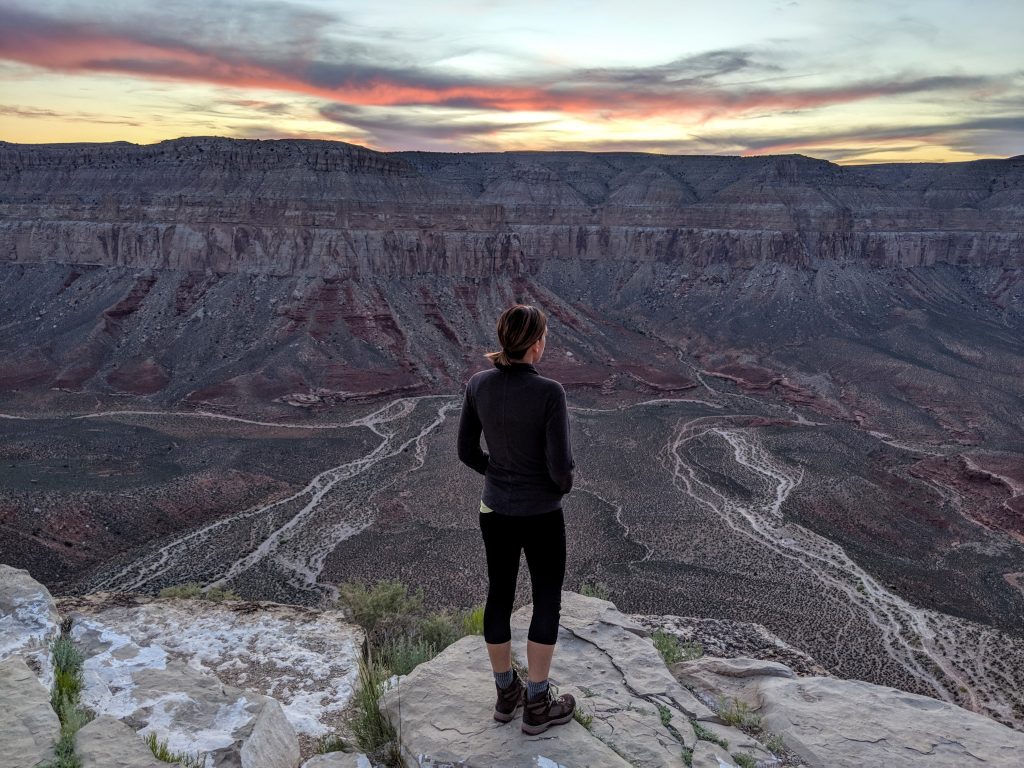
If you get a permit, next is figuring out how to get to the falls. It is an hour drive down a paved road (Indian Road 18, off Route 66) that has no pull offs and only leads to the Hualapai Hilltop, which essentially is just a parking lot. It’s about a 4-hour drive from Phoenix airport to the hilltop, and 3.5 from Vegas. Many people either sleep at the closest lodging to the Indian Road 18 pulloff in Peach Springs, Arizona, or sleep in the car at the hilltop to get an early start for the hike. This is especially important during the summer as you don’t want to be hiking in the middle of the day. We slept in our rental car, which was a miserable experience if I’m being honest.
Getting from the parking lot to Supai
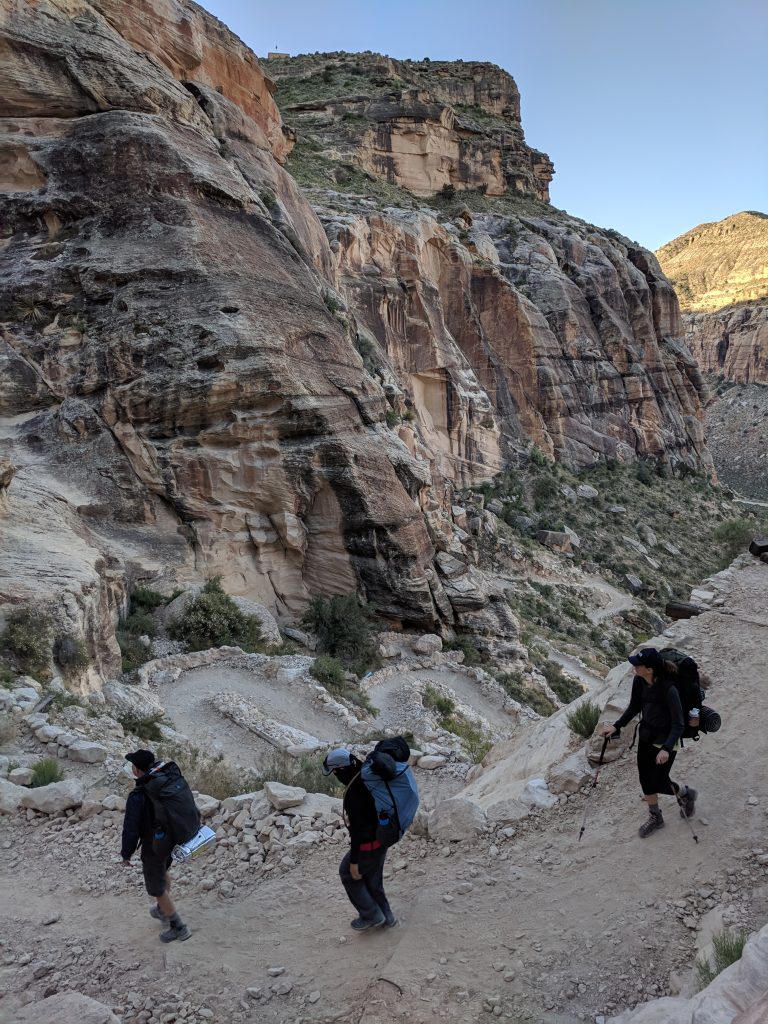
Once you’re at the hilltop, it’s an 8-mile hike to the village of Supai. You can have a horse take your pack down and/or up, or take a helicopter. Both options are rather expensive. There has been a lot of scrutiny about the treatment of the horses and they said they made significant improvements for 2019 – no basis for comparison so I can’t comment on that. I’d say if you’re physically able, carry your pack.
There might not be any water at the hilltop – they had places where they do sell water and food, but they were not open when we arrived (7 PM) or when we started our hike (6 AM). There is no water along the trail so plan accordingly. It’s not a difficult hike and is downhill since you’re hiking into the canyon.
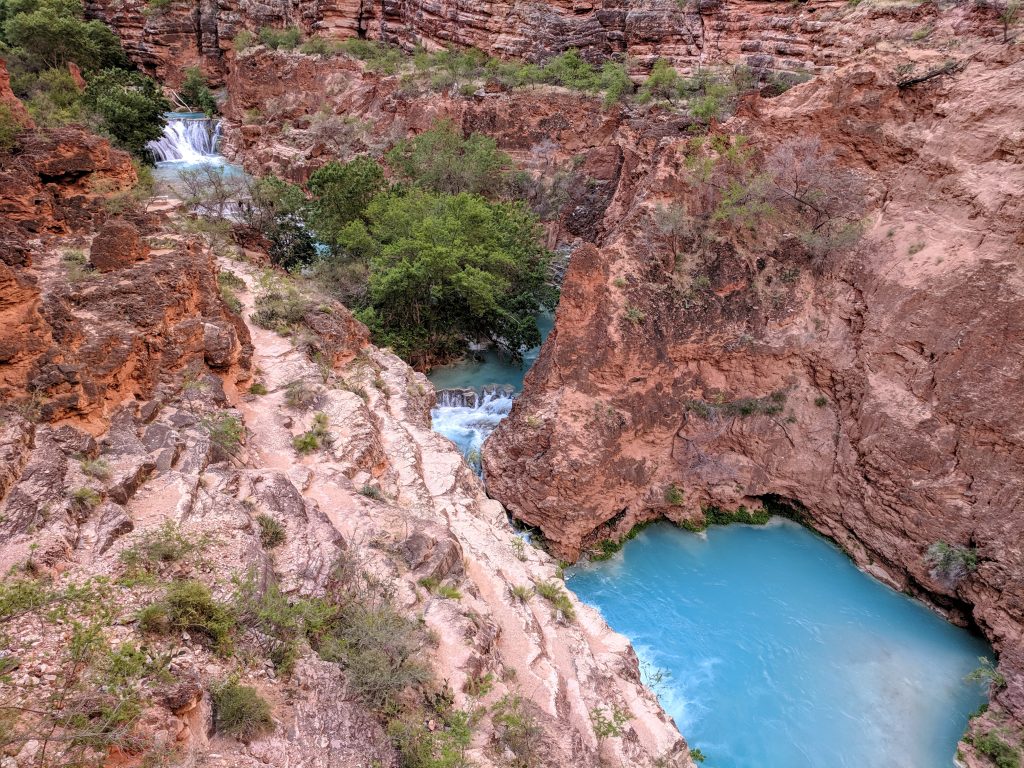
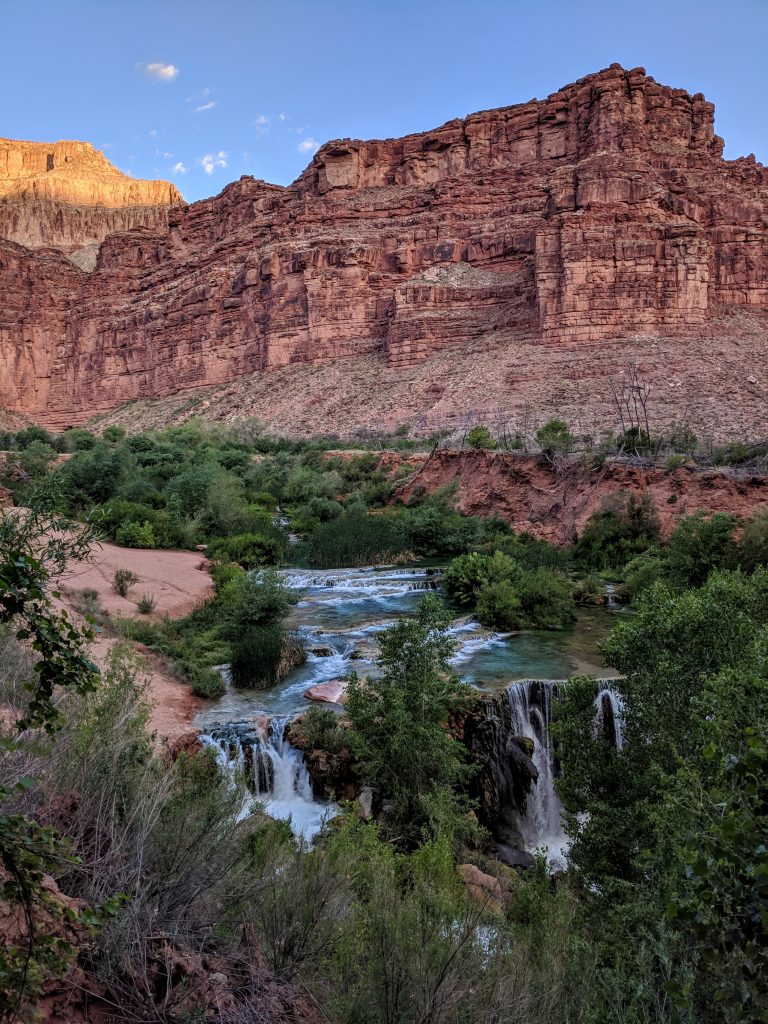
In Supai there is a restaurant and store that has a lot of stuff (food, drinks, sunscreen, medicine, etc.). This is where the lodge is located, and all visitors must check in and get a wristband at the office (big sign, can’t miss it). From there, it’s another 2 miles to the start of the campground, which is all the land between Havasu Falls to Mooney Falls. That stretch is 1 mile long with canyon walls on both sides, so you’ll have somewhere between 10 and 11 miles total from the hilltop to your camping spot.
You can camp anywhere you’d like between Havasu and Mooney, and there are some really neat spots that you have to cross a log bridge to get to that puts you surrounded by the blue water flowing on 2 sides. There are several bathrooms evenly spaced throughout the campground. They are 2-story compost-style where you do your business on the upper level and put a scoop of wood shavings down – no running water. They have solar-powered lights, however, which are great for when it’s dark. There is also hand sanitizer on the outside.
Day 1
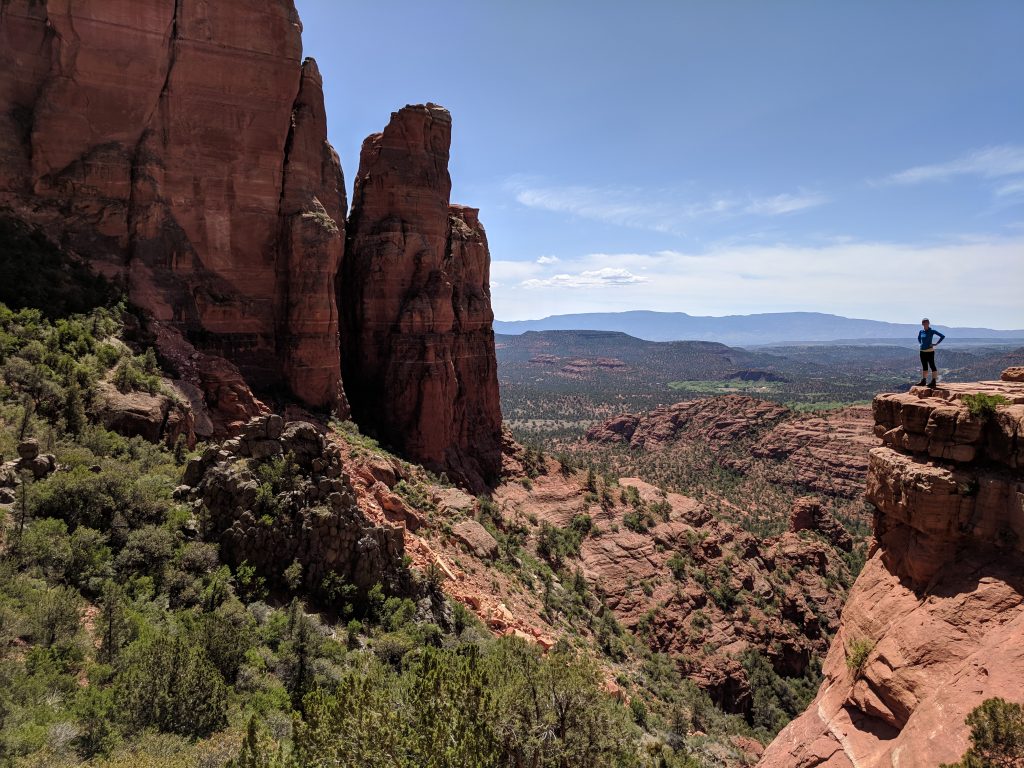
- Cathedral Rock Trailhead
- Picazzo’s Healthy Italian Kitchen Sedona
- Hualapai Hilltop
We flew into Phoenix early so we could stop in Sedona on the way. It only adds an hour of driving and since we had a 4-hour flight and at least a 4-hour drive, it was great to break up the day by doing a short hike and seeing another cool place. We did the Cathedral Rock Trail (2 hour-drive from PHX airport), which we’d done before and knew it would allow us to still get to the hilltop at a reasonable time. Just over 1 mile round trip – there is one area where you might need all 4 limbs/have to scramble. It’s not bad at all, but there were some people who weren’t comfortable with it so it’s worth mentioning. Nice views at the top, only need an hour or so total.
Ordered pizza to-go from Picazzo’s – expensive, but so good. Another 3 hours of driving to get to the hilltop. Make sure you have enough gas to get to the hilltop and back – fill up in Peach Springs if you have less than half a tank or so (120 miles). Met friends at the hilltop, had the pizza and went to sleep in the car (awful idea).
Day 2
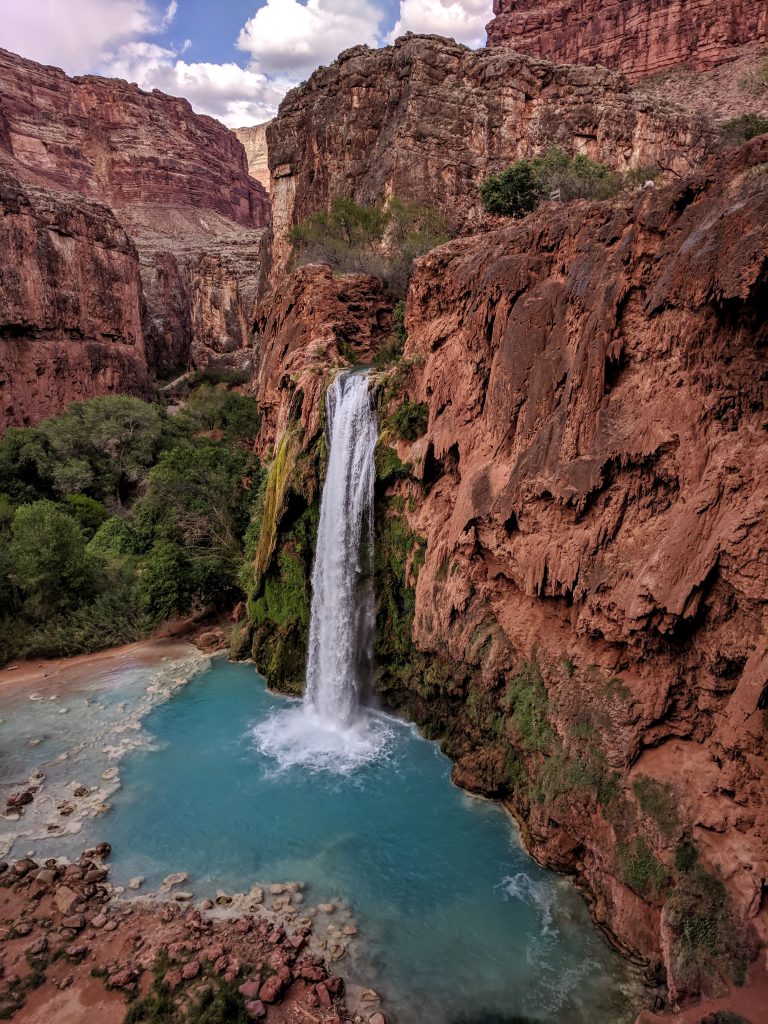
- Havasu Falls
- Mooney Falls
Didn’t sleep much so I noticed people leaving as early as 3 AM. We got started at 6 and it took us 4 hours to get to the campground. Made a a brief stop at the store in Supai for some supplies. You pass Navajo Falls and Havasu Falls and then come to a fence with a small entry – this is where the campground starts.
There is a building for the rangers and a table with lots of stuff people left and didn’t want to carry out. You can find so much here – food, propane containers for cooking, sleeping mats, etc. It’s sad that people leave that behind, but can be very useful if you need something. Check it out on your way in, and also pick up one of the 5-gallon buckets with a lid from here. These are to store your food in, to keep the squirrels away. We bought a container to keep animals out and it kind of turned out to be a waste of money. Put food in the bucket and throw a rock on the lid.
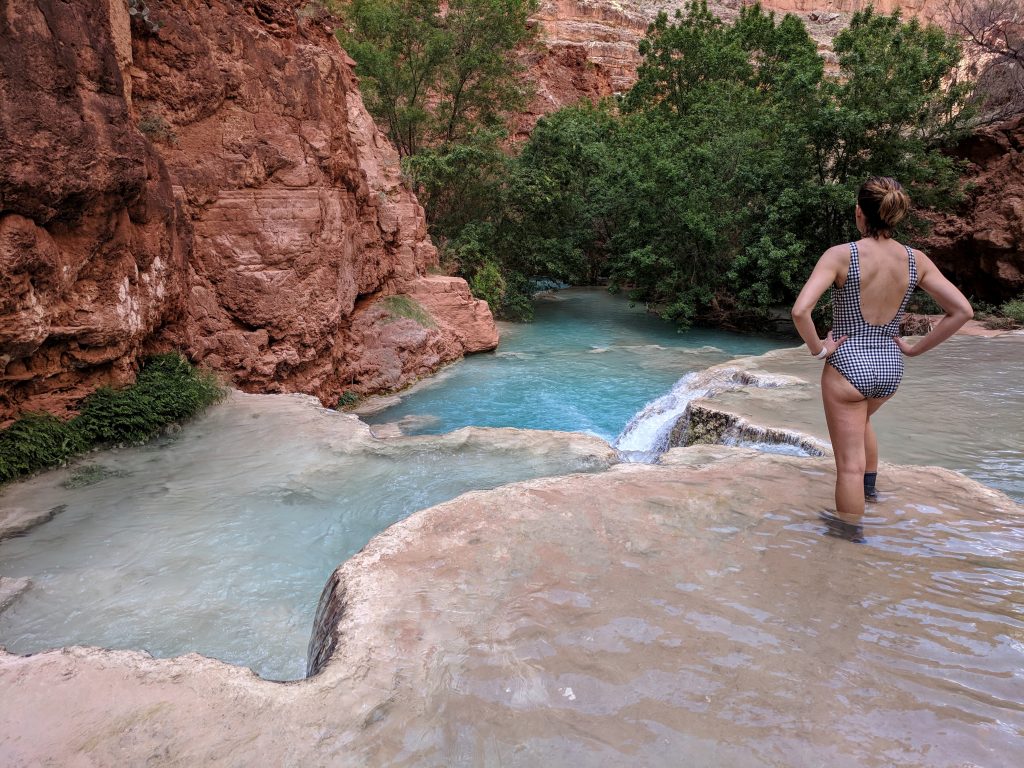
As for camping, pick any spot you see between there and Mooney Falls. Lots of people had hammocks and there are plenty of trees. There are some really awesome spots further into the campground where the streams are louder. We found a great area real close to the spring that had a nice big picnic table. The only source of water is a spring that constantly flows on the left-hand side of the campground (as you’re walking through from Havasu to Mooney). It is close to the start of the campground and there are signs. We still filtered the water, and it was really convenient to be so close.
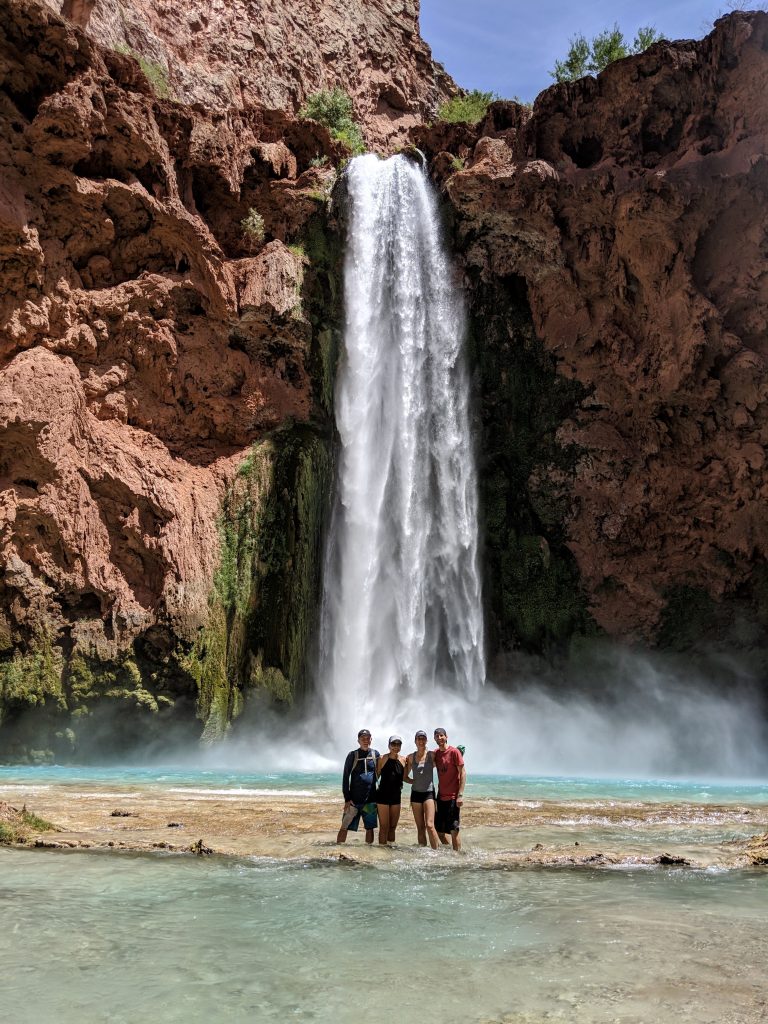
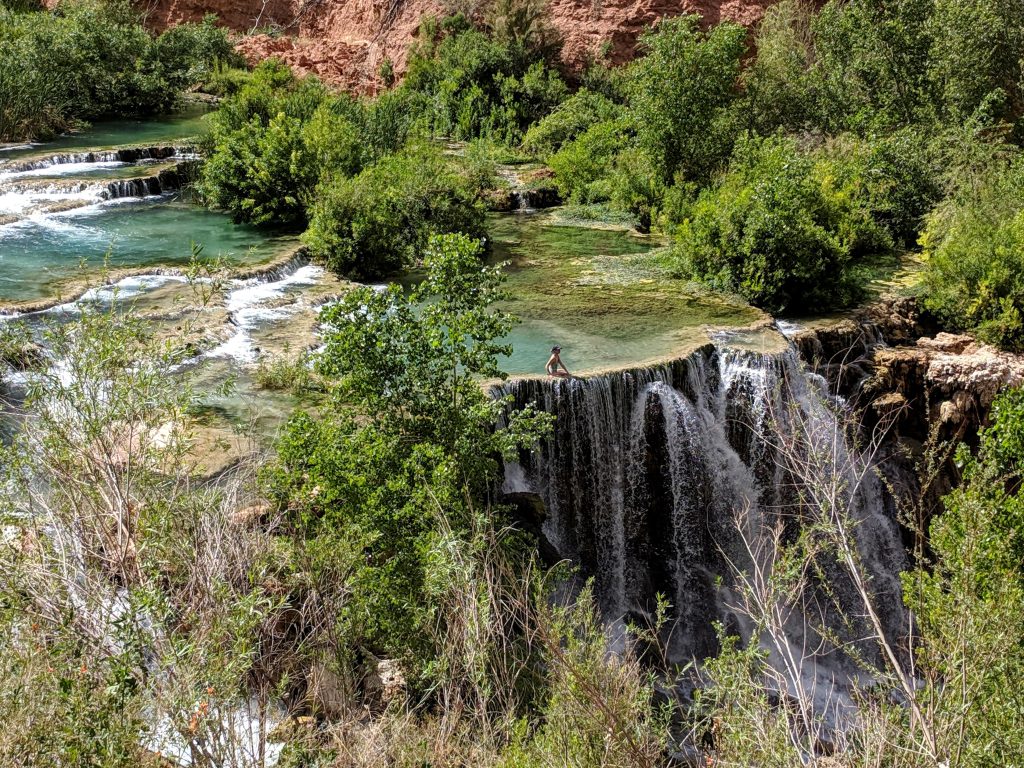
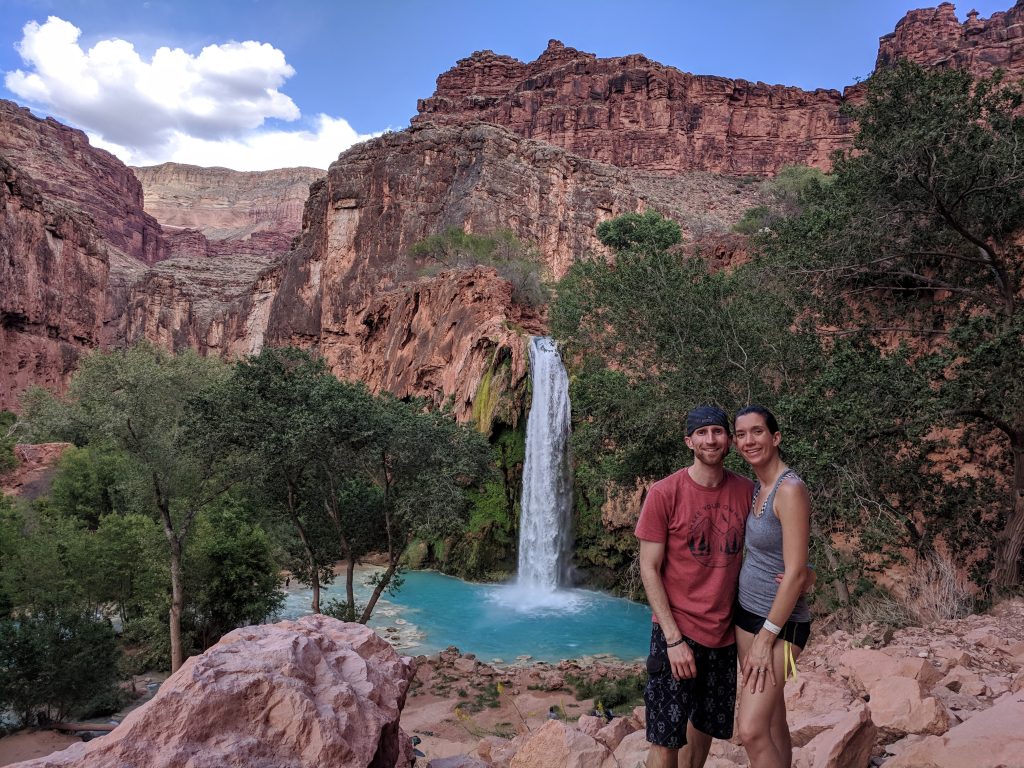
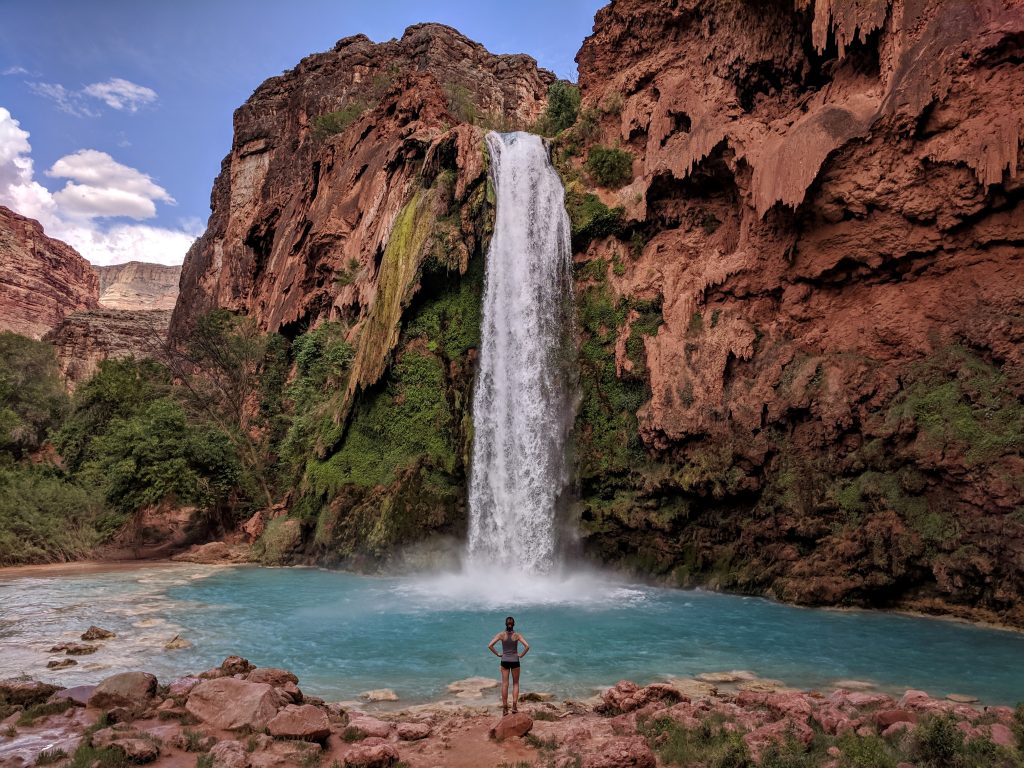
We set up camp and took a short nap, then went to play around Havasu Falls. Spent a little time there taking pictures and walking around, then went to find a “secret” area I had read about. Explore near the first set of bathrooms as you enter the campground – when you find the stream, you’ve found it.
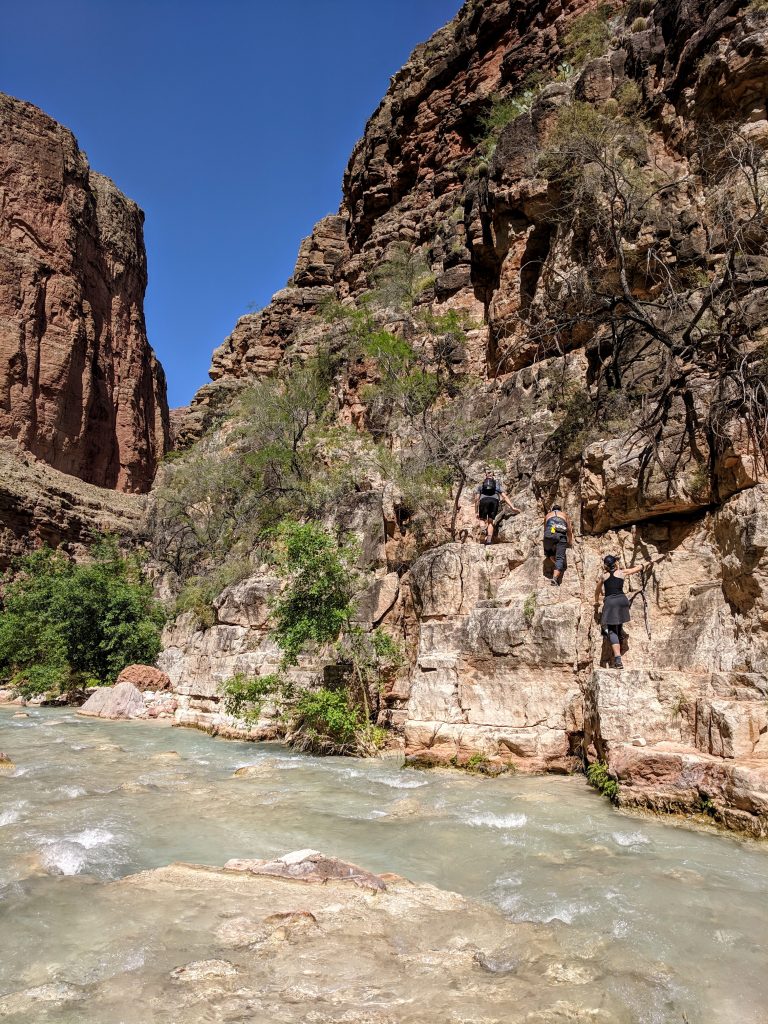
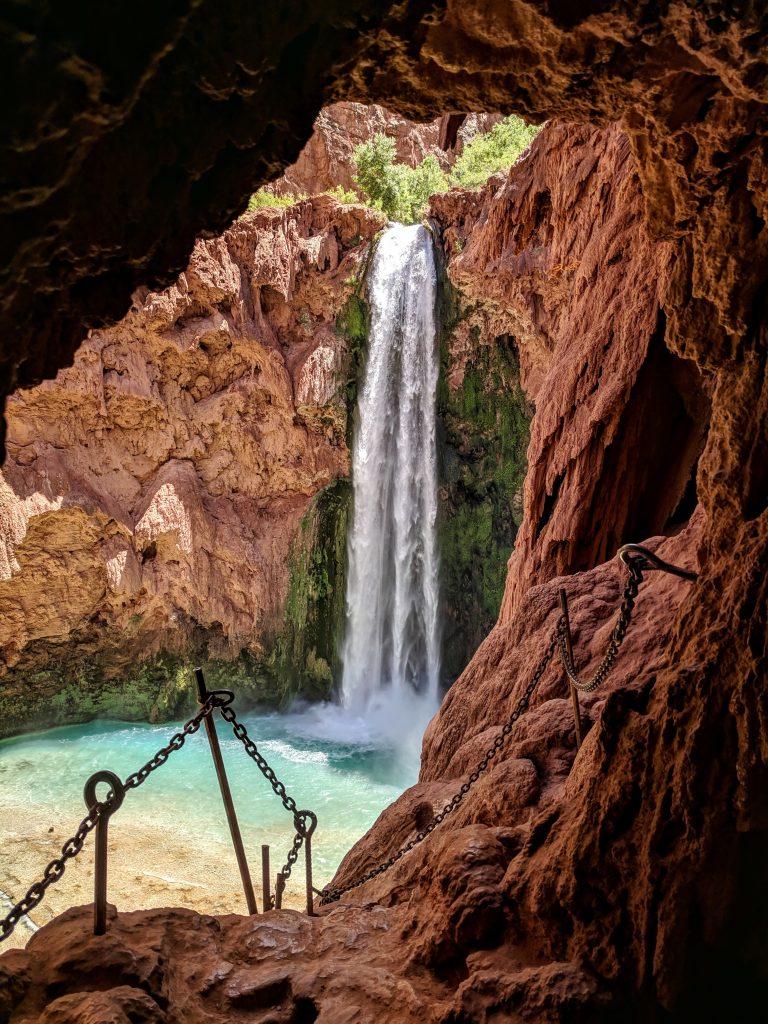
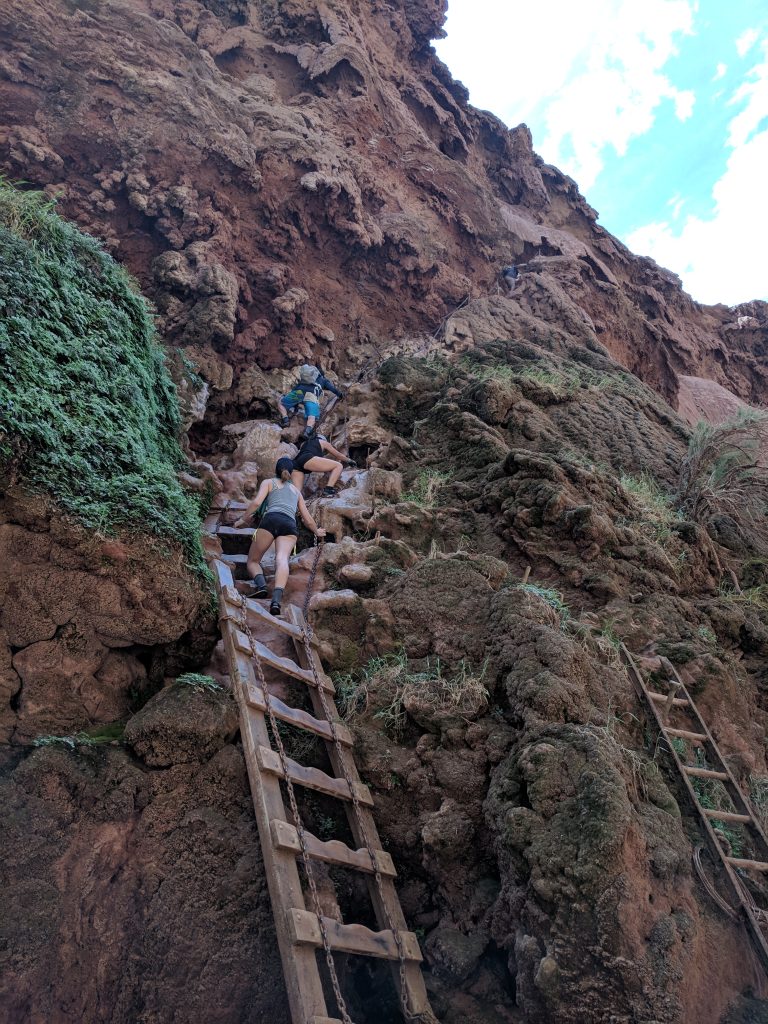
The campground ends at the top of Mooney Falls, and there are little caves, chains and ladders to get you down to the bottom. Really awesome. The sun is only on Mooney Falls for a short part of the day due to its location, but it’s still amazing in the shade. Went back up, made dinner and read in the tent until we fell asleep.
Day 3
- The Confluence
- Beaver Falls
- Mooney Falls
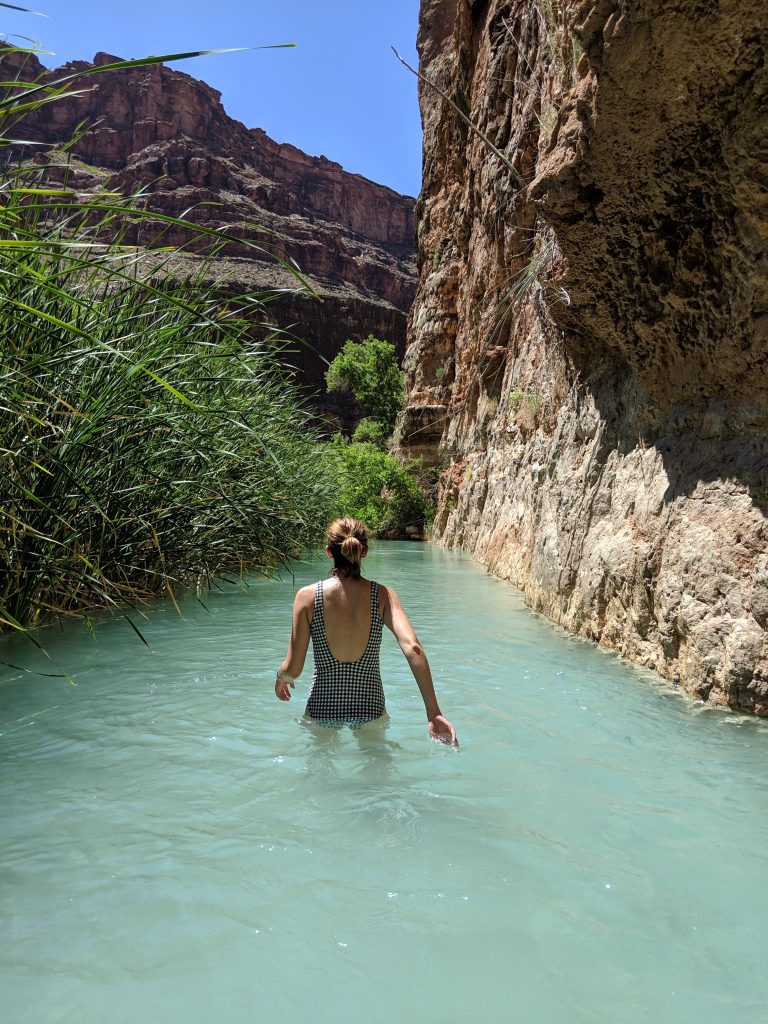
We planned on doing the 14-15 mile RT hike to the confluence this day, so we would have more of a relaxing last day before the hike back out. It’s an easy hike but there are a lot of river crossings, so you have to pay attention and look for cairns.
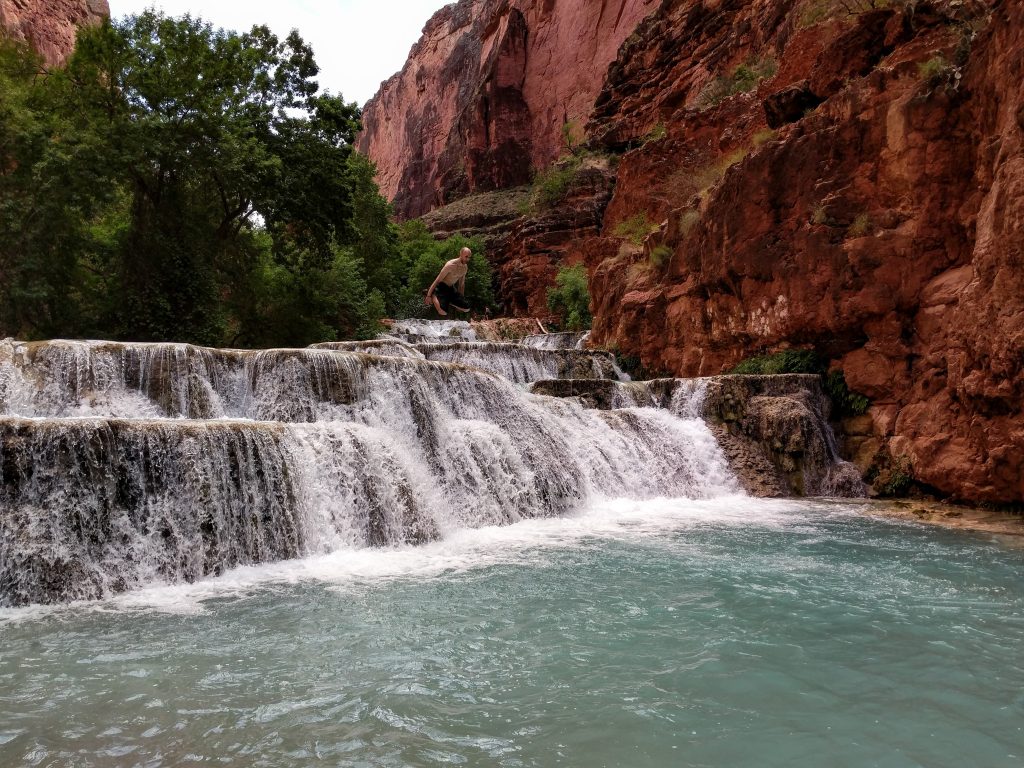
You descend down to Mooney Falls and follow the trail to Beaver Falls. That’s the most stunning of all the waterfalls in my opinion. It was hard to not go play in Beaver Falls because there was no one there (we started at 6 AM), but we planned on going there on the way back because we didn’t want to be rushed at the confluence.
Once you get close to Beaver, which is 2.5 miles from Mooney Falls, you’re hiking up with the canyon wall on your right. There is a point where you turn left and go down to Beaver Falls. Instead of turning left at that point to head to Beaver, to get to the confluence you have to keep going up and straight with the canyon wall on your right. From there you descend down to the water and follow it the rest of the way, crossing several times.
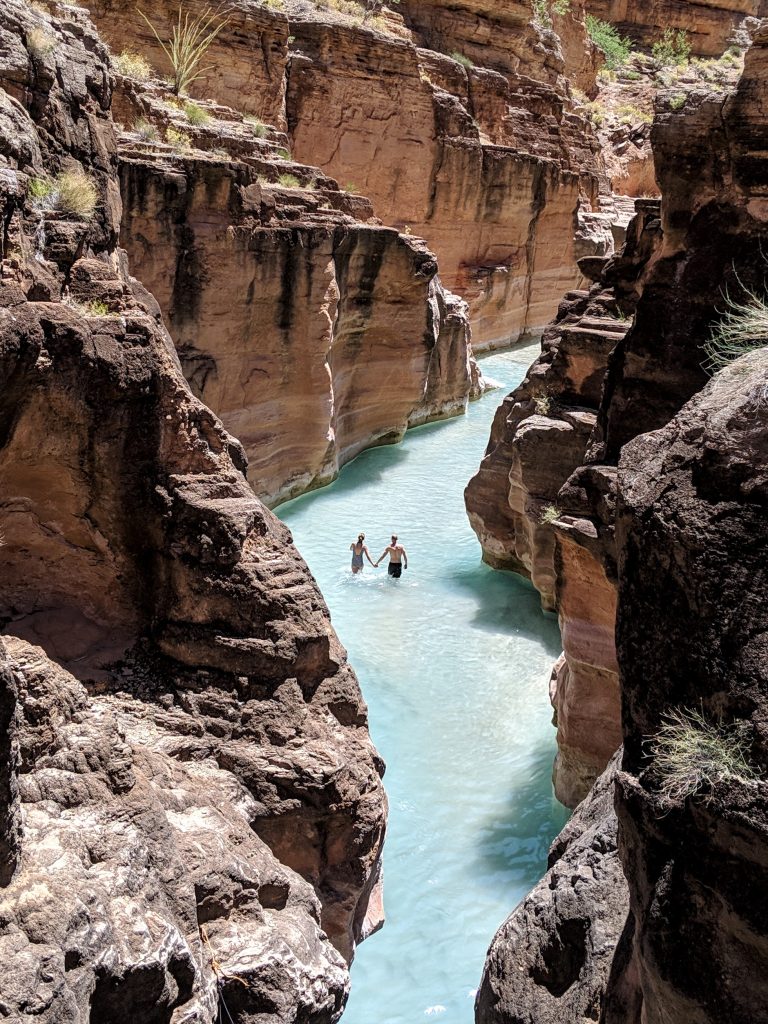
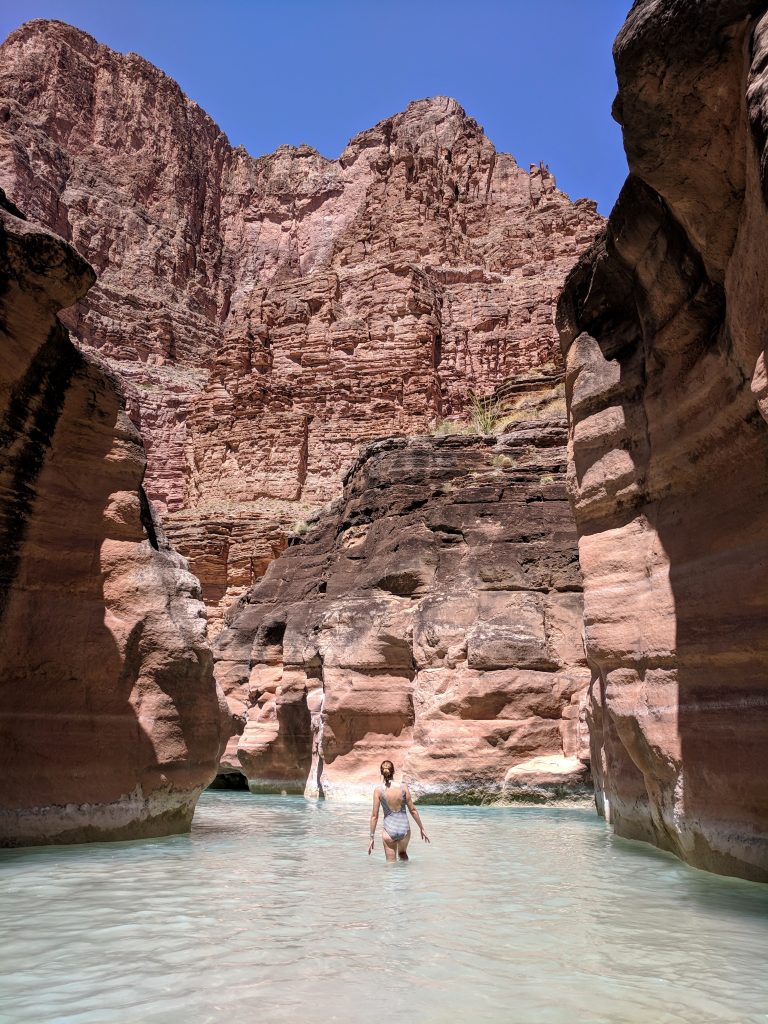
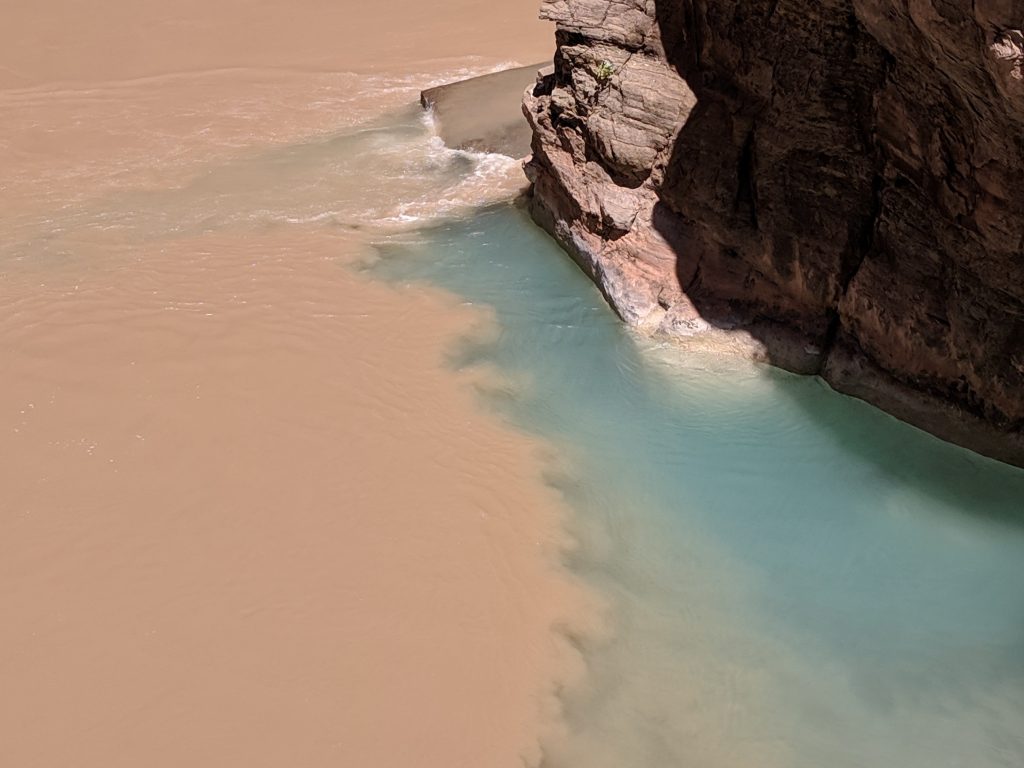
When you get close to the narrow slot canyon, look for a path on the left side. That takes you up and above the canyon. Then you can descend on the other side into the Colorado River and swim back up the slot canyon. We took pictures of others from above as they went down and around, and back into the canyon, then they did the same for us. That’s the amazing shot that everyone wants at the confluence.
Seeing the blue water meet and disappear into the brown water of the Colorado River is crazy. Definitely worth the hike. Spent almost 2 hours here eating and exploring, then back the same way.
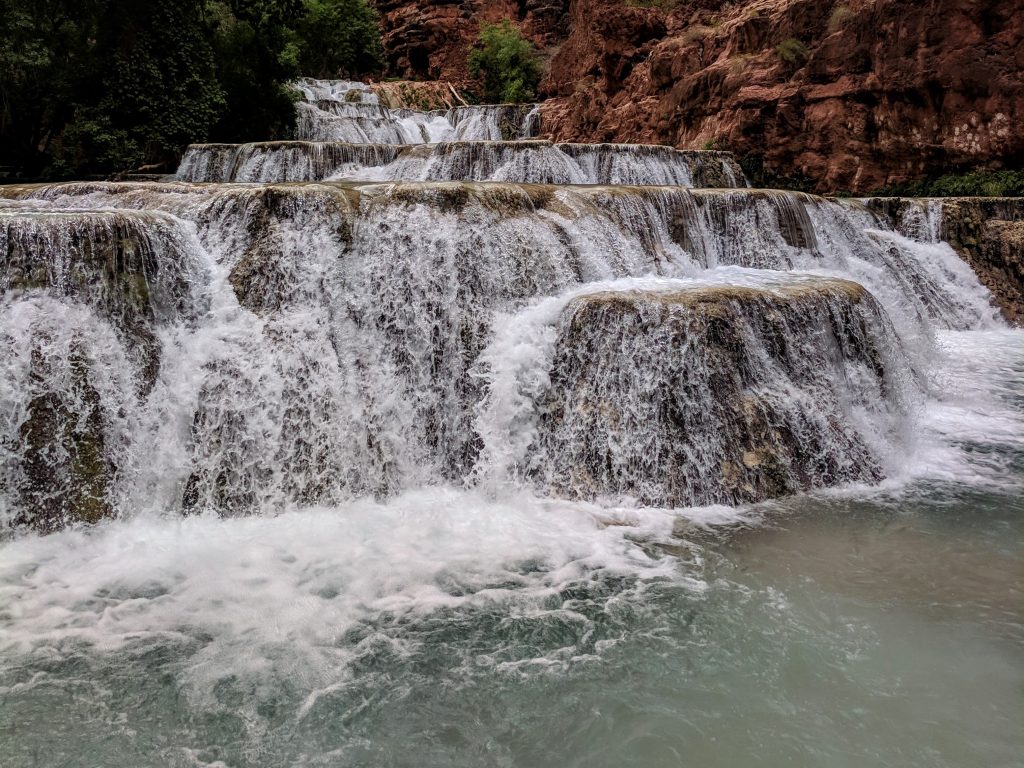
Stopped at Beaver Falls – there were a decent amount of people here even though the sun had already passed over the canyon wall. Spent about an hour here swimming and exploring the different tiers. One of the most picturesque places I’ve ever been.
Went back up Mooney Falls to our campsite and went to the fry bread stand by Havasu Falls. Unfortunately, they only had Nutella, powdered sugar, and honey left for toppings. We were looking forward to one of the tacos they make, but had to make do with what they had. I’d say get there before 5 PM if you want the full menu.
Day 4
- Mooney Falls
- Fifty Foot Falls
- Navajo Falls
- Havasu Falls
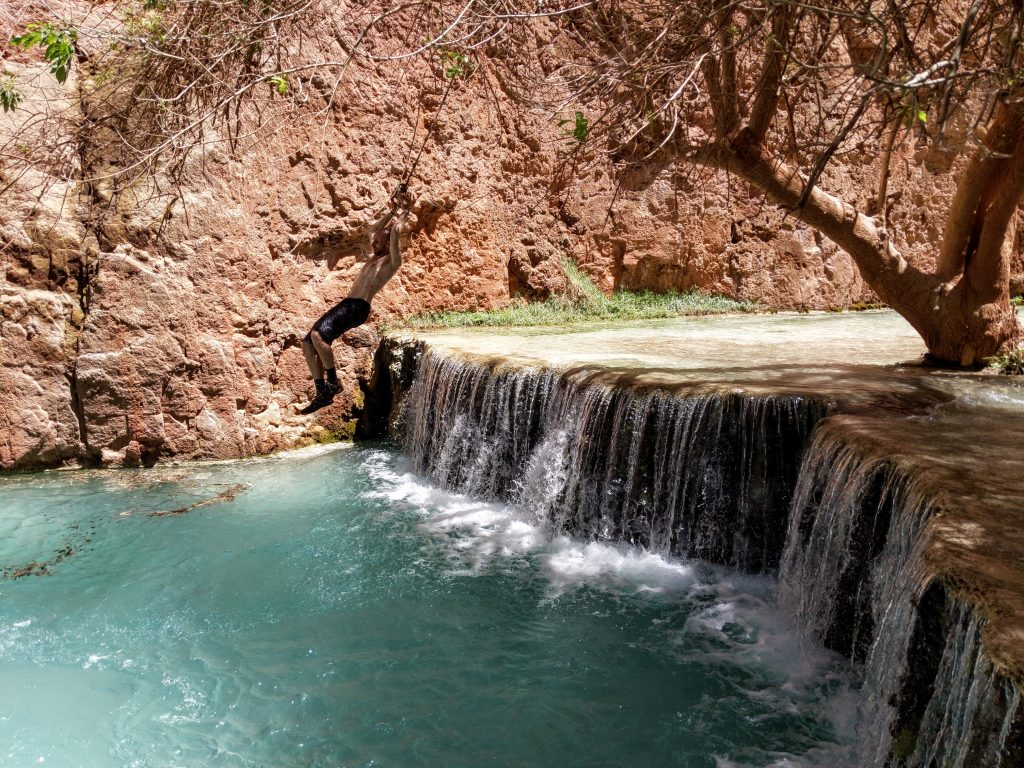
Even though we’d seen Mooney the previous 2 days, we wanted to see it in the sun. We had a very relaxed morning reading and hanging out by the tent. After a couple hours we went down to Mooney for the last time. There is a rope swing at the bottom of Mooney Falls that’s a lot of fun. It’s on the opposite side from where you descend down the chains and ladders, close to the canyon wall. We spent a bit of time at Mooney getting pictures. Next we headed back, past our campsite, to the other falls we had yet to visit.

We stopped at the fry bread stand by the top of Havasu Falls for lunch and got the Indian tacos. Pretty good, but steep ($8-$14 depending on toppings).
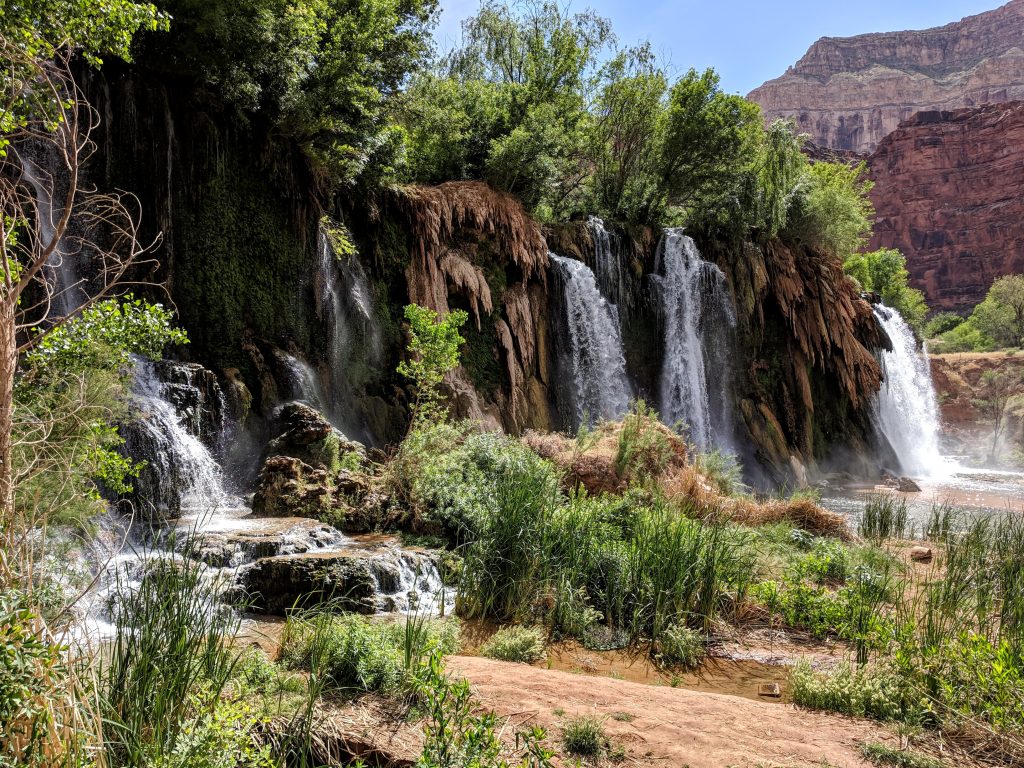
After that, you keep going uphill like you’re heading to the village to get to Navajo Falls, which we saw during the walk in. Fifty Foot Falls is just “above” Navajo. There was no one else at Fifty Foot, and I heard they were much more impressive a few years ago before some flash floods changed them forever. I can’t say that they’re worth exploring, but you’re there and it adds maybe 15-30 minutes so why not.
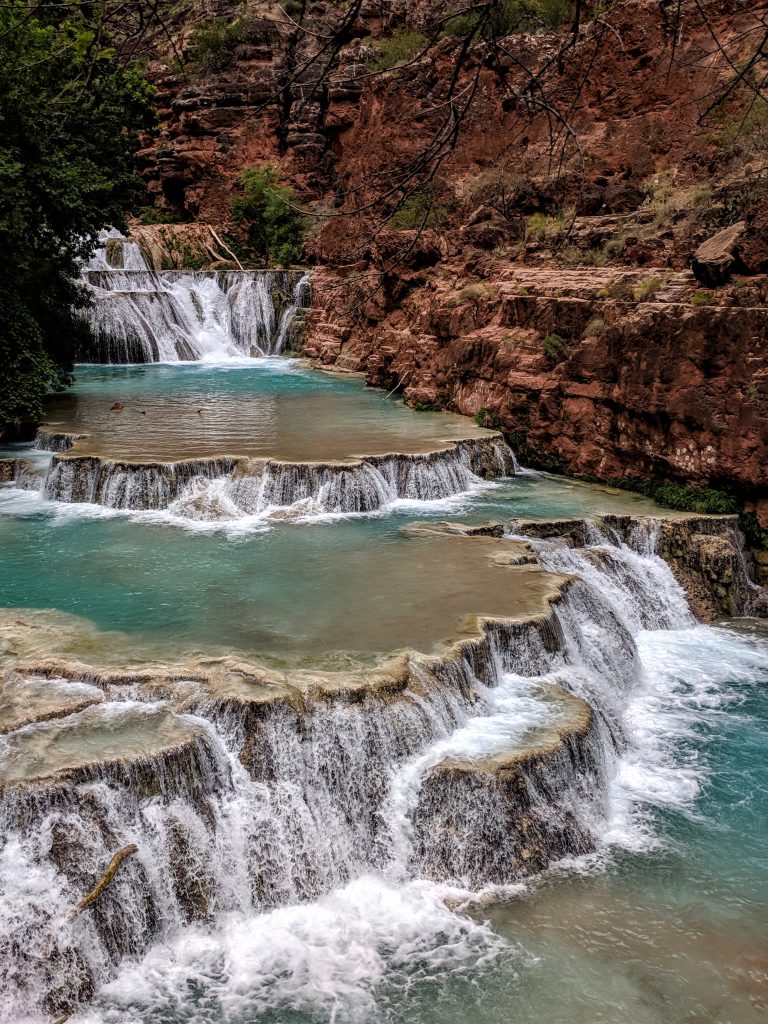
Navajo Falls is awesome. It’s like a mix of Beaver Falls since there are lots of different tiers and pools that you can wade in, and you can even go right to the edge of the biggest drop off.
Then we went to Havasu Falls, which we had passed several times and is always stunning. You can’t help but take pictures every time you go by, even though you took the same picture 5 times already. We played around there for a while and then headed back to camp to eat all the food we still had left and get ready for the hike out early.
Day 5
We were supposed to start the hike at 5, but one of us was throwing up all night, unfortunately. It was a slower morning and pace than we’re used to, so it took us 5 hours to hike to the hilltop. The last mile and a half is the majority of the elevation gain for the whole hike, so you definitely want to start as early as possible so you’re doing it in the shade. Drove 3.5 hours to our hotel in Las Vegas – The Tru by Hilton. It’s basically across the street from the car rental spot, so if you’re like us and have no interest in going to the strip, it’s a good option. Amazing breakfast. We were going to eat dinner at Firefly, but the sickness wouldn’t allow. Ordered in and flew home the next morning.
Flying into Phoenix and out of Las Vegas worked out great. The flights were the same price and the rental car was surprisingly cheap.
The weather in May was absolutely perfect. Hot enough in the day where the water felt great, and cool enough in the evenings for sleeping. No bugs at all. July and August are when the flash floods can happen, so I’d stay away from those months. It might be tempting since lots of people are off work and the water probably feels the best, but look at pictures of the falls when they’re brown.
If you can go, go. Can’t recommend it enough.
Traveled in May 2019
Very good information
Thank you for reading and I’m glad you found it helpful!