The most important thing on this page: please follow the 7 principles of Leave No Trace whenever hiking (and all the time, actually – most are pretty good general life tips, too):
- Plan ahead and prepare
- Travel and camp on durable surfaces
- Dispose of waste properly
- Leave what you find
- Minimize campfire impacts
- Respect wildlife
- Be considerate of other visitors
Now, on to the Grinnell Glacier hike. Here are the quick facts:
- Where: Glacier National Park, Montana.
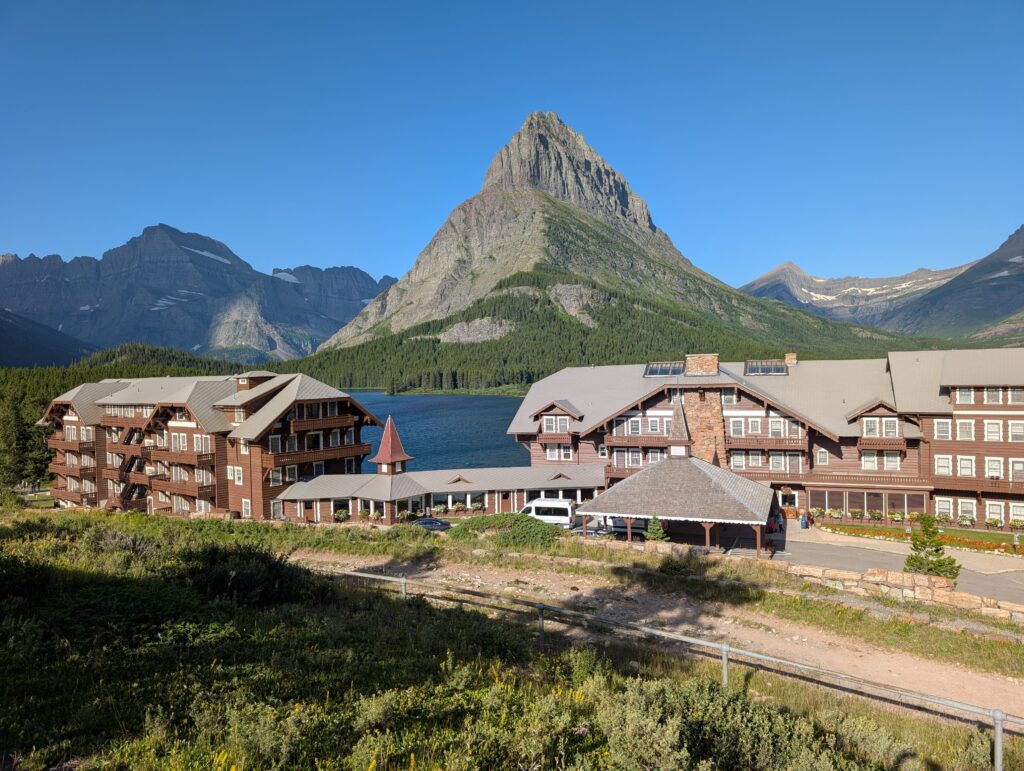
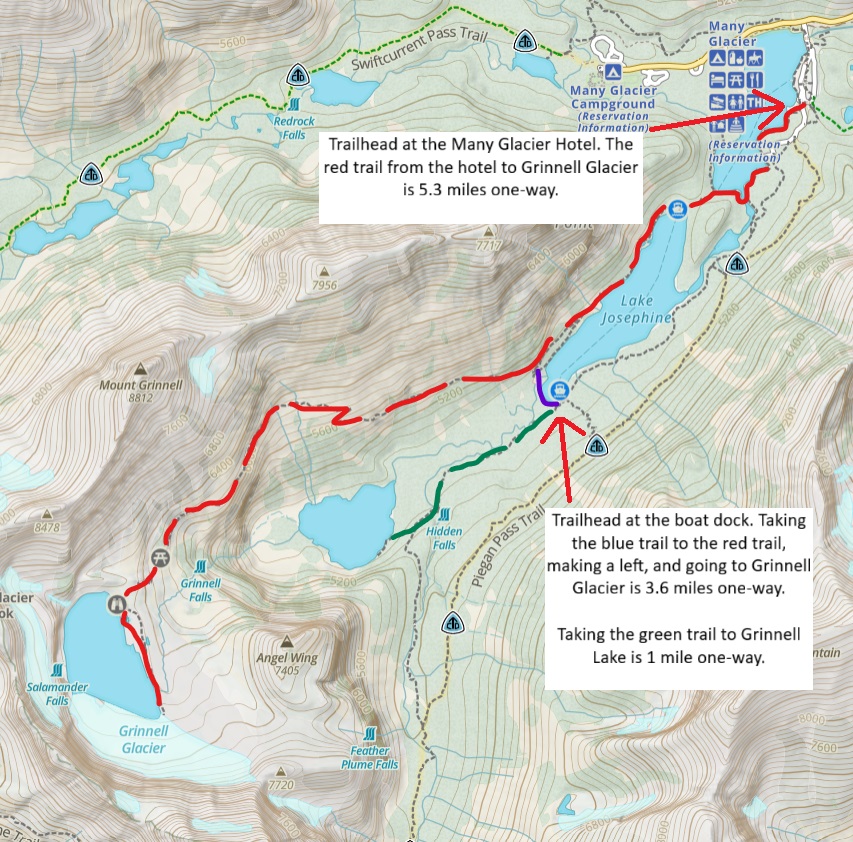
- More specifically, where: The trail starts at the Many Glacier Hotel.
- Distance and elevation: The quickest route is 7.2 miles (11.6 km) RT with 1,600 feet (490 meters) of elevation gain. That is with taking the boat both ways (more on this below).
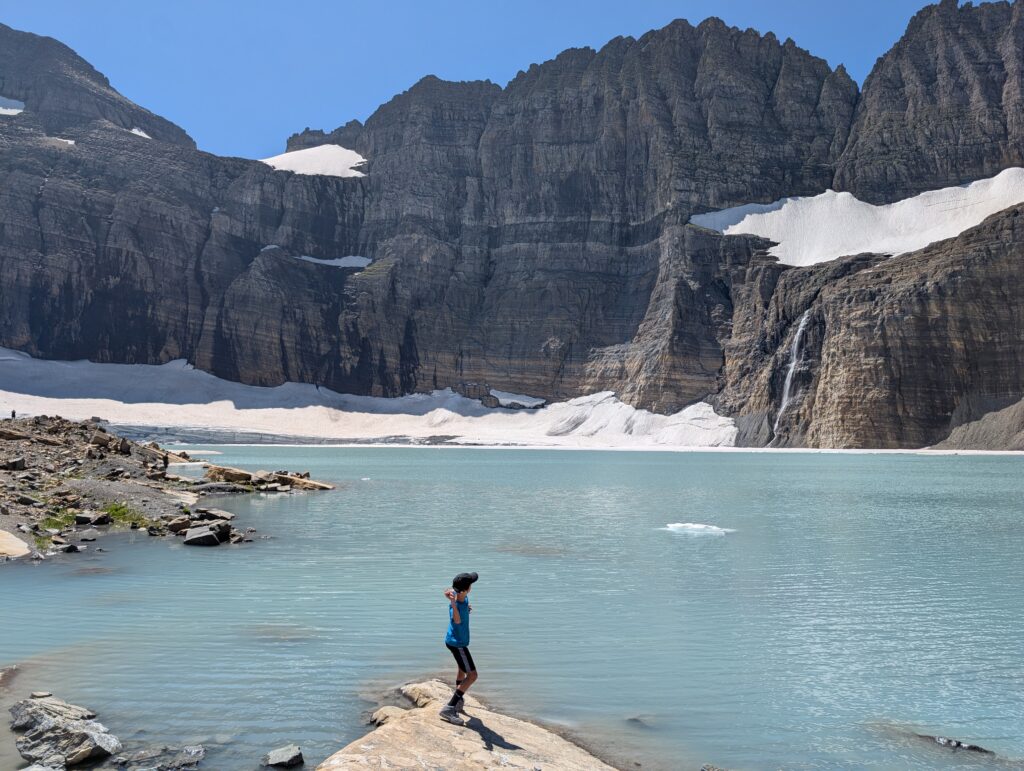
- Highest point: 6,463 feet (1,970 meters) at Upper Grinnell Lake (where Grinnell Glacier is).
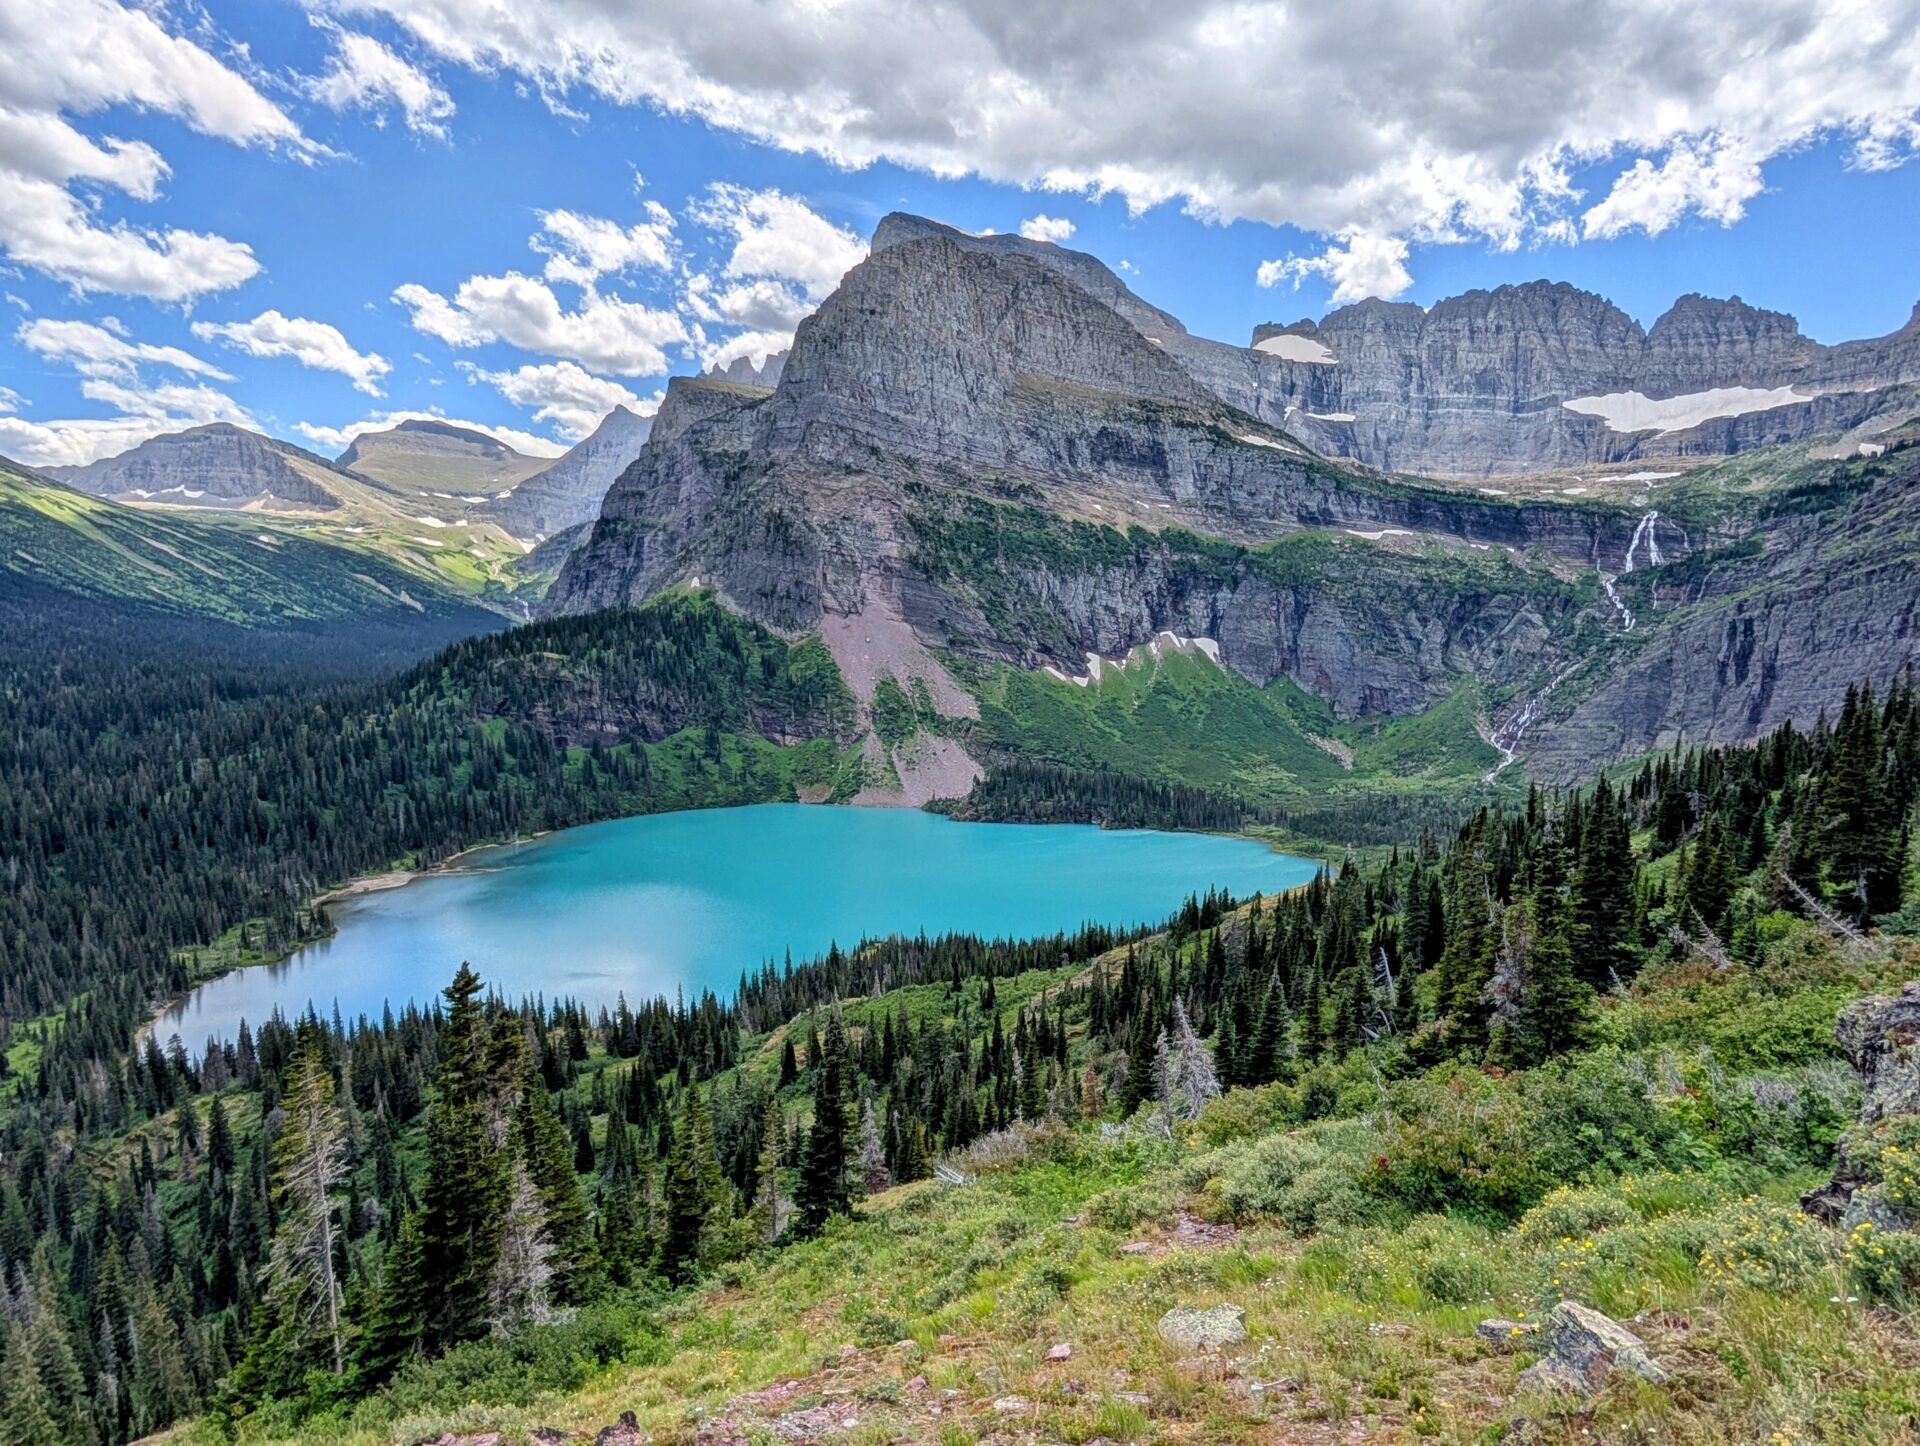
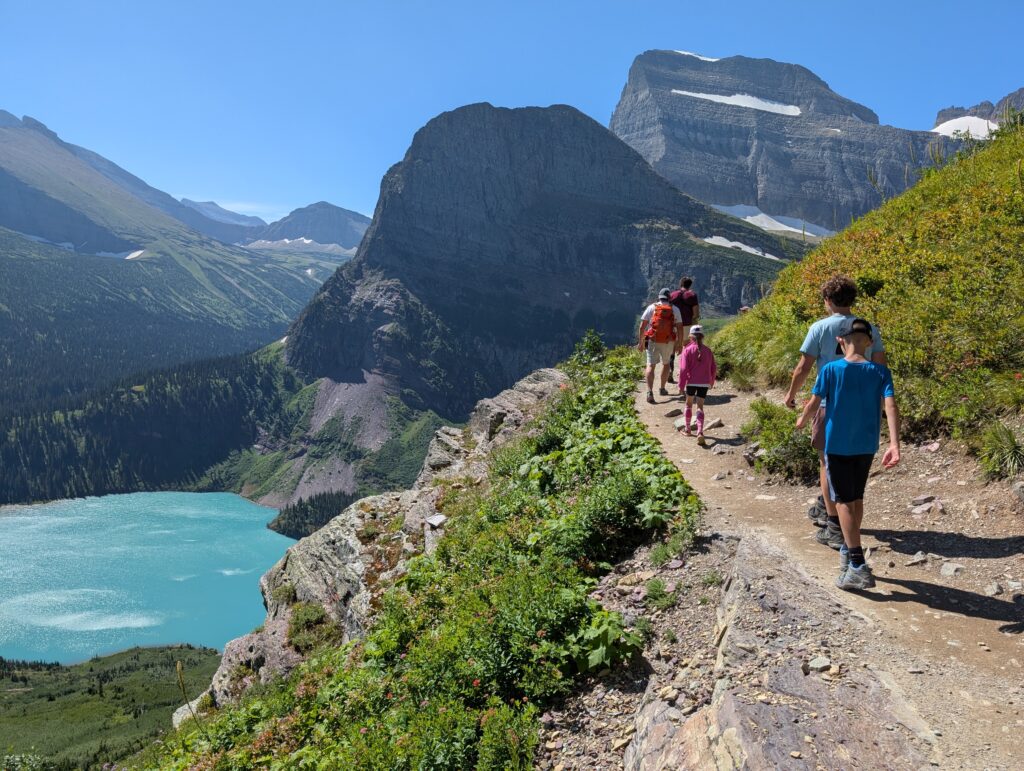
- Why you should hike this trail: 4 stunning lakes, a waterfall, a glacier, great chance for wildlife, and one of the country’s best mountain views: Grinnell Lake with Angel Wing looming large behind it.
- Fee or permit? At least a National Park Pass, maybe more. Depends on what restrictions are in place the year you’re looking to go. Best to check the NPS site here.
- Best time of year: The trail can have snow into July, so mid-July through September is the best time to go.
- Closest commercial airport: Kalispell, Montana (FCA) is known as Glacier Park International Airport. It takes about 2.5 hours to get to the Many Glacier Hotel from there under the best of circumstances. Note there is also a Kalispell City Airport (S27), so make sure you go to the right one on your way out. Some people will fly to Bozeman or Missoula, Montana, or Spokane, Washington, to save money on a flight and rental car, but you’ll be driving more than 4 hours from each one.

Tips for the Grinnell Glacier Hike
- The hardest part is figuring out the logistics. The hike itself is easy to follow and I’d consider it moderate.
- The view that you’re probably looking for is of Grinnell Lake from the Grinnell Glacier trail. There is a separate trail that goes to Grinnell Lake.
- Unless you’re staying at the Many Glacier Hotel, Swiftcurrent Inn, or one of the campgrounds in Many Glacier, you’ll have to drive a bit to get there. If you have to drive in, try to get there by 6 am to make sure you have a parking spot. The lots fill up and they can close access to the entire area if traffic is too congested.
- Try to get round-trip boat tickets to save 3.4 miles of hiking. If the outbounds are sold out, look for one-way tickets for the return only.
- If you are taking the boat back, make sure you know the departure times and plan accordingly.
- The hike is still very manageable without taking the boat. The 1.7 miles are flat, picturesque, and go by quickly. It’ll up your mileage to 8.9 RT with a one-way boat ticket or 10.6 RT with no boat, but there is no extra elevation gain.
- Make sure you have bear spray.
- If you have boat tickets or plenty of time and energy, the extra 2-mile RT hike to the shore of Grinnell Lake would be worth it.
Getting there
Many Glacier is one of the main “sections” of Glacier National Park. There is only one way in and out, which is 12 miles down the dead-end Many Glacier Road starting in Babb, Montana. How to get there will depend on where you’re staying. West Glacier, near the airport and where many people stay, is at least a 2-hour drive. There are other areas like St. Mary and East Glacier that are closer. Of course, staying in Many Glacier itself would be ideal. However, lodging in Many Glacier fills up 13 months in advance. Bookings can be made here. We tried to get reservations the second they went on sale, at 2 am local time, but were not successful. If you have a lot of flexibility, they have a generous cancellation policy so there’s a chance to grab week-of reservations, too.
There was major construction in 2025 when we went and you needed some kind of reservation (lodging, boat, hiker’s shuttle, etc.) to even get to the Many Glacier area. In other years, you needed a vehicle reservation during certain hours. Hopefully, you won’t need to deal with those extra headaches and can come and go any day. But, get there as early as possible! As mentioned in the Tips section, make sure you’ve done your research on the rules for getting into Many Glacier on the NPS site.
If you’re able to drive all the way in, park in the large lot next to the Many Glacier Hotel. Then, head to the left of the hotel at the water’s edge if you don’t have a boat ticket. If you do, head to the check-in stall near the boat dock.
Many Glacier Hotel to Lake Josephine by boat
Outbound boat tickets are time-specific. If you have one, you’ll board right outside the middle of the hotel on Swiftcurrent Lake. There are actually 2 boats each way and your ticket covers both rides. So, a one-way boat ticket will take you across Swiftcurrent Lake and across Lake Josephine, on 2 separate boats.
After the first boat gets to the other end of Swiftcurrent Lake, every passenger must get off and take a relatively easy 0.2 mile walk through the woods. There are signs at the dock for which way to go. Another sign marks the turn to the left for the next boat dock on the shore of Lake Josephine. The second boat will take you to the far end of Lake Josephine. When you get off, on the 4th boat dock of the trip, head clockwise (right) around the end of the lake. You’ll start to gain elevation and then will see the signed intersection with the Grinnell Glacier Trail. Take a very sharp left, basically a u-turn, and start heading uphill!
Many Glacier Hotel to Lake Josephine by foot
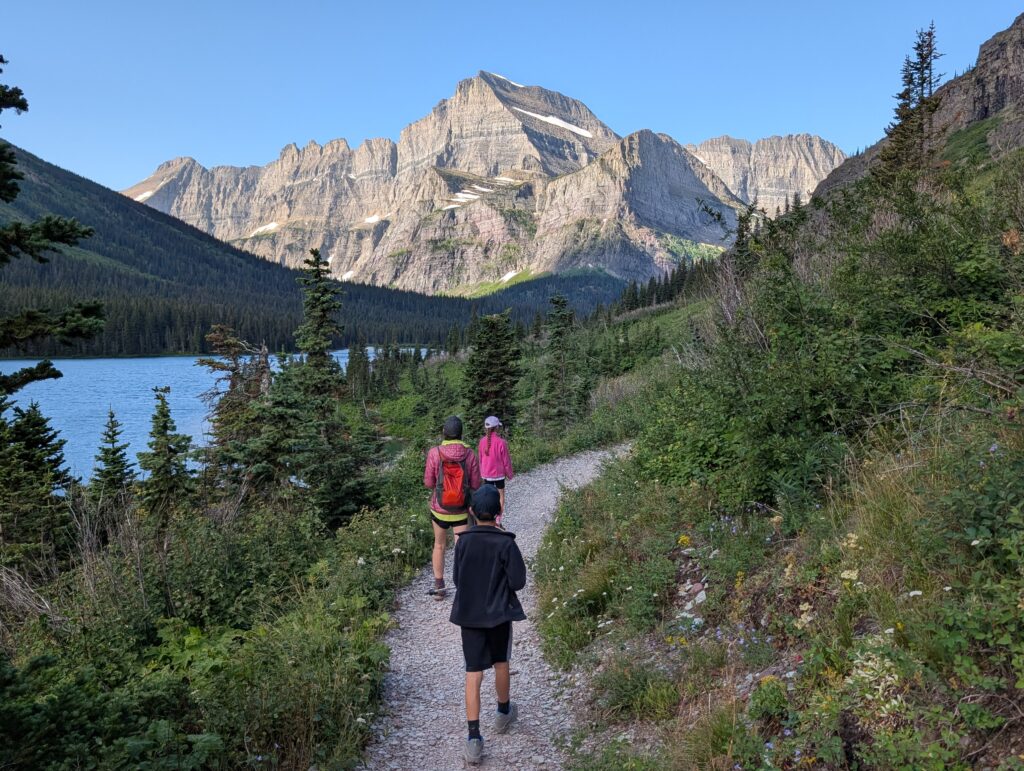
If you are on foot, start down the well-marked trail at the far end of the Many Glacier Hotel, near Sawmill Road. The trail will dip out to the shore at times and provide exceptional views of Grinnell Point.

Once you get to the boat dock on the other side of Swiftcurrent Lake, make sure to take a left and head into the woods. Continuing straight will take you back along the other side of the lake. Signage is great so you shouldn’t have any issues. After 0.2 miles, you’ll pass a short side trail to the left. That would take you to the next boat dock. Nice view from the dock, but you’ll get better ones as you walk along the lake. No need to check it out.
As you are heading towards Grinnell Glacier, make sure Lake Josephine is on your left. The views are incredible. Plus it’s shorter and the trail on the other side has no views.
Shortly after you start to gain a little elevation, 1.7 miles in, will be a trail leading downhill to the left. This is the trail that goes to the boat dock, so continue on straight/to the right.
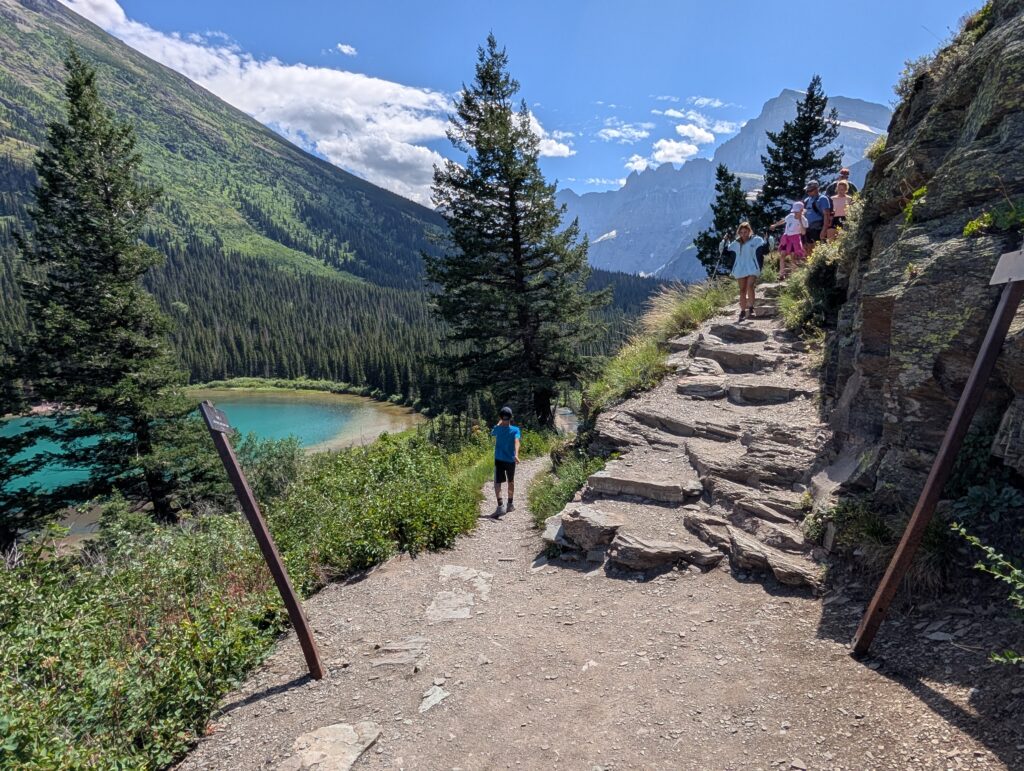
Lake Josephine to Upper Grinnell Lake
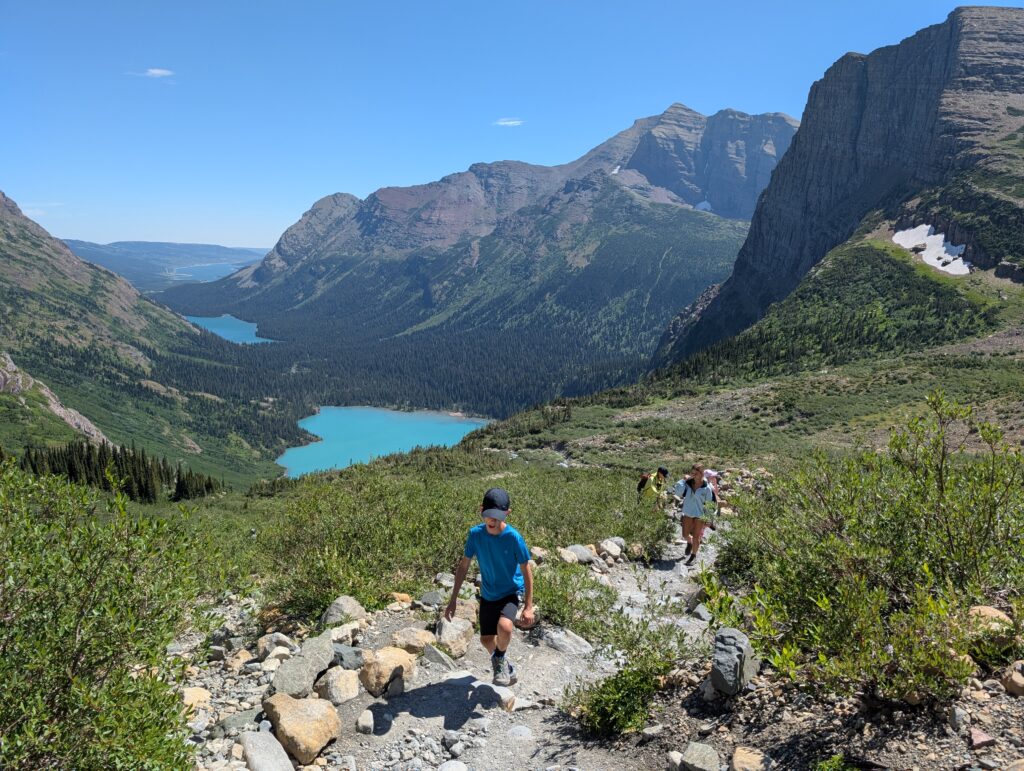
The rest of the way is as straightforward as it gets. There are no trail intersections or turns, only some switchbacks. The trail steadily, but not steeply, gains elevation as it slightly bends around to the right. You won’t have to wait long to get your first glimpse of Grinnell Lake. The anticipation of the best view on the hike, the one that probably caught your eye and brought you here, will start building.
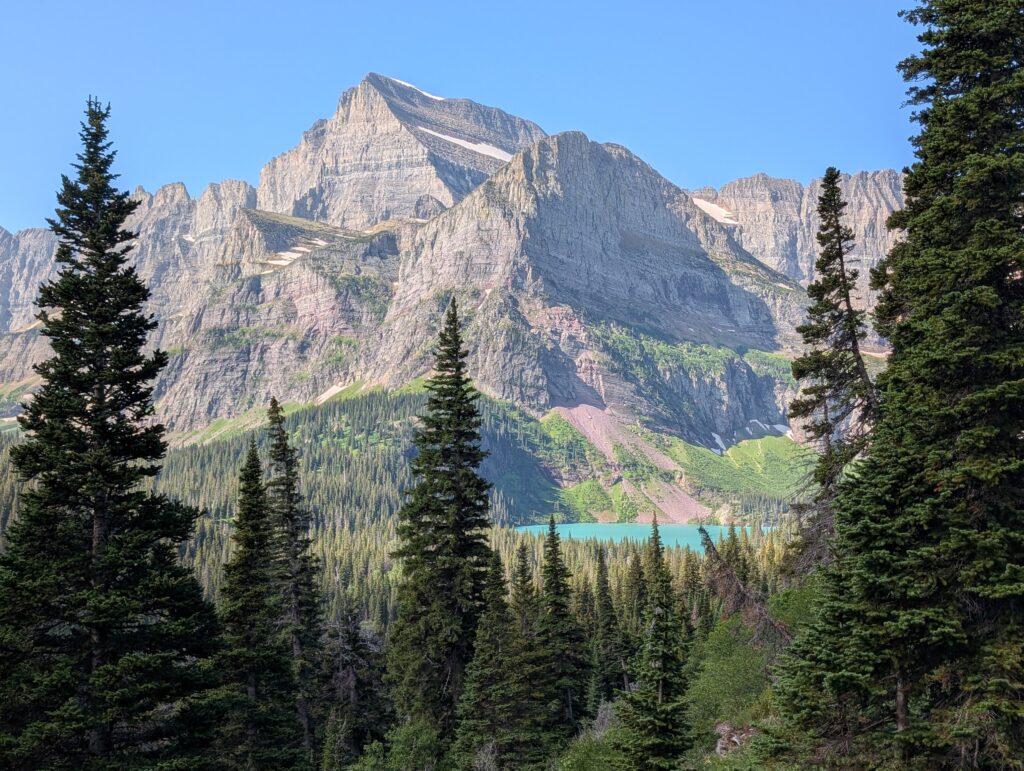
There is a long stretch where the lake is to your left and the view keeps getting better and better. This is a great time to grab a snack and take in one of the best landscapes on earth.

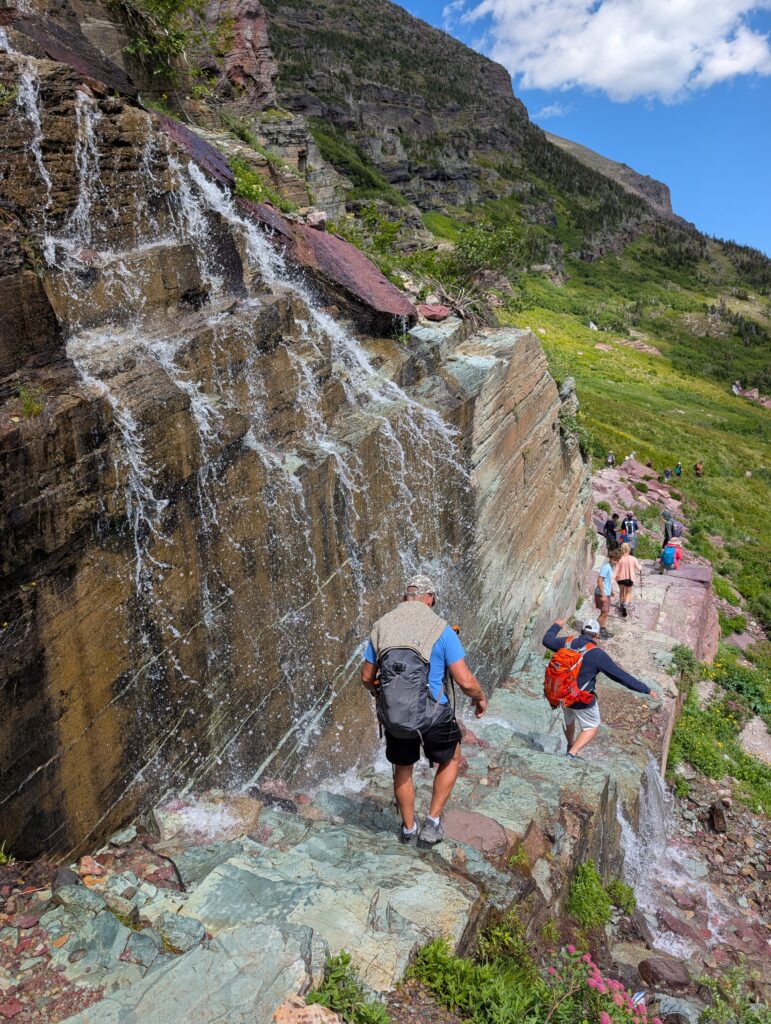
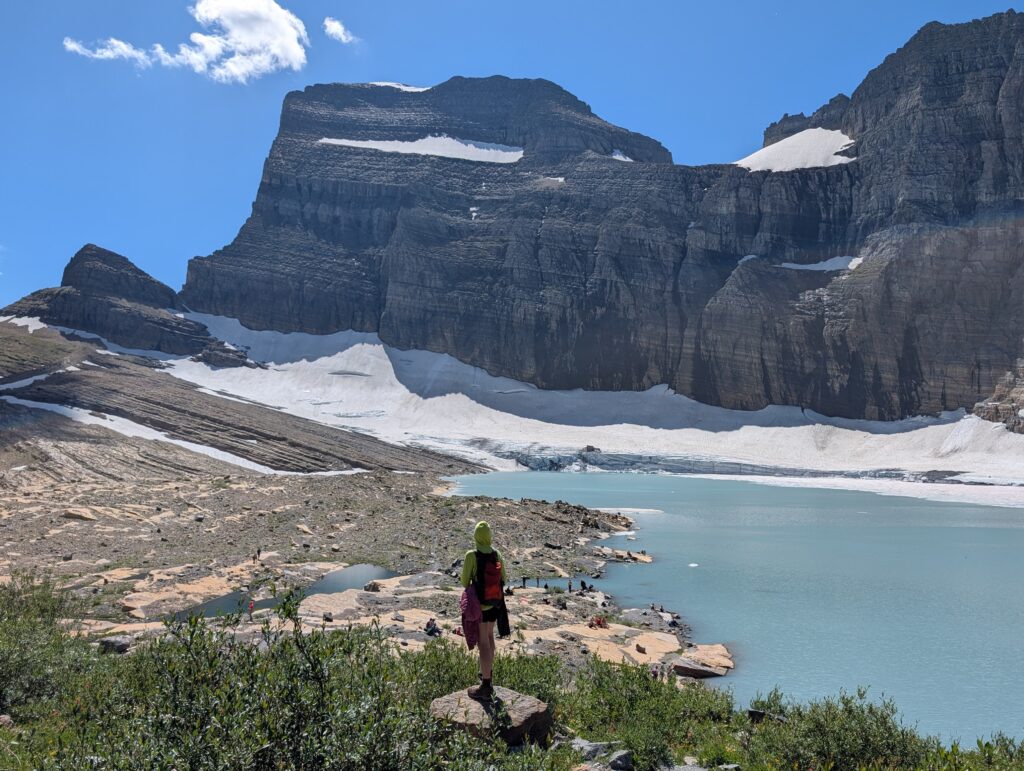
If you’re wondering where the final destination of Upper Grinnell Lake and Grinnell Glacier is, it’s above Grinnell Falls. That’s towards the upper-right in the photo above. You’ll have to briefly head in the opposite direction from the waterfall along one switchback, then turn back and continue straight towards it again for a while. There is one rocky section where water may be splashing on the trail with not a lot of room to maneuver. I imagine it can be impassable if the water flow is too great.
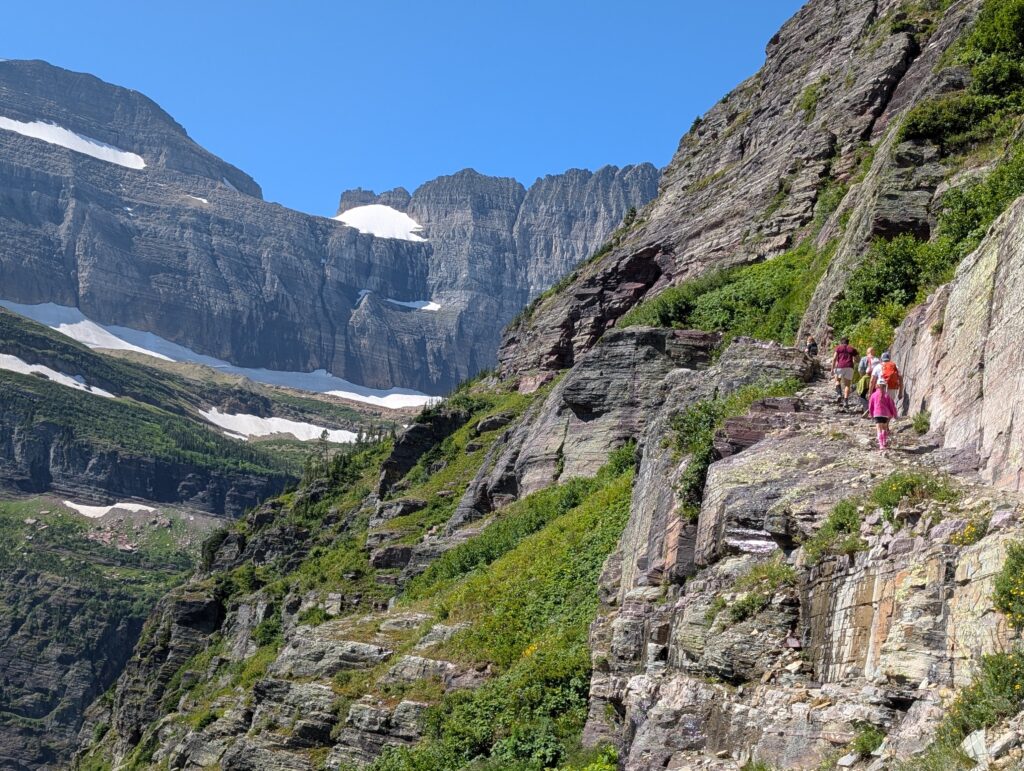
There are a few spots where the exposure could be uncomfortable for some, but there is plenty of room and no drop-offs for the majority of the trail. As you get closer to the glacier, the view looking back becomes lake after lake after lake. The last bit consists of switchbacks, which are the steepest and toughest part of the hike.
Once you level off, the trail turns to the left and the lake and glacier will come into view! The glacier is on the opposite side of the lake. You can walk over to it or just head directly to the lakeshore. Spend as much time as you’d like, but plan your return carefully if you plan on catching the boat back.
The return and Grinnell Lake
If you’re on foot for the whole way back, retrace the steps outlined above. It will be 5.3 miles to the hotel.
If you’re taking the boat, the returns are first come-first serve. Head down until you are beside Lake Josephine, and look for the very sharp turn to the right that leads down to the lake and dock. You may get to the dock only to find out you’ll have to wait a while for the next one, which can be a bummer. Usually there is an employee writing down names of those arriving to make sure the appropriate order is followed. Take the first boat across Lake Josephine, walk the 0.2 miles to the other boat dock, and take the second boat back to the Many Glacier Hotel.
Note that if you get to the dock and find out you’re going to have to wait a while, you might make better time by walking the 1.7 miles back. From the dock side of Lake Josephine, however, the trail is overgrown in spots and away from the water so there are no views.
Also, the shore of that beautiful, turquoise-colored Grinnell Lake is only 1 mile from that same boat dock on Lake Josephine. If you’re up for it, this is an excellent add-on and signs will lead you there in no time. I wanted to take a quick jaunt there, but one in our large group hurt their ankle so we wanted to get back as soon as possible.
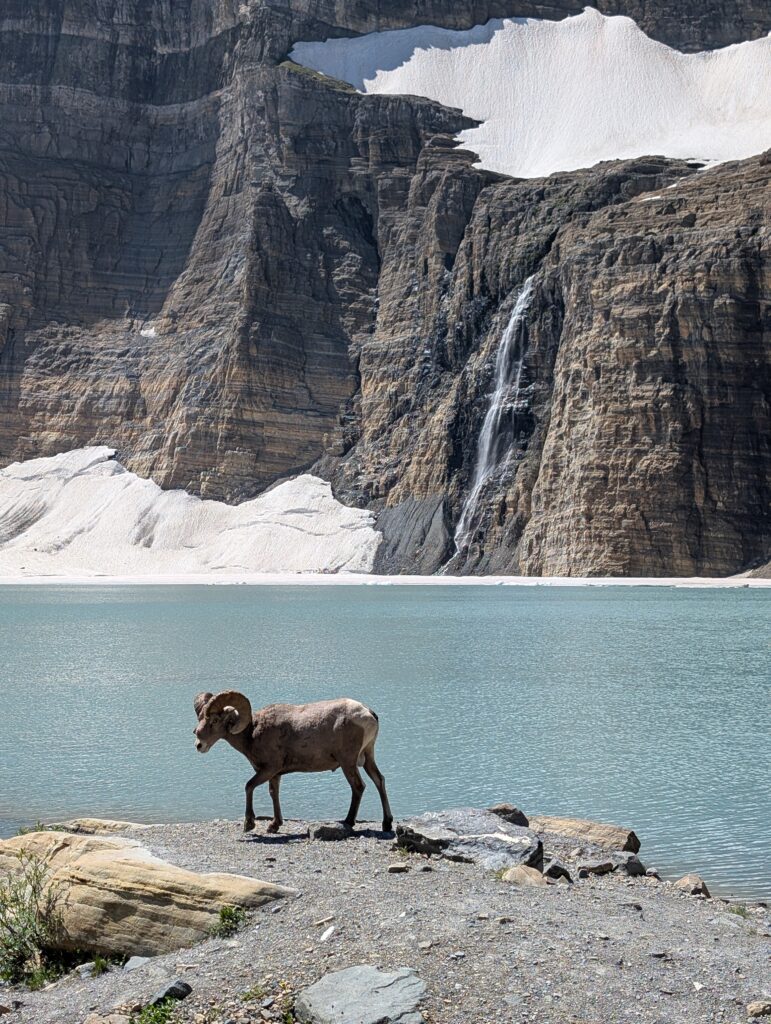
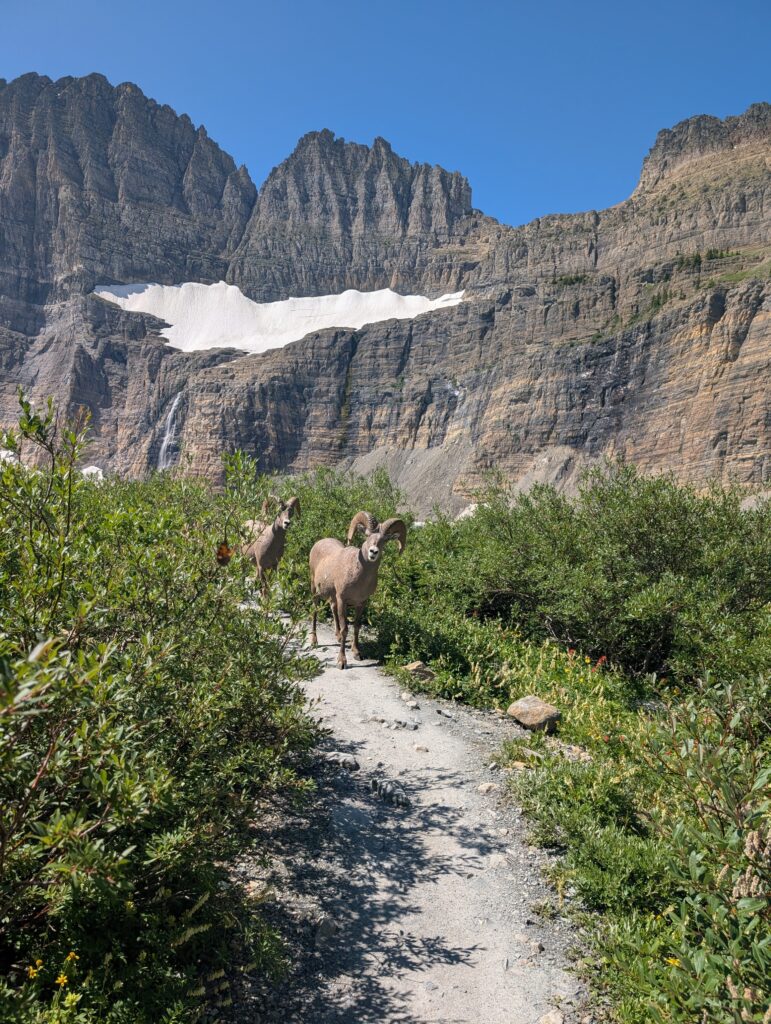
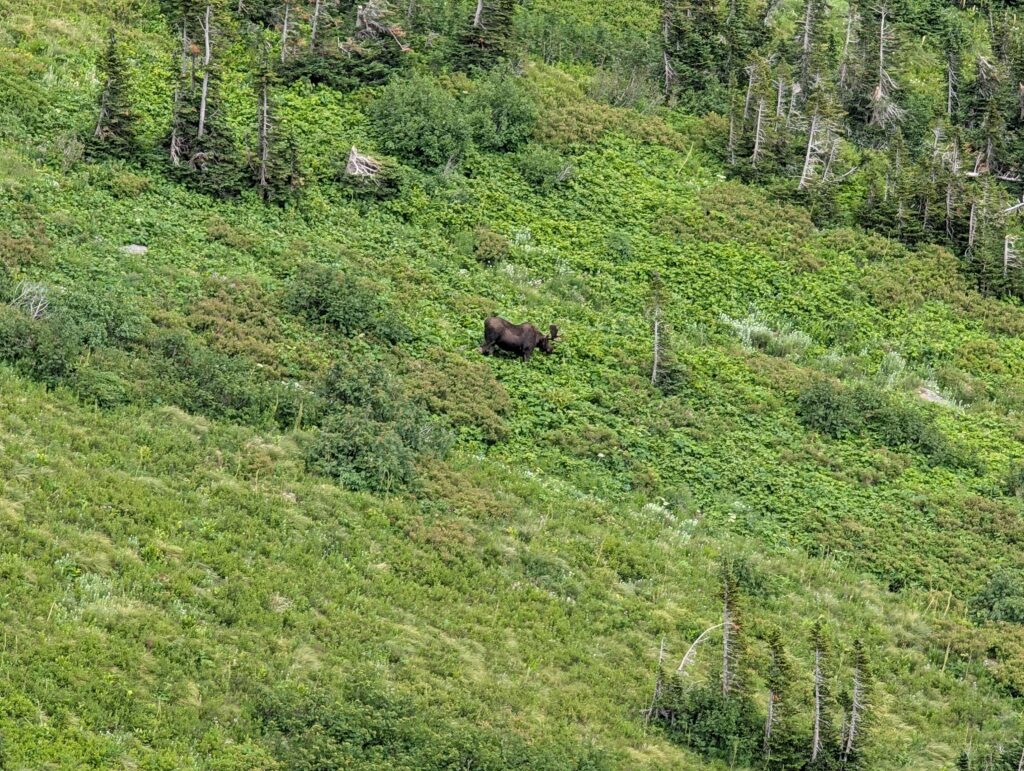
Lastly, you have a great chance to spot wildlife on this hike. We saw quite a few Bighorn sheep by Upper Grinnell Lake and 2 moose from afar, when we were higher up looking down towards Grinnell Lake. No bears, unfortunately.
That’s it! Have you ever done this hike, or have any questions? Leave a comment below!

Leave a reply