The most important thing on this page: please follow the 7 principles of Leave No Trace whenever hiking (and all the time, actually – most are pretty good general life tips, too):
- Plan ahead and prepare
- Travel and camp on durable surfaces
- Dispose of waste properly
- Leave what you find
- Minimize campfire impacts
- Respect wildlife
- Be considerate of other visitors
Now, on to the Indian Head hike. Here are the quick facts:
- Where: Adirondacks, northeast New York
- More specifically, where: the trailhead is on Route 73 near Keene Valley, 30 minutes southeast of Lake Placid
- Distance and elevation: minimum of 8.4 miles (13.5 km) with 1,430 feet (435 meters) of elevation gain for the quickest way to Indian Head and back. Can (and should) make additional stops, however.
- Highest point: 2,667 feet (812 meters) at Indian Head. PS – I have no idea why most sites show this as having 1,900 – 2,000 feet of elevation gain.
- Why you should hike this trail: the best mountain view in the eastern US
- Fee or permit? yes – free parking reservation required from May 1 – October 31 (more info below)
- Best time of year: May – October
- Closest commercial airport: Burlington, Vermont is a 1 hour, 45 minute drive. New York City is a 4-hour drive.
Tips
- MAKE SURE YOU GET A RESERVATION
- There are several ways to get there and back, so make a plan in advance
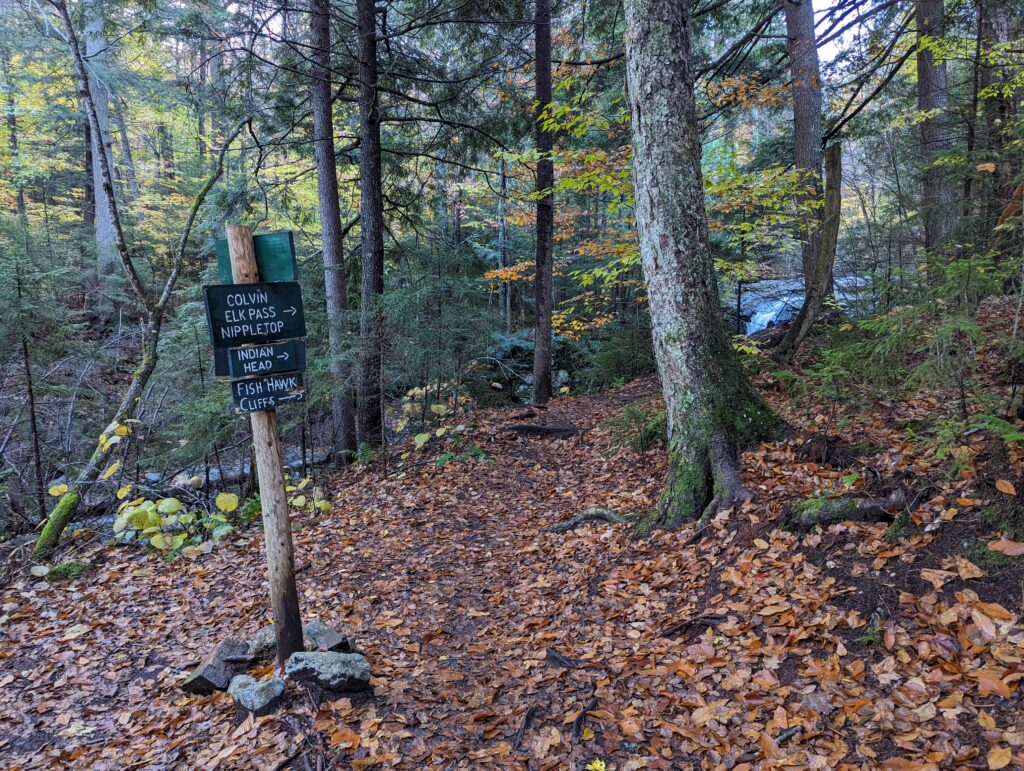
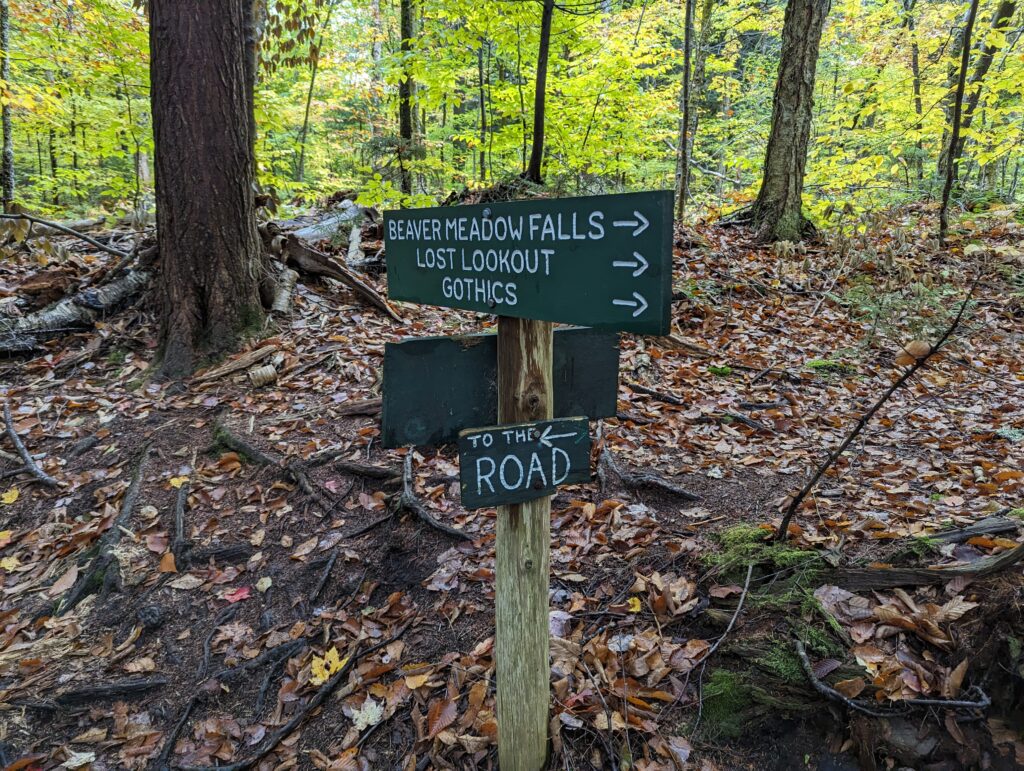
- There is excellent, helpful signage at every trail intersection
- Skip the North Overlook if you take the Gill Brook Trail – it’s not worth it
- When you get to the Indian Head overlook, make sure to descend through a small section of trees, towards the water, for unobstructed views
- Take the ~30 minute detour to Fish Hawk Cliffs, close to the Indian Head overlook
- Take the 10-15 minute detour to Rainbow Falls unless water levels are very low
- Take the West River Trail on the way back that passes right by Beaver Meadow Falls
The Indian Head hike was difficult to figure out because there are so many variations and trail intersections. Looking at a single picture of all the trail possibilities can be overwhelming, so I'd recommend breaking it down into 2 parts.

First, decide on your route to Indian Head. Everyone will need to park at the same lot and follow the same 2 roads for the first 2.5+ miles. Then there are 3 trail options, detailed below.

Second, decide if you want to make the return longer by adding any stops.
Getting a parking reservation
You cannot do this hike without a parking reservation or recent bus pass. You cannot park elsewhere and walk, get dropped off, or arrive by bike – no walk-ins are allowed. The only exception is passengers arriving to Keene Valley by bus. You will be allowed in if you have a ticket from within 24 hours of the time you get to the parking lot.
If you’re not arriving by bus, you’ll have to get a reservation at https://www.hikeamr.org/. It’s a good idea to sign up for a free account and get familiar with the site before trying to get one. They have an excellent FAQ document and were very responsive by email when I had a couple questions.
Reservations are released at midnight NY/Eastern time exactly 2 weeks in advance. In case there’s any confusion, there is a running countdown to when reservations become available. If you select the date that is 15 days away, you’ll see it.
When you get to the reservation page, you’ll select a date within the next 2 weeks and see if there are any open slots. We stayed up until midnight two nights in a row to maximize our chance of getting getting a reservation and got them as soon as they were available.
Some important notes about reservations:
- Although they are made for a specific hour, you can enter the lot at any time during the day
- A reservation is good for one car, up to 8 people
- The same person/account can make 2 reservations per week
- People can cancel their reservation, so it’s worth checking frequently if there are none available on your preferred day(s)
Getting there
The closest airports are Lake Placid Airport (LKP) and Adirondack Regional Airport (SLK). They are quite small so you likely will be driving to Keene Valley from a larger city like Burlington, Vermont (1 hour, 45 minutes) or New York City (4 hours). Wherever you’re coming from, the Indian Head parking lot is on Ausable Road. Ausable Road has 2 entrances from Route 73, and you want the one to the south that is almost exactly across the street from the Roaring Brook Falls parking lot.
After turning onto Ausable Road, the parking lot is immediately on the left. If arriving between 5 am and 4 pm, you’ll need to tell the guard your name and time of reservation. The lot is closed with a gate outside of those hours, but it will automatically lift for those leaving the lot if there’s no guard when you return from your hike.
Part 1: Walking along Ausable and Lake Roads
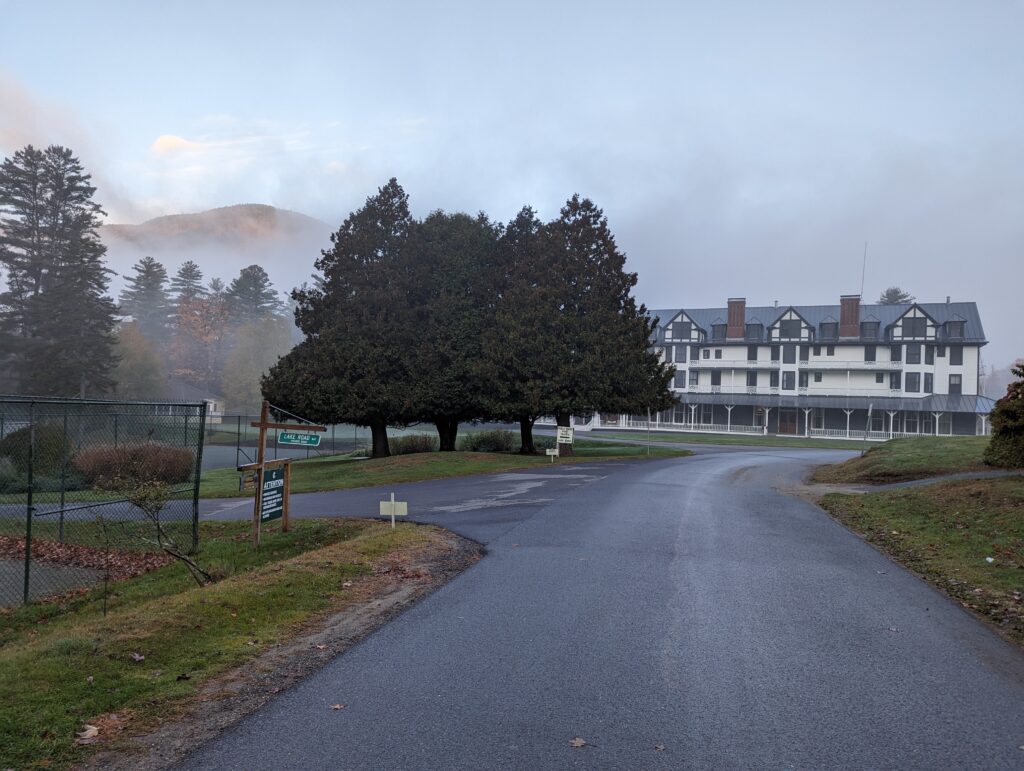
A significant part of the hike is spent walking along 2 roads. The first, Ausable Road, is a regular road but limited to local traffic only. You’ll likely be sharing it with a few cars. After 0.6 miles, just before the Ausable Clubhouse, Lake Road branches off to the left.
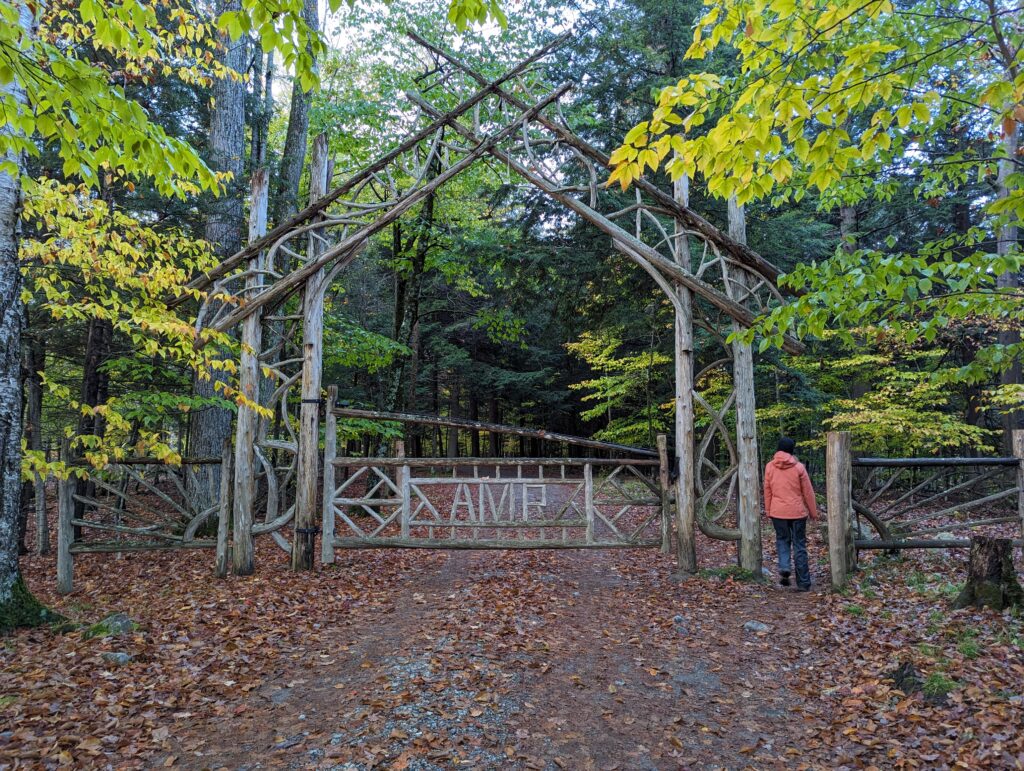
After walking down Lake Road for a brief time, there’s another guard post and trail register. Give the guard your name and reservation time again and sign the register. From the guard post, you’ll see a gate that prohibits most vehicles from proceeding further down Lake Road. There is an opening for pedestrians and this is where you’ll get under the canopy.
Part 2: Choosing a trail to get to Indian Head
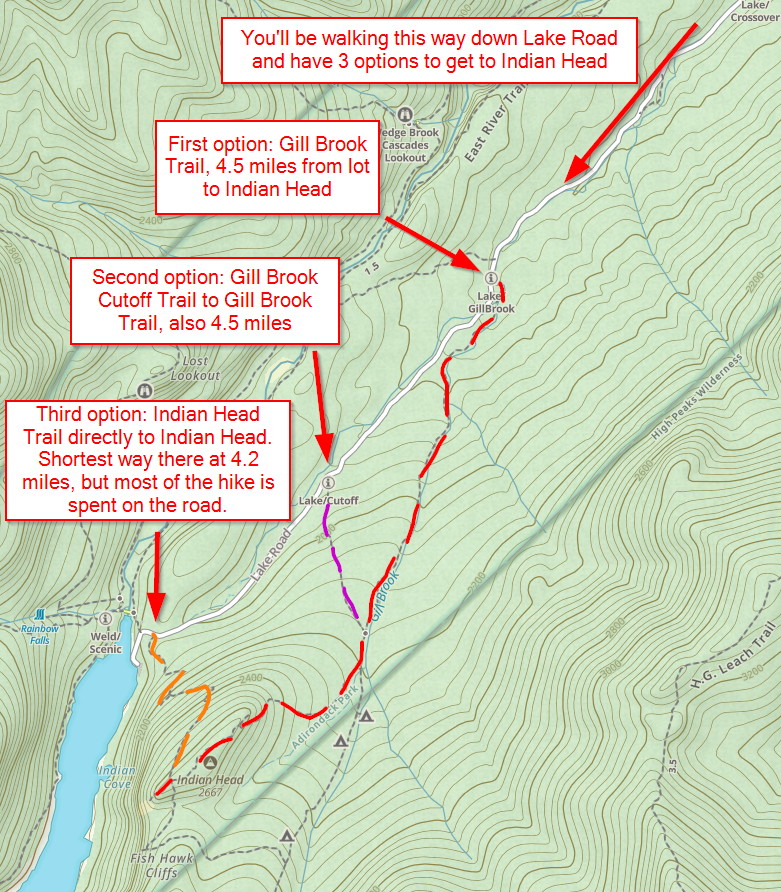
Option 1 – Gill Brook Trail
After just over 2 miles down Lake Road, and about 2.65 miles total from the parking lot, is the first opportunity to cut into the woods. The Gill Brook Trail will be on your left and is clearly marked.
Taking this trail will result in 4.5 miles from the lot to Indian Head and get you off Lake Road the fastest. Make sure you follow signs for Indian Head, which will branch off to the right just after the intersection with the Gill Brook Cutoff Trail (visual in the trail map just above).
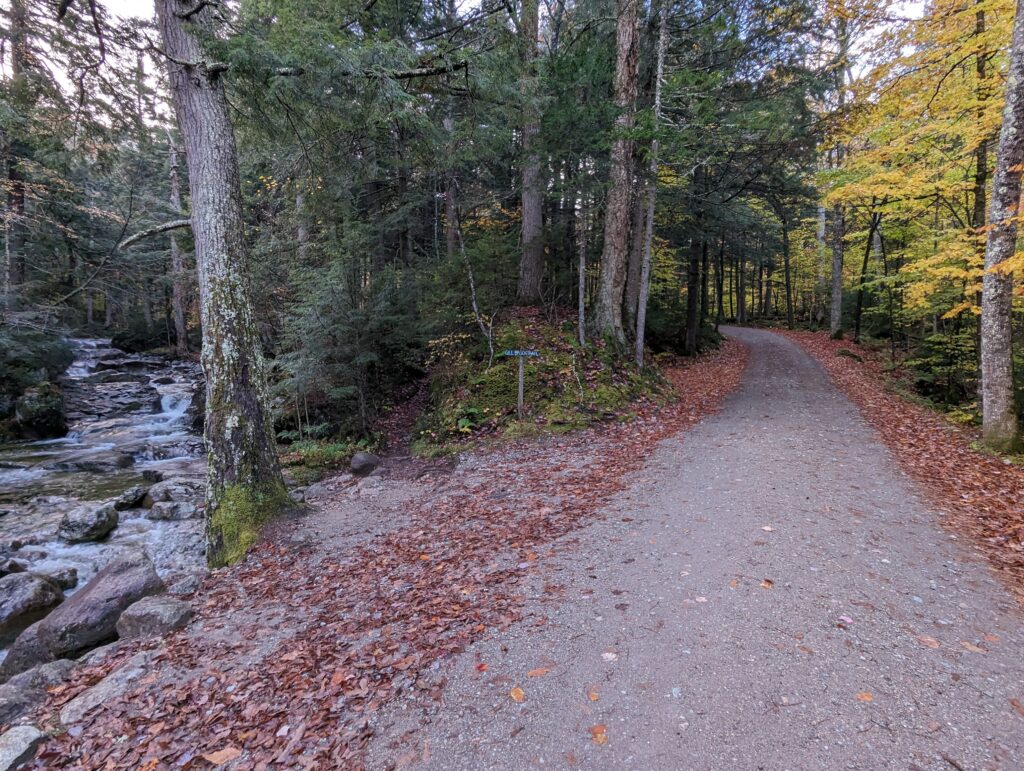
Option 2 – Gill Brook Cutoff Trail
Only 0.7 miles after the Gill Brook Trail junction is the Gill Brook Cutoff Trail. This also results in 4.5 miles total, so the only real difference is more time on the road or in the woods. Walking through the woods can be a little challenging as there are some steeper parts. There are also lots of roots, rocks, and a couple stair sections. Shortly after joining up with the Gill Brook Trail, keep an eye out for the signed trail to the right for Indian Head.

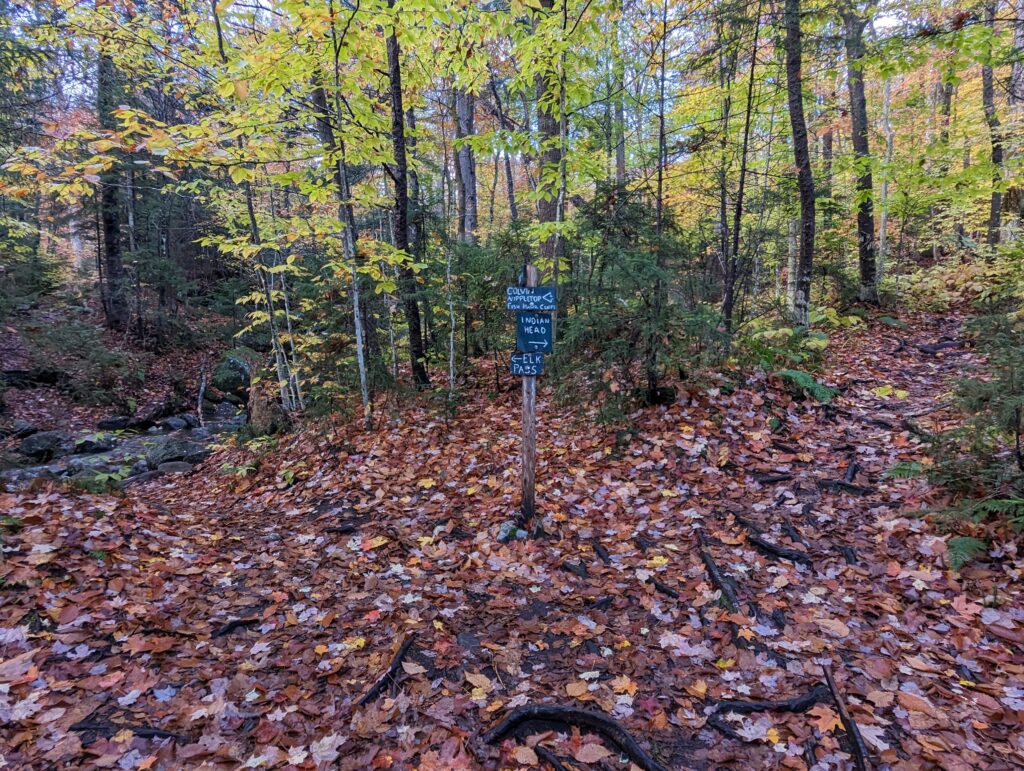
If you take the Gill Brook or Gill Brook Cutoff Trail, I would say don’t bother taking the short detour to the North Overlook. It’s in the opposite direction of Indian Head and the pictures I’ve seen are not worth even 5 extra steps when compared to the upcoming overlooks.
Option 3 – Indian Head Trail
Finally, just under 4 miles from the parking lot is the final opportunity to get to Indian Head. The Indian Head Trail starts rather aggressively uphill and gets you to the the lookout in 4.2 miles total. Take this option both ways if you’re short on time and need the quickest way there and back.
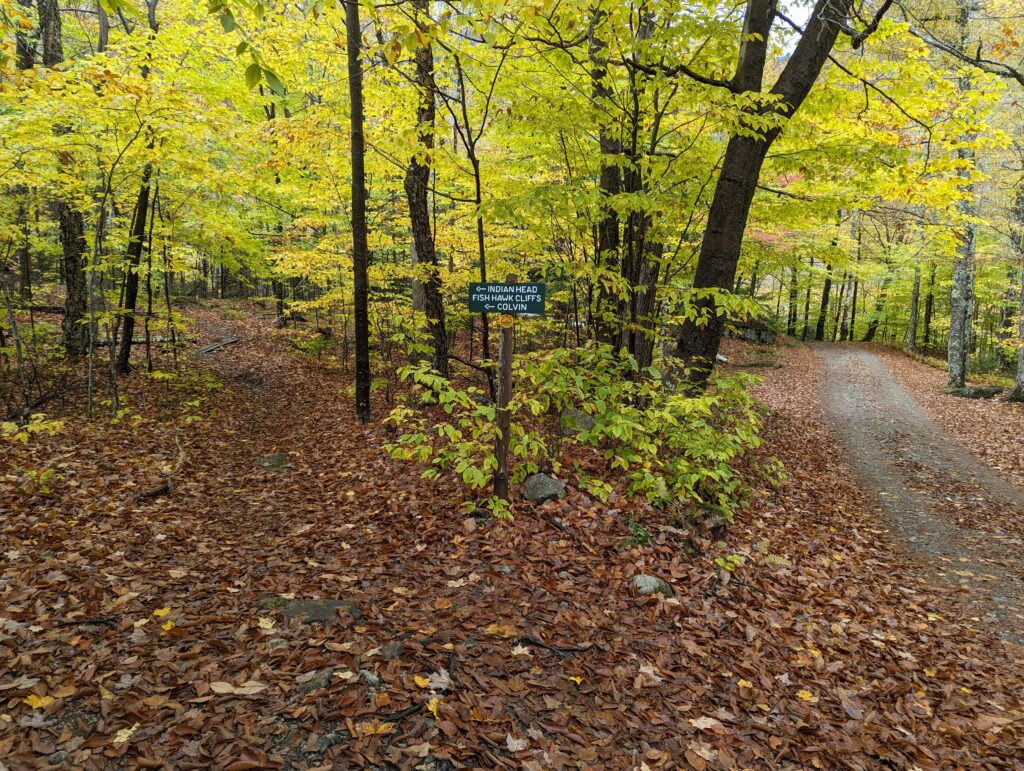
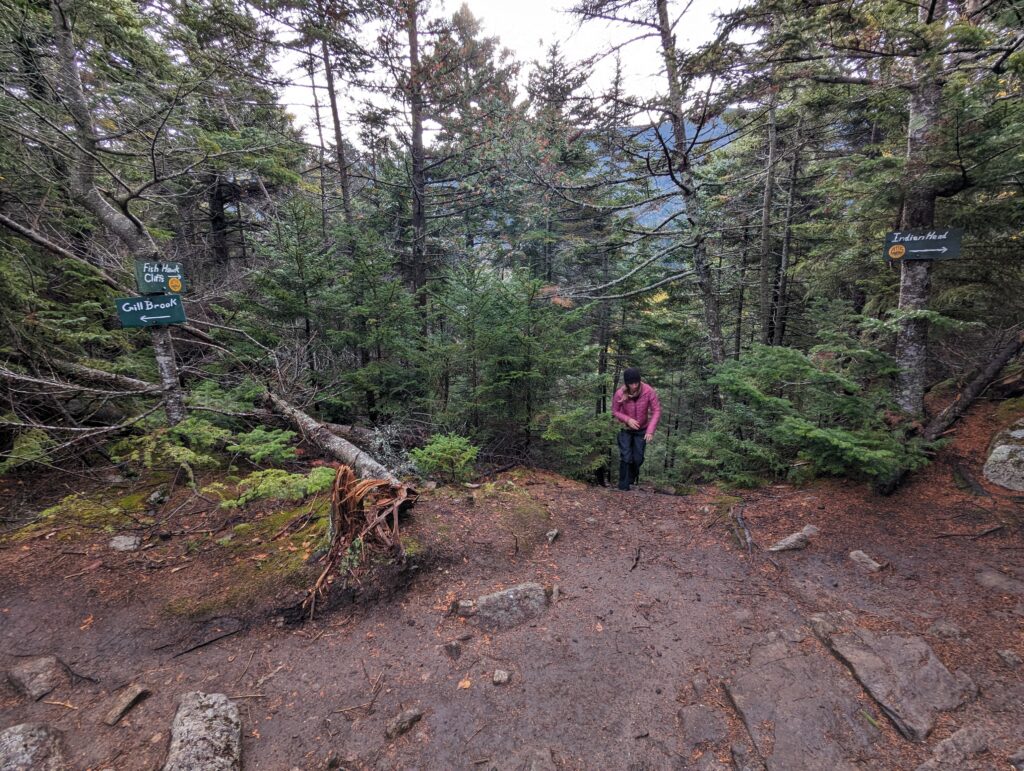
Part 3: Exploring Indian Head and Fish Hawk Cliffs
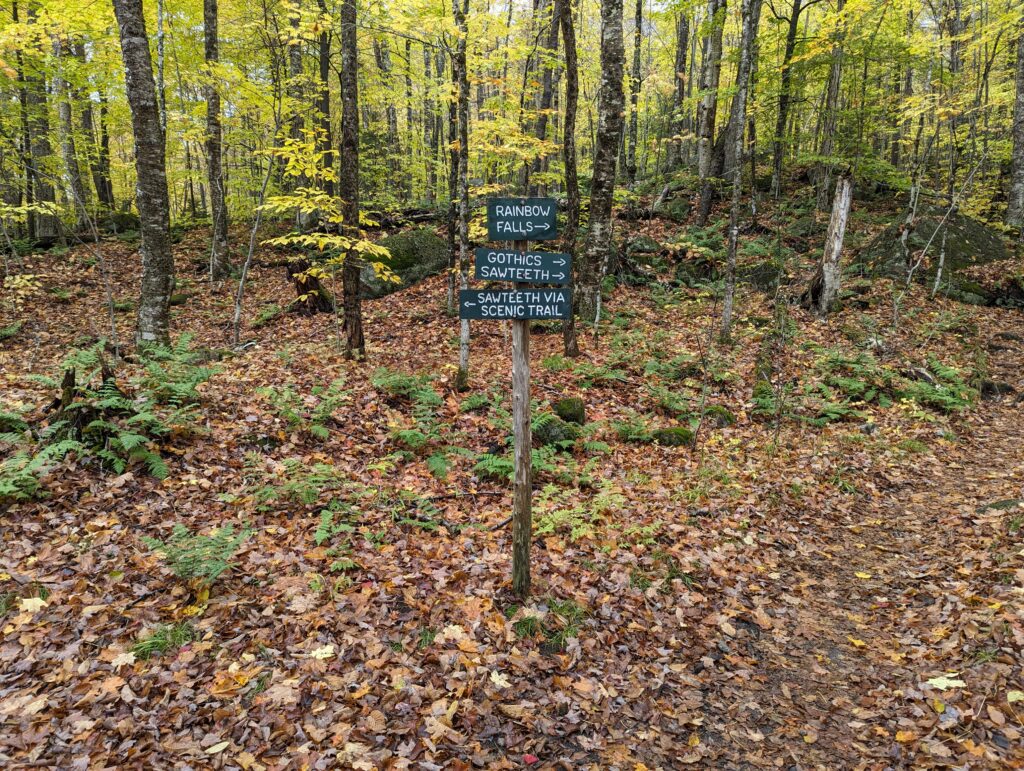
The trails for Gill Brook, Indian Head, and Fish Hawk Cliffs meet at this signed spot very close to Indian Head:
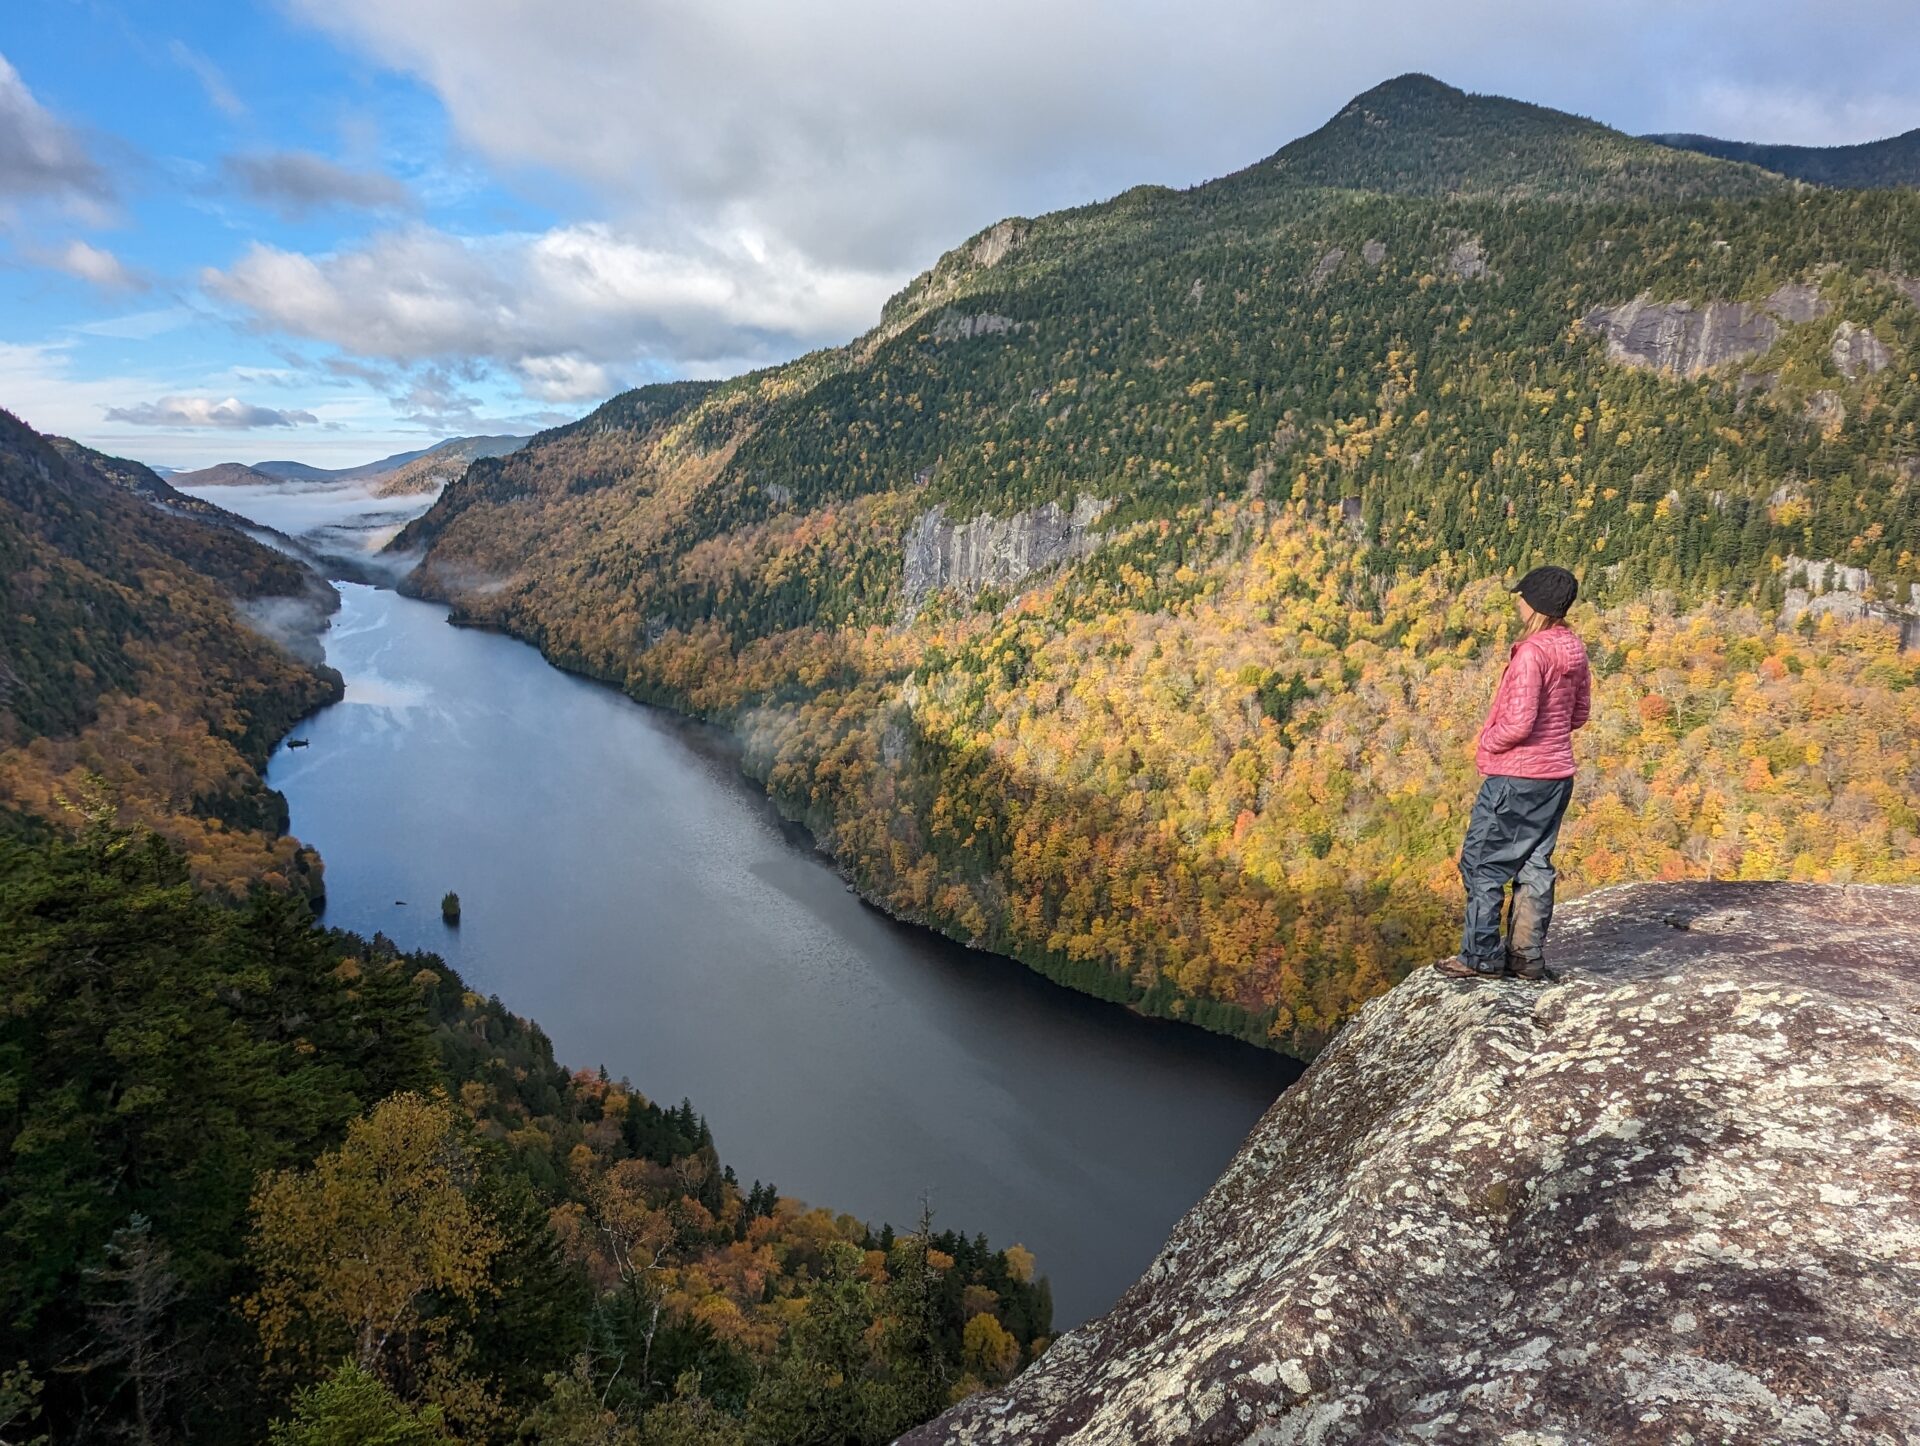
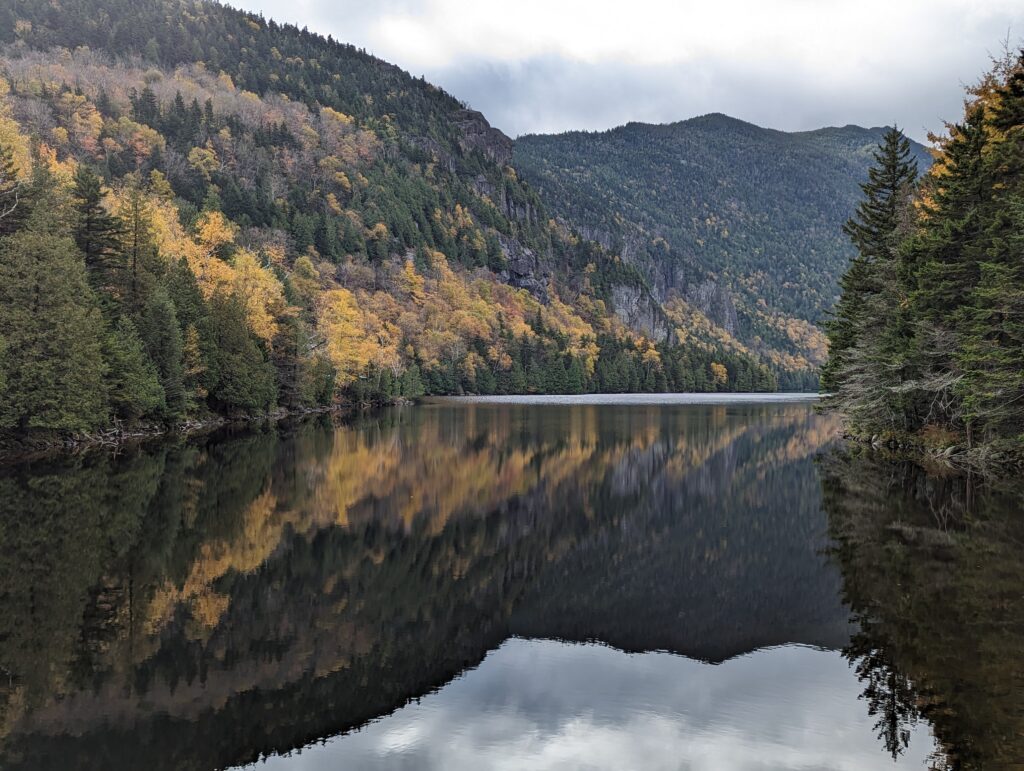
Indian Head is a matter of steps away. Following the sign, you’ll break through the trees in no time and have your first glimpse of one of the best views in the US.
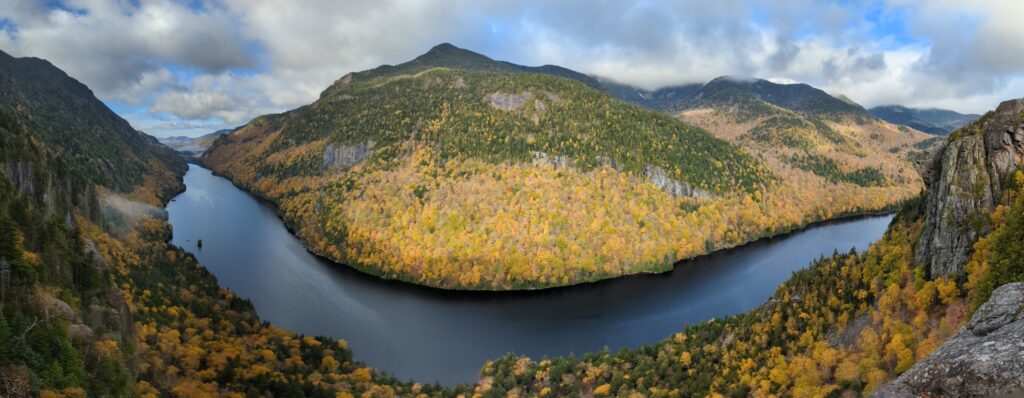
Don’t stop there, however. Carefully work your way down the rocks in the direction of the water. You’ll be rewarded with an unobstructed, straight-on view of Lower Ausable Lake flanked by rising mountains on both sides. This is sometimes referred to as the Lower Indian Head Viewpoint.
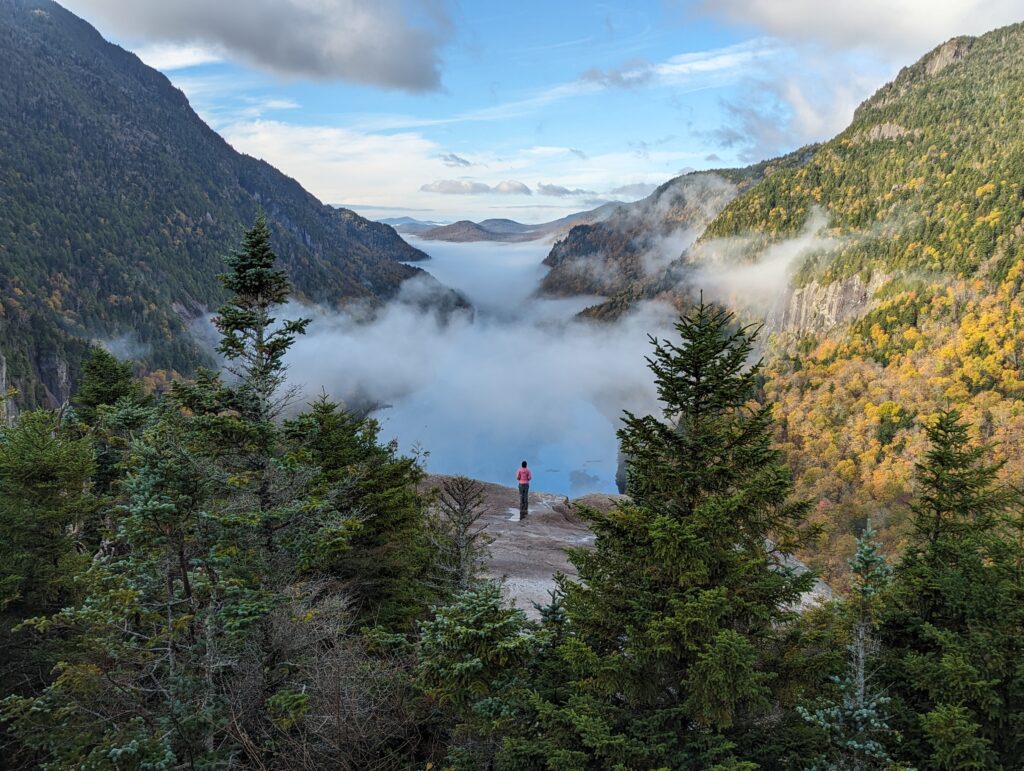
While it’s a small area, make sure to explore different angles for the best photo. You could spend as little as 5-10 minutes at Indian Head or as long as you’d like.
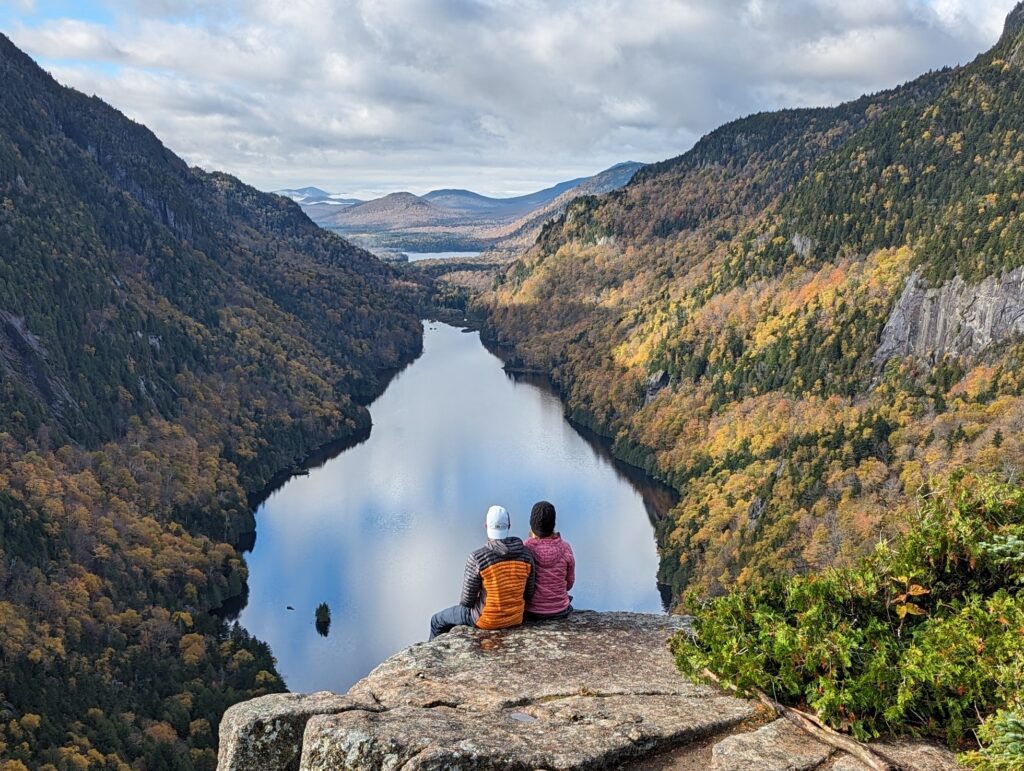
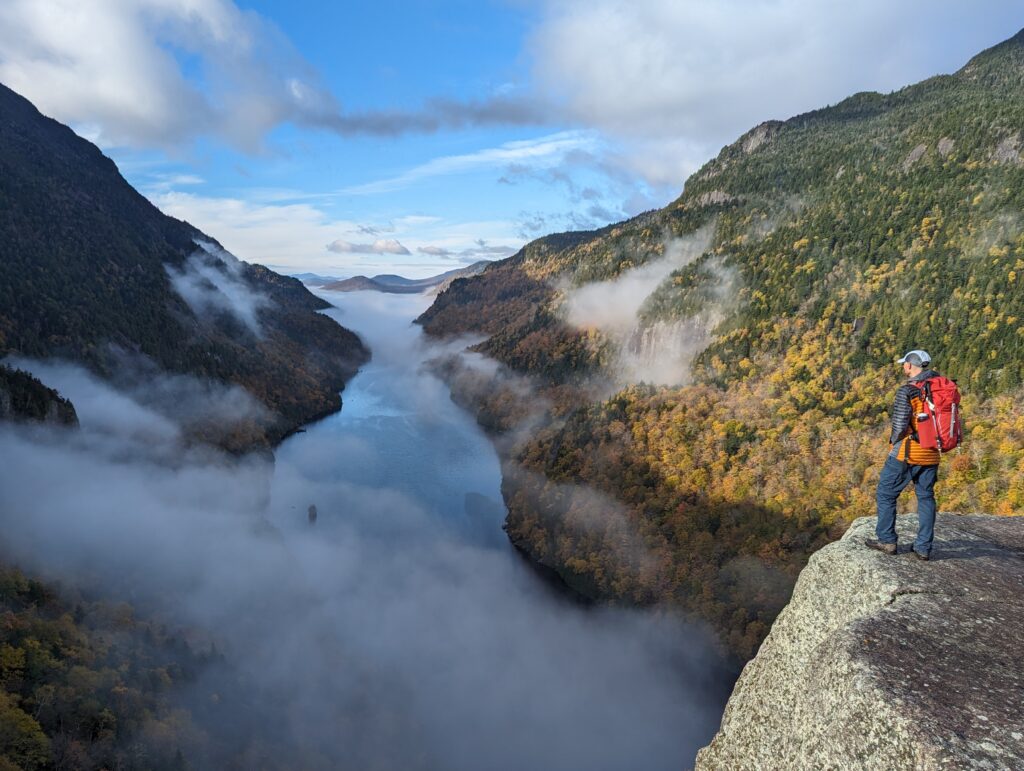
Back to the signed intersection, the trail to Fish Hawk Cliffs sharply descends and works its way 0.2 miles to another stunning vista. Although it’s very short, the initial section is the steepest of the entire hike. Take some caution, especially if it’s wet. It should take about 10-15 minutes to get from Indian Head to Fish Hawk Cliffs.
When you get to Fish Hawk Cliffs, also take a minute to explore around the small area and see what your favorite vantage point is. Don’t forget to look back at Indian Head from there. Fish Hawk Cliffs is a smaller area than Indian Head, so you only really need a few minutes there. But it’s so beautiful, you may find yourself admiring the views for a bit.

We went to Indian Head first, then Fish Hawk Cliffs, then back to Indian Head. There’s no right or wrong order since they’re so close, and you might have Fish Hawk Cliffs all to yourself.
Part 4: Indian Head back to the parking lot
More options!
After taking the Indian Head Trail down to Lake Road, make a right if you want to head straight back to the parking lot. That will put you at 8.4 miles for the day.
My recommendation, and what we did, includes the following steps:
- Take the Indian Head Trail back down to Lake Road
- Turn left on the road, cross the main bridge, and take the short trail to Rainbow Falls
- Follow the West River Trail to Beaver Meadow Falls
- Take the most direct route back to the parking lot
Adding the 2 waterfalls on the way back adds almost 2 miles from the quickest way to and from Indian Head. That makes a total of 10.3 miles, but the whole way back including both detours is flat or downhill.
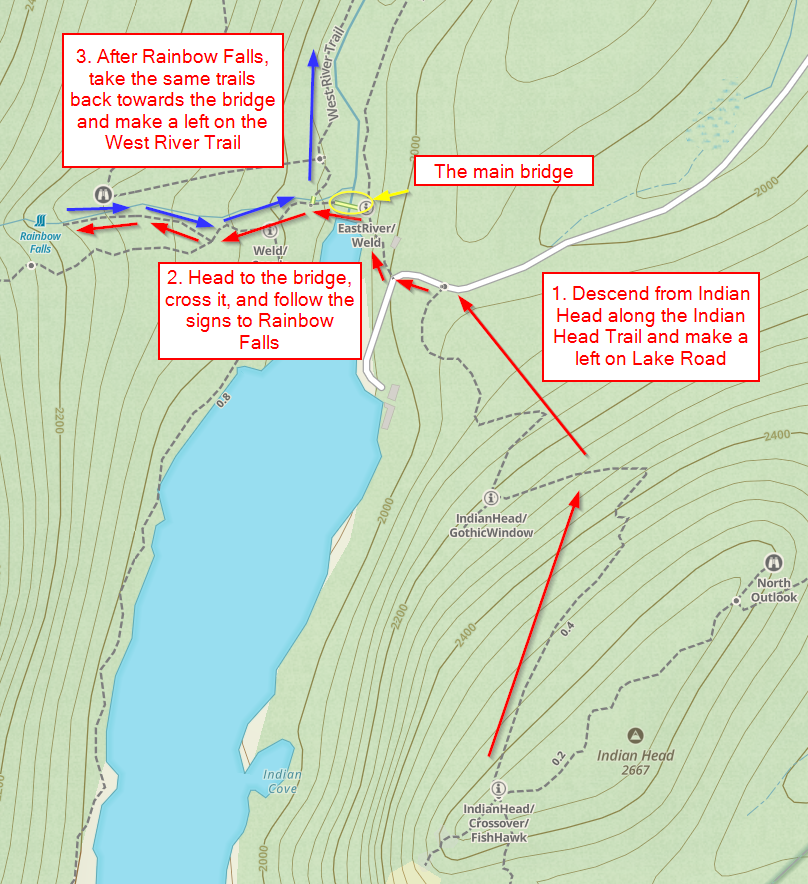
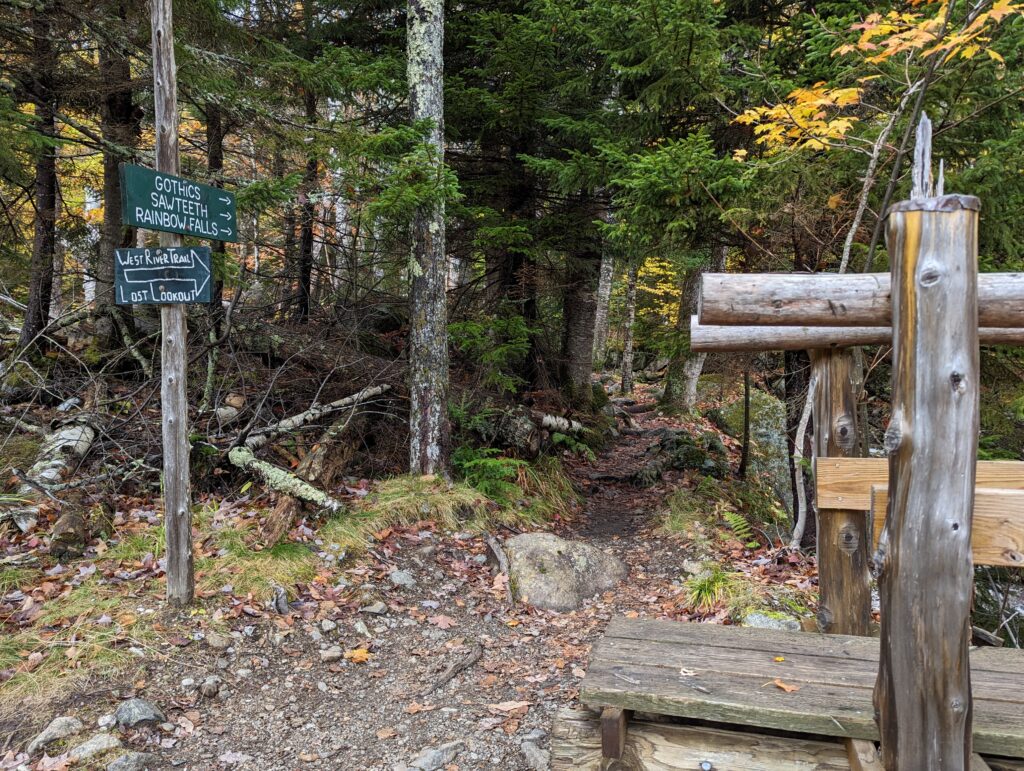
If you want to see Rainbow Falls and Beaver Meadow Falls, descend on the Indian Head Trail and take a left on Lake Road. You’ll see the main bridge almost right away – head right for it.
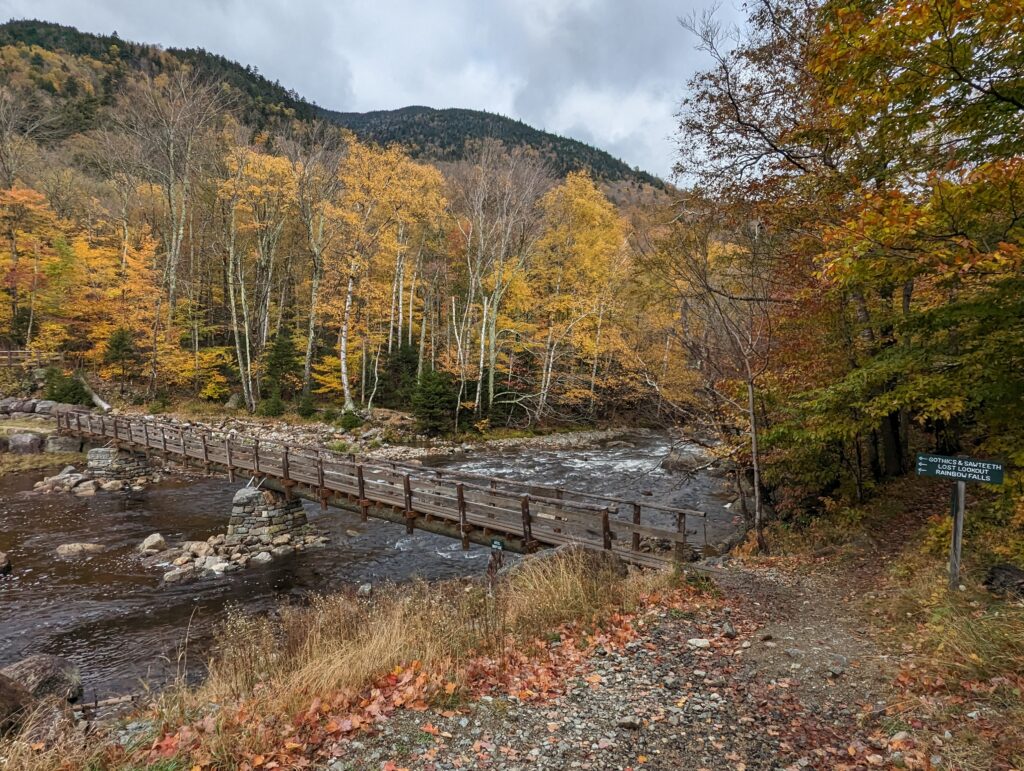
Make a mental note of the trails before and after you cross the main bridge. The East River Trail is before you cross the bridge and is not the one you want. Just after crossing the main bridge is yet another bridge to the right. This is the West River Trail, and the one you want to take after the short detour to Rainbow Falls.
Also look to your left when crossing the main bridge. The view from water level is beautiful and you might get a nice reflection.
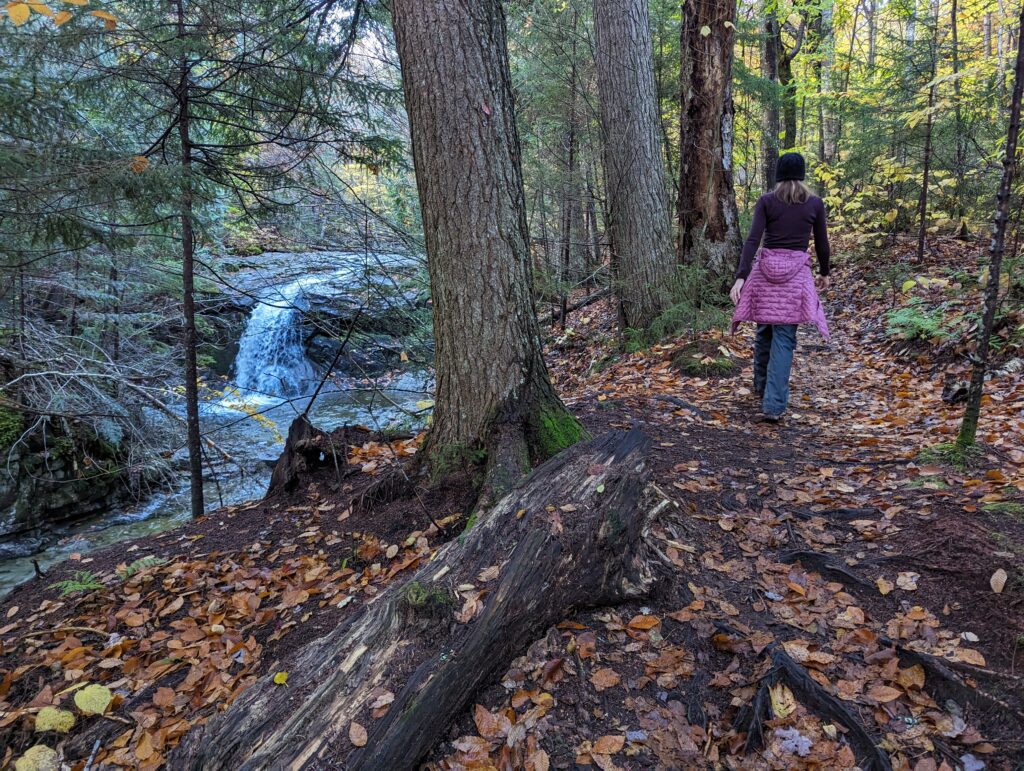
Rainbow Falls
Rainbow Falls is less than 10 minutes away from the main bridge. You’ll come upon several trail intersections but Rainbow Falls is clearly marked on each one.
As you approach the falls, be careful as the rocks get very slippery. How close you get to the falls depends on how much water flow there is. After enjoying the view, retrace your steps and follow the signs back to the West River Trail.

West River Trail to Beaver Meadow Falls
Just before getting back to the main bridge, follow the sign for West River Trail. This will be on the left since you’re now coming from the opposite direction. The West River Trail goes beside the river almost the whole way to Beaver Meadow Falls.
There are a few times where it meanders away from the water and it can be hard to tell where the trail is. Look for the frequent trail markers on the trees if you lose the path. In just under a mile from the start of the West River Trail, you’ll arrive at Beaver Meadow Falls.
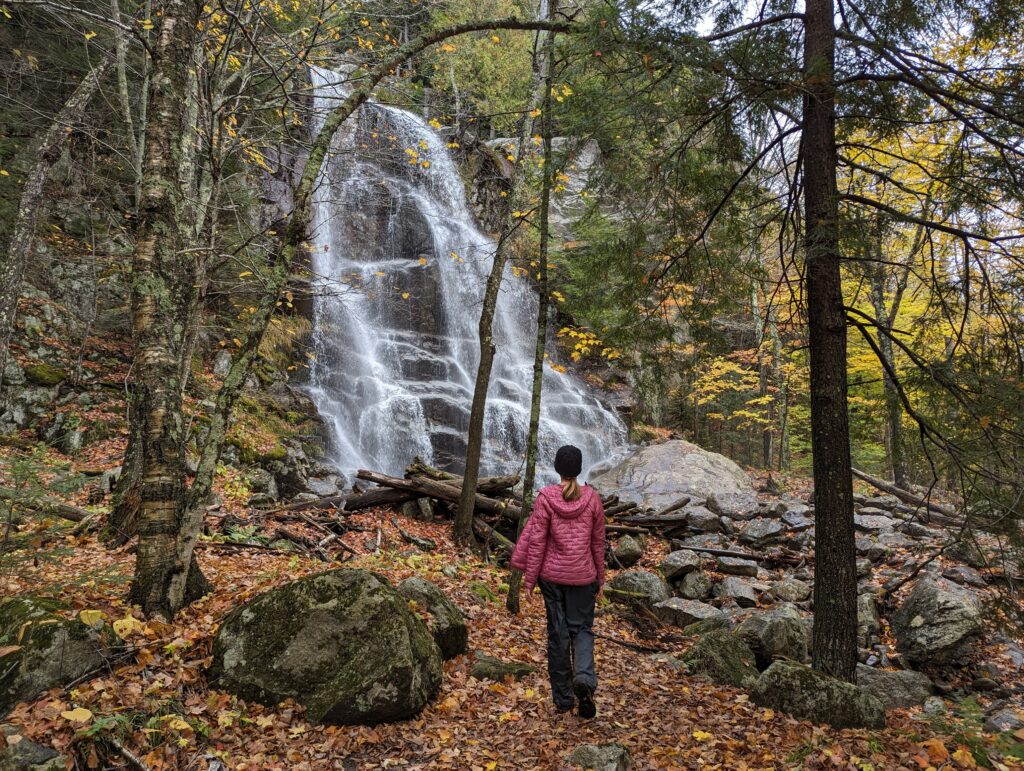
While I found both waterfalls to be better than I expected, they might be not worth the detours in especially dry times.
Beaver Meadow Falls back to the parking lot
The falls are right at an intersection of trails. If looking at a trail map, there are several turns in a very short period of time:
- From the West River Trail at Beaver Meadow Falls, make a right on the Beaver Meadow Trail
- Cross over the river on a bridge and make a left on the East River Trail
- Make a right to get back on the Beaver Meadow Trail
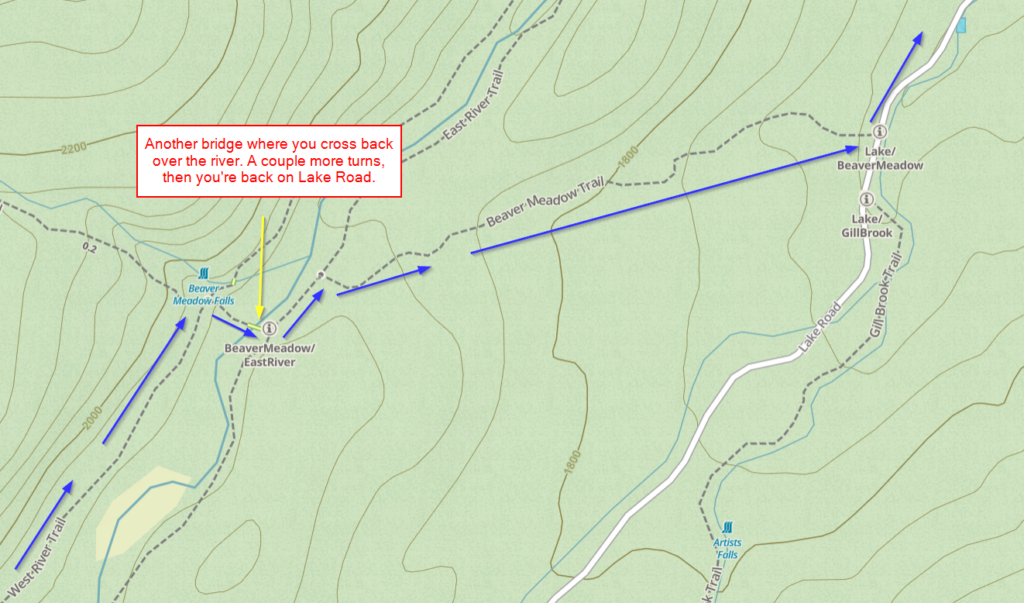
While that might seem like a confusing section, it is very short and well-marked. You also don’t have to remember the trail names. The signs say “The Road” or “Lake Road” to make it easier.
Just over 0.5 miles from Beaver Meadow Falls, the Beaver Meadow Trail ends at Lake Road. Make a left and retrace your steps on the roads all the way back to the parking lot. Remember to sign out at the guard post just after you go through the big, wooden AMR gate. Turn right on Ausable Road and finish up the last 0.6 miles.
That’s it! Have you ever done the Indian Head hike, or have a question? Please leave a comment below!


Leave a reply