The most important thing on this page: please follow the 7 principles of Leave No Trace whenever hiking (and all the time, actually – most are pretty good general life tips, too):
- Plan ahead and prepare
- Travel and camp on durable surfaces
- Dispose of waste properly
- Leave what you find
- Minimize campfire impacts
- Respect wildlife
- Be considerate of other visitors
Now, on to the Half Dome hike. Here are the quick facts:
- Where: Yosemite National Park, California.
- More specifically, where: Near the Happy Isles shuttle stop, all the way into Yosemite Valley.
- Distance and elevation: The quickest route is 14.2 miles (22.9 km) RT with 4,800 feet (1,460 meters) of elevation gain.
- Highest point: 8,839 feet (2,694 meters) on top of Half Dome.
- Why you should hike this trail: one of the world’s most iconic and coveted hikes. Summiting the highlight of Yosemite while passing 2 stunning waterfalls and amazing views all around.
- Fee or permit? Yes – yearly lottery in March plus day-before lotteries as well. More below.
- Best time of year: The cables are up from late May until early October. June will have the booming waterfalls, but the best time is whenever you can get a permit!
- Closest commercial airport: Fresno (FAT), California is about 2.5 hours from the trailhead. San Francisco (SFO) is another option with about a 4.5 hour drive.

Tips to remember for the Half Dome hike
- Start as early as possible, ideally in the dark. This helps you avoid crowds on the cables and afternoon thunderstorms.
- Stay inside the park if you can, close to the entrance if not. The trailhead is at least a 20 minute drive from any entrance to Yosemite.
- Do not attempt this hike in poor or threatening weather, and make peace in advance with turning around due to weather or fear. Deaths happen while trying to summit Half Dome.
- Consider a climbing harness, but make sure you are familiar with using it before you go.
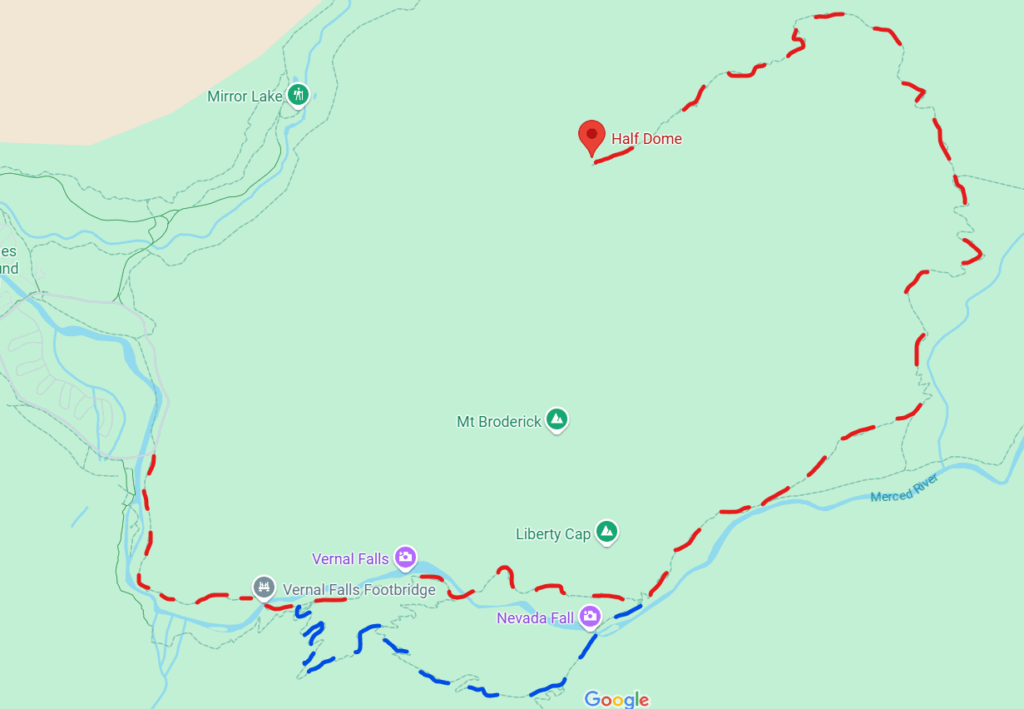
- Take the Mist Trail up and John Muir Trail back.
- Bring gloves for the cables. I liked having fingerless gloves, but that may not be ideal for some.
- Make sure you have hiking shoes or boots with excellent grip. If you get a new pair for this one, break them in well.
- Get a cell phone harness that you can clip to your clothes or gear.
- Bring your patience. You’re almost guaranteed to come across someone that is terrified and/or slow on the cables, and there is not much room at all for people to pass. Be safe and considerate, please.
Getting a permit for the Half Dome hike
You need to hit the lottery. Literally. There are 2 ways to score a day hike permit: the preseason lottery in March and daily lotteries. There are 300 permits each day, with 225 awarded during the preseason lottery and 75 during the daily lottery.
You can enter the preseason lottery at any time during the month of March. You can select up to 7 dates, and each date can either be a specific day or range of days. We applied for years, using a combination of specific dates and ranges, and finally were awarded a permit in 2024. I don’t think there’s any magical strategy, but you’ll have a better chance with weekdays and after Labor Day. The overall success rate of getting a permit to climb Half Dome during the preseason lottery is around 20%, with the daily lottery slightly higher.
There is a $10 fee (as of this writing) to enter the lottery on Recreation.gov. Winners are announced in April.
A few notes:
- You can put one alternate person on your reservation.
- You cannot apply more than once for the same lottery. If you do, all your applications will be cancelled.
- Having your name limited to one application applies whether you are the applicant or the alternate. You cannot apply yourself and be an alternate on another application.
- You can enter daily lotteries even if you were awarded a permit for a different day.
- There are other ways to do the Half Dome hike, such as getting backcountry permits. This guide covers the day hike only, but there is more information on backcountry/overnight permits here.
The daily lotteries take place 2 days before the hike date and you’ll apply on Recreation.gov for these, too.
Lastly, my guess is, if you’re reading this, you’re thinking about doing the hike when the cables are up. Or maybe you’re not aware they put the cables up around Memorial Day and take them down just after Columbus day every year. People can and do summit Half Dome when the cables are down, but you should be very experienced and know what you’re getting into (i.e., you’re not reading this).
Getting there
If you’re doing the Half Dome hike in one day, you really should not need to worry about getting a vehicle reservation that may be required at times to enter Yosemite National Park. You’ll want to be starting the hike well before the entrance stations are manned and any reservation-only hours are in effect. I think sometime between 4 and 5 am is the ideal time to start, but again, you can’t start too early. Make sure you know how long it will take you to drive from your lodging to “Yosemite Valley Trailhead Parking.” It is all the way into the valley, so it can take some time. Here’s a map for orientation:
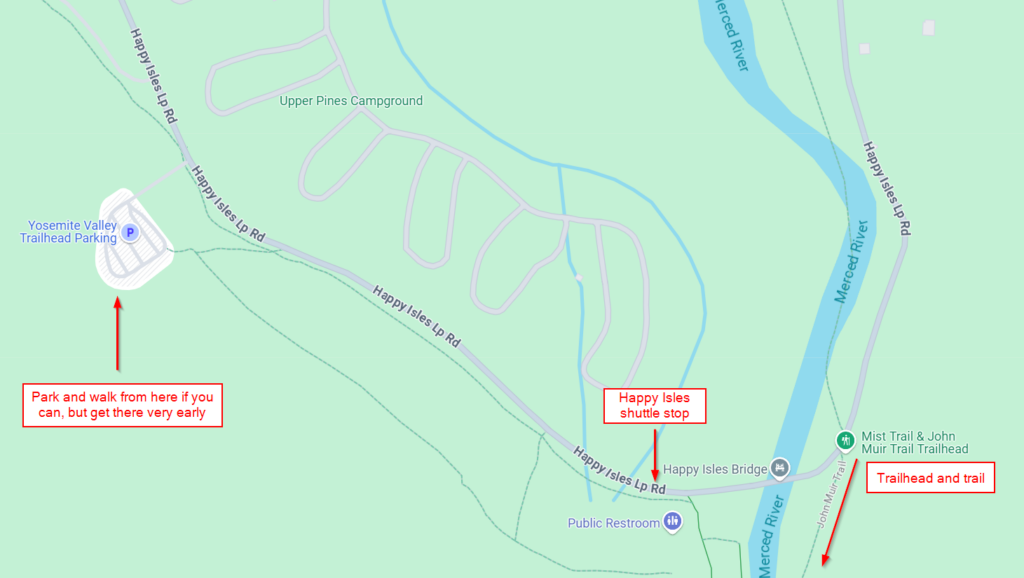
Note that the Happy Isles Loop Road is one-way (counter clockwise when looking at the map above), so don’t pass the turnoff for the parking lot. While there are free shuttles throughout the park that can take you to the Happy Isles shuttle stop, they don’t start until 7 am. Park in the lot and take the trail right beside the Happy Isles Loop Road (visible in the map above) to the trailhead. You’ll walk over the Happy Isles bridge and see signs on your right to start the actual trail.
Trailhead to Vernal Fall
Shortly after crossing the Happy Isles bridge, you’ll take a right at the trailhead and see signs for Vernal Fall and Nevada Fall on the Mist Trail. The trail is paved and has pretty steady elevation gain for the first mile. The path isn’t that wide, however, so you may get stuck in two-way traffic depending on the time of day.
You’ll arrive at the Vernal Fall bridge after that first mile. There are bathrooms and fountains to fill up water right after the bridge. Use either or both if needed then keep heading uphill. You’ll then see a signed trail on your right, which is the John Muir Trail. This is where you can (and should) be descending from on the way back, but continue on straight for now.
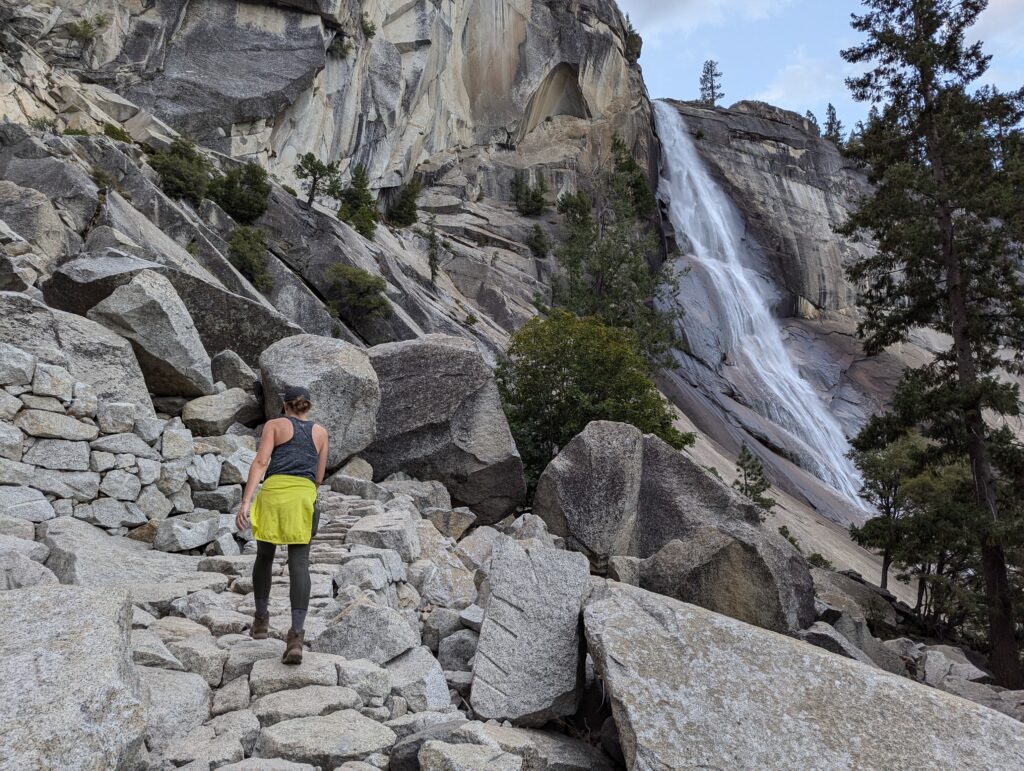
Shortly after the John Muir Trail intersection you’ll arrive at the start of the stairs. This means you’re close to rounding a bend and getting your first view of Vernal Fall. Taking the stairs towards and around Vernal Fall is one of the neatest parts of this hike.
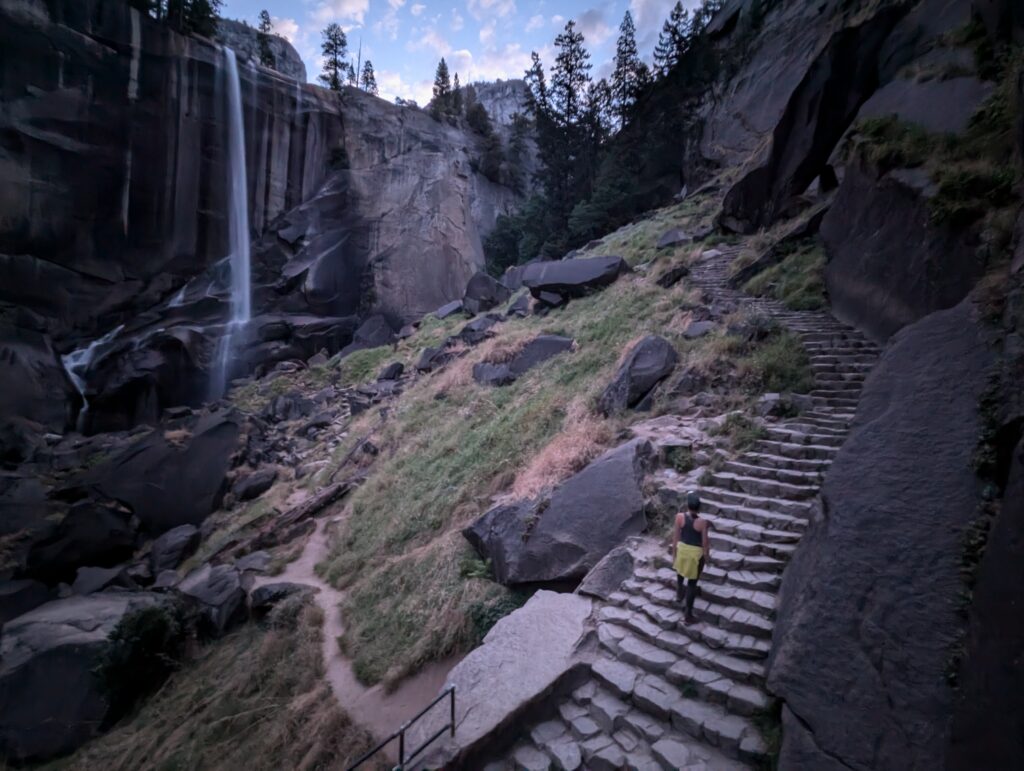
The section of stairs where you can see Vernal Fall will likely have lots of people if you don’t get there early. There are side trails that go closer to the waterfall and some people will simply find a place to sit and enjoy the view. As you continue upward, the stairs get quite steep and harder. After 1.5 miles from the trailhead you’ll reach the top of the first waterfall!
Please take caution at the top of Vernal Fall – there are guardrails and signs to remind you that deaths happen here. Many people head back for an easy 3-mile RT hike but you’ll want to keep going.
Vernal Fall to Half Dome Trail
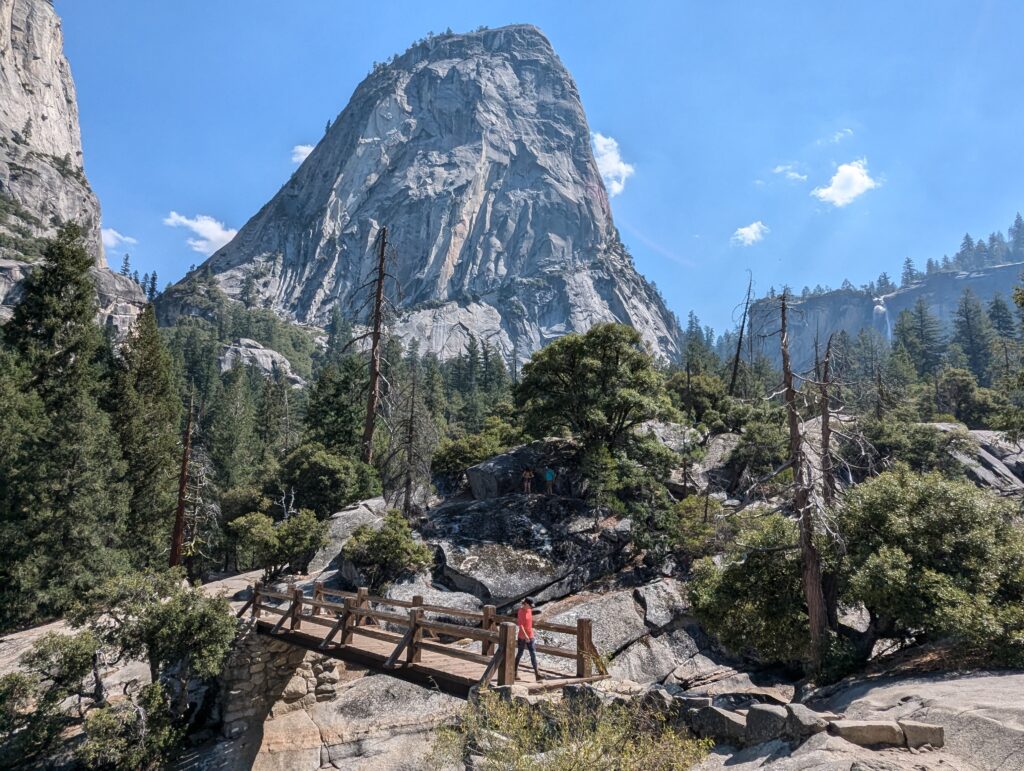
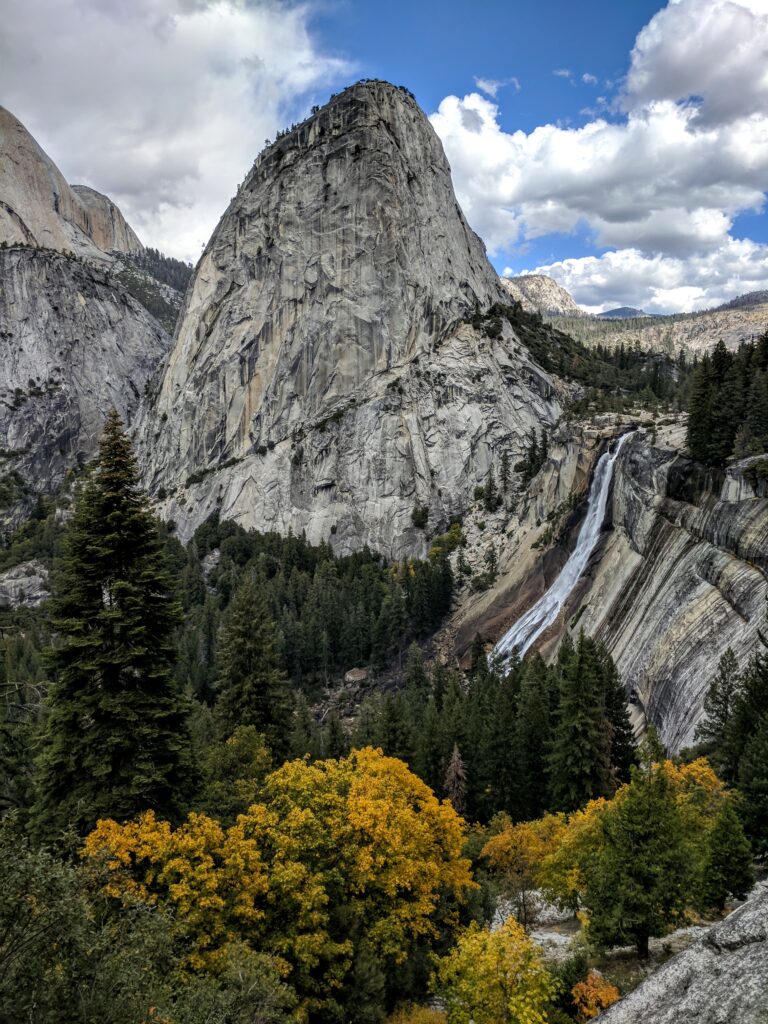
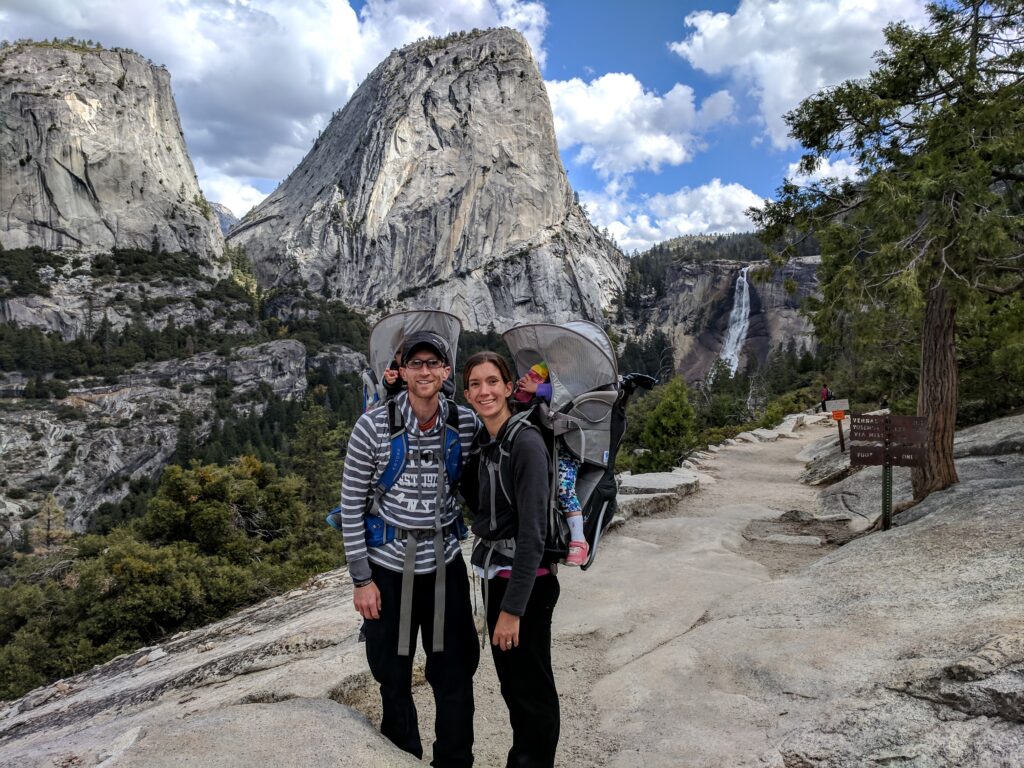
Stay on the Mist Trail and follow signs for Nevada Fall. Make sure to pause and take in the view of the foot bridge shortly after Vernal Fall with Liberty Cap looming large behind it.
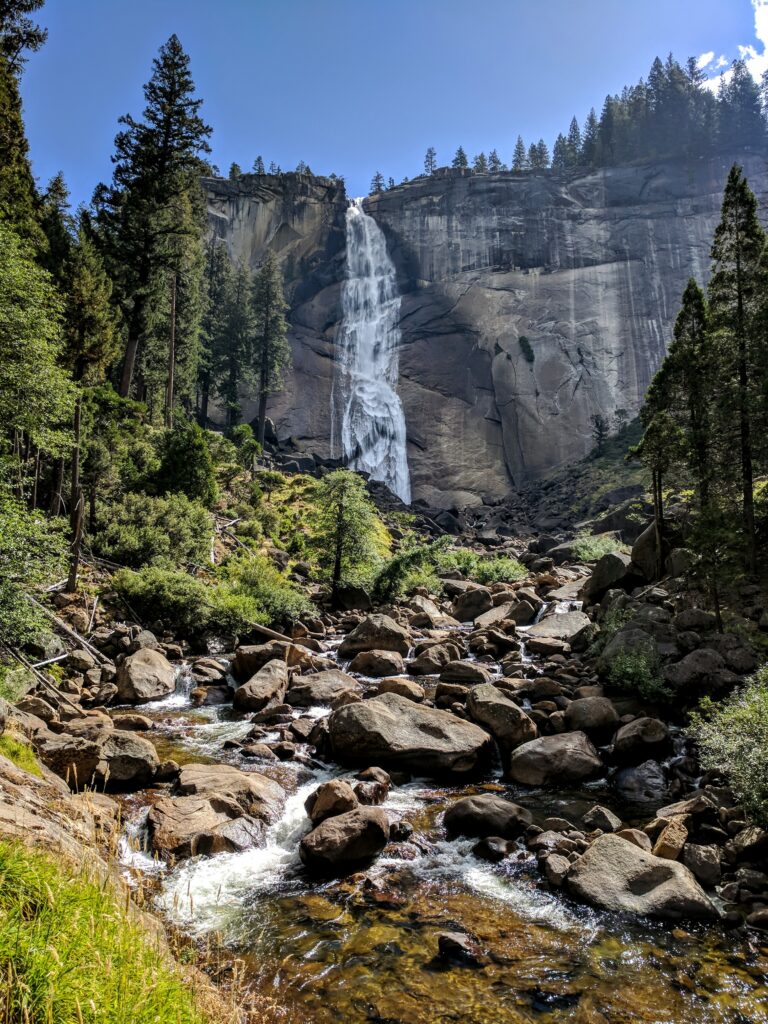
You’ll gain a good bit of elevation between Vernal Fall and Nevada Fall and there are a decent amount of switchbacks. There are some great views of Nevada Fall from straight on and to the side.
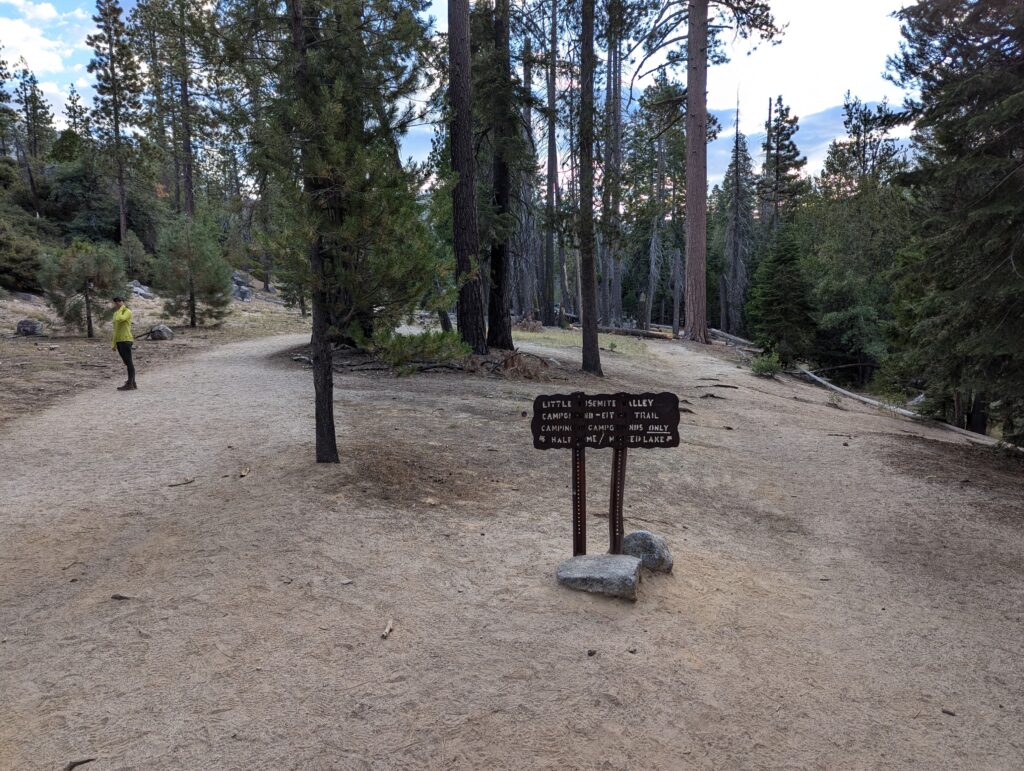
After a rather aggressive incline, and just under a mile from Vernal Fall, the Mist Trail ends at an intersection with the John Muir Trail again. They put the nicest outhouse you’ll come across on the entire hike here, too. Turn left on the John Muir Trail and head towards the Little Yosemite Campground.
This is the easy stretch of the hike as it’s mostly flat and you’ll be in the shade at times. There will be a trail split, just over 0.5 miles from where the Mist Trail ended, where going to the right will keep you along the river and go to the campground. If you don’t have to filter water near the river (there is no drinkable water) or use the composting toilets, stay to the left for the most direct route.
About 1.25 miles from the end of the Mist Trail, you’ll likely see a sign about Half Dome before entering some trees and heading up an incline again. There was a reminder about needing a permit and the dangers of the hike when we were there, but it was a hand-written sign.
This stretch isn’t too bad but is consistently uphill. Another 1.25 miles from that first Half Dome sign, 2.5 miles total from the end of the Mist Trail, and your time on the John Muir Trail will end (for the time being). Turn left on the Half Dome Trail.
The Half Dome Trail to Subdome
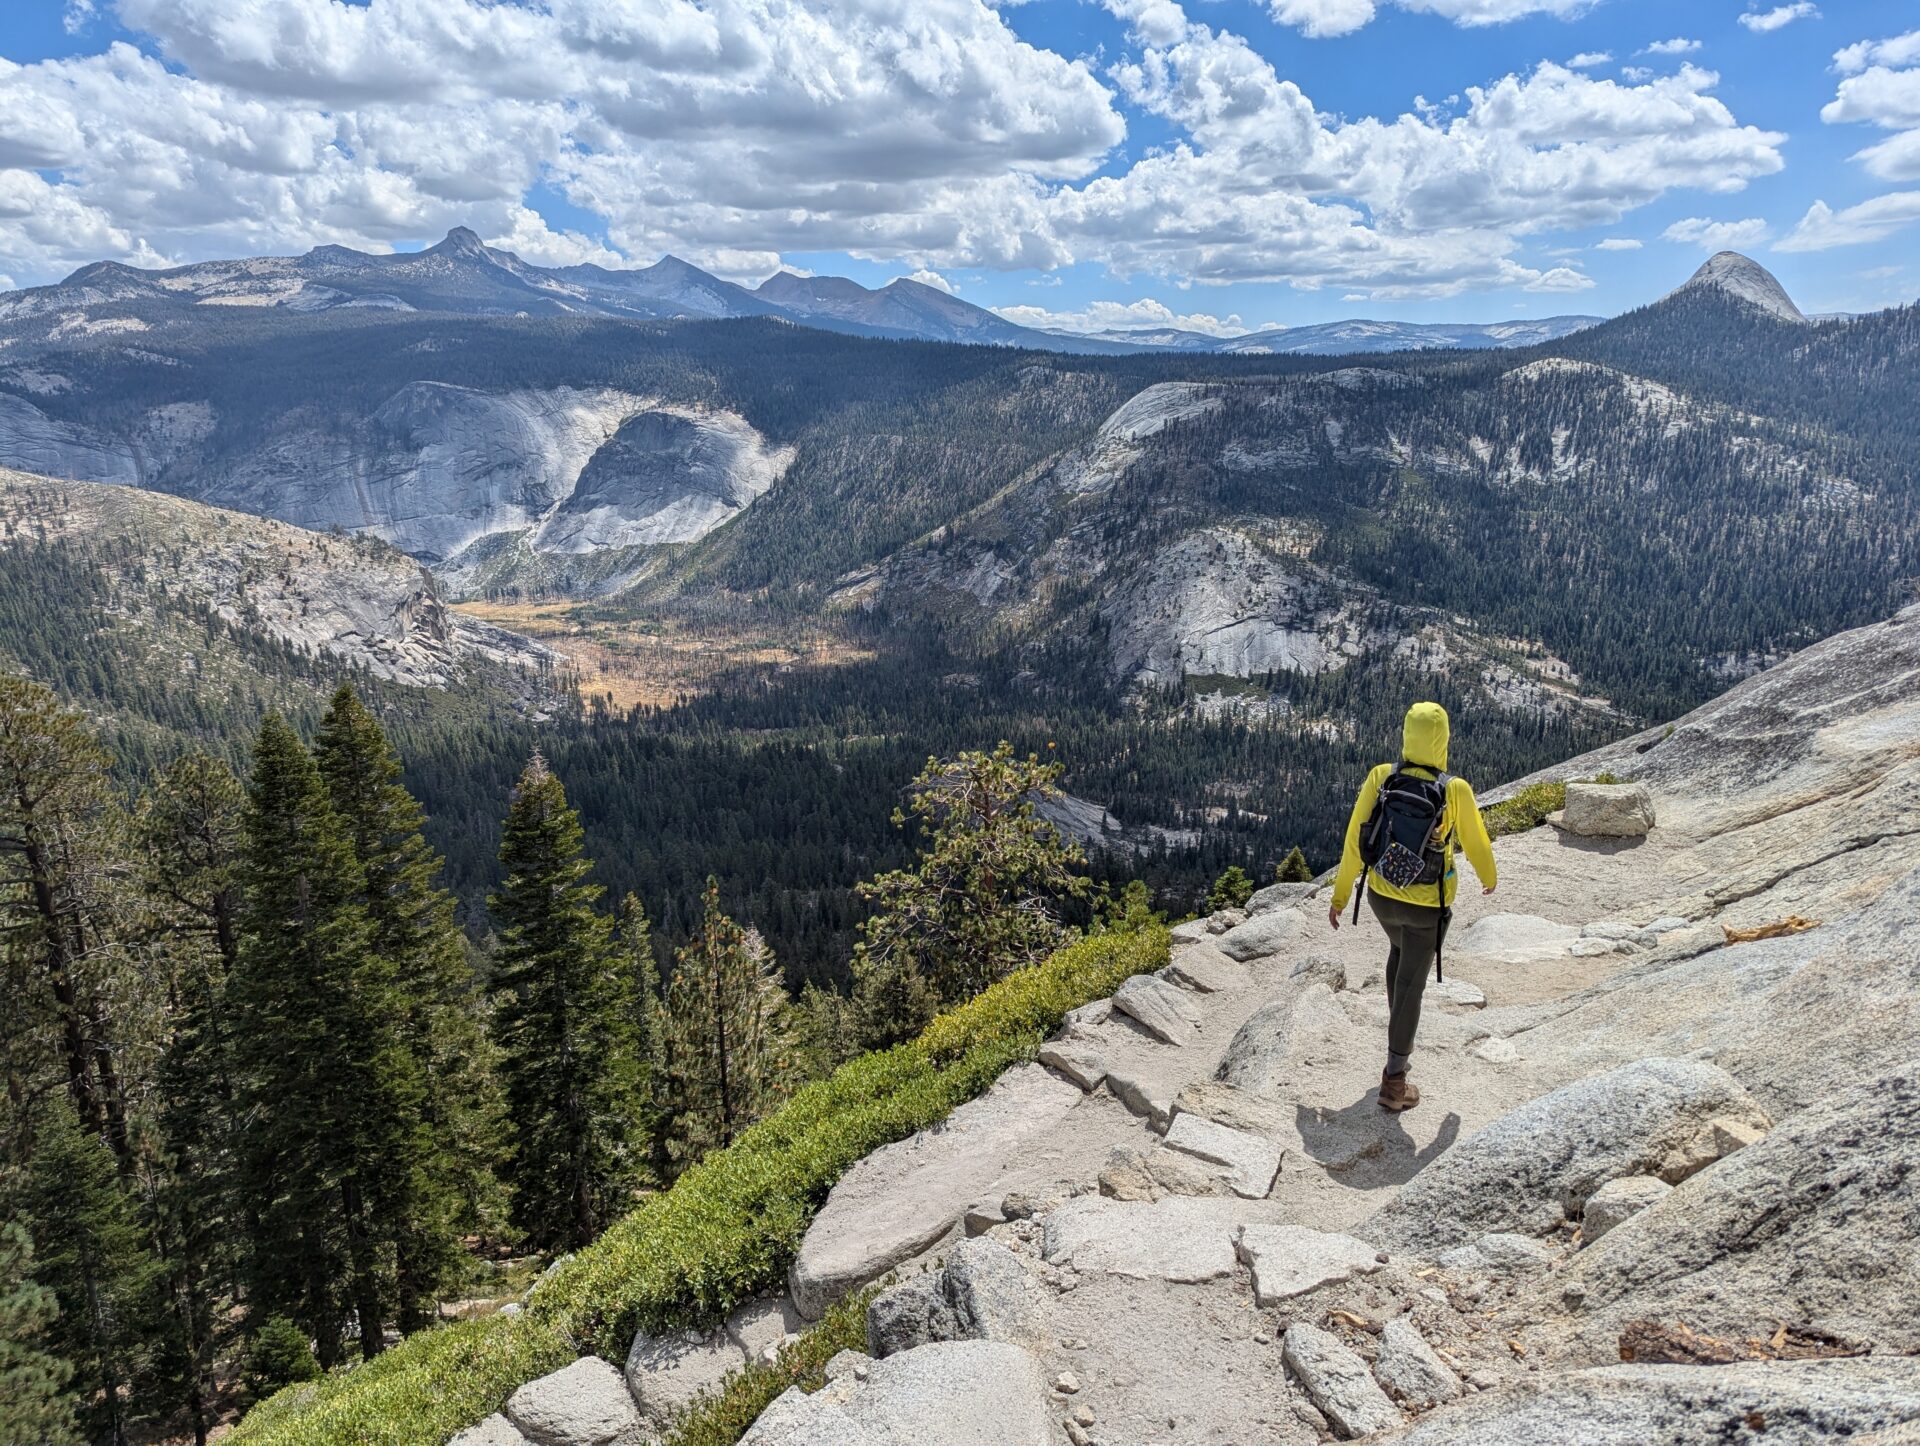
The stretch from the start of the Half Dome Trail to the bottom of Subdome is 1.5 miles. It is mostly uphill and you’ll get a few glimpses of Half Dome along with some valley views to make it interesting at times. Otherwise, there’s not a whole lot to this mostly-forested section but there are some neat glimpses of the final destination.
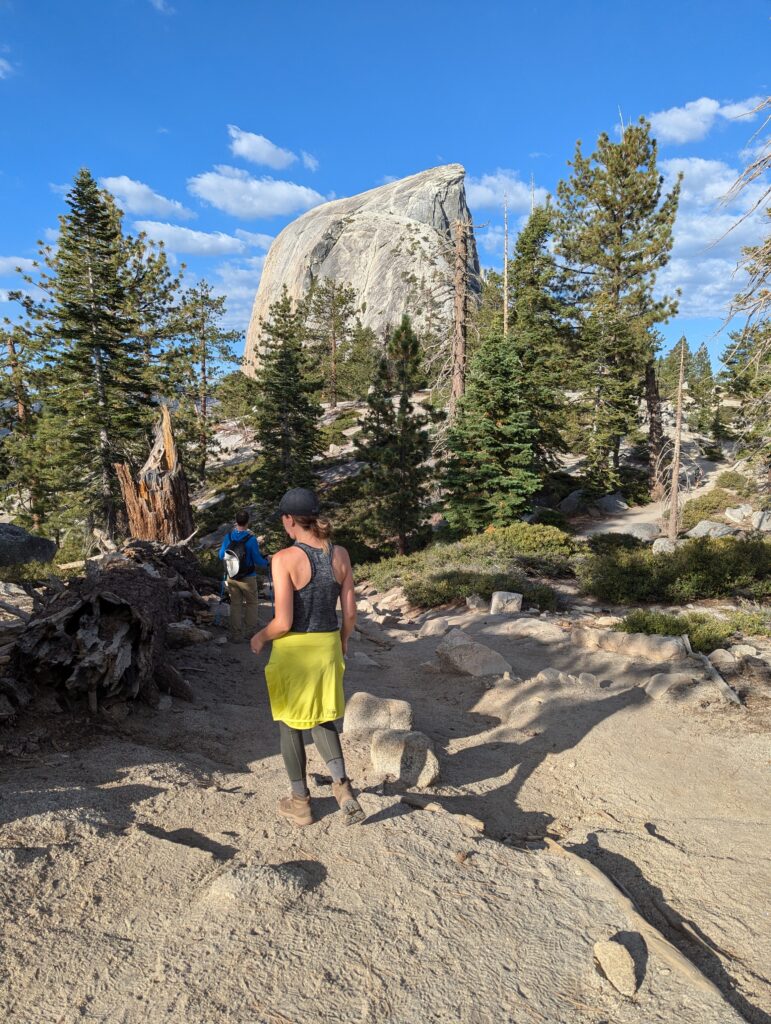
Subdome
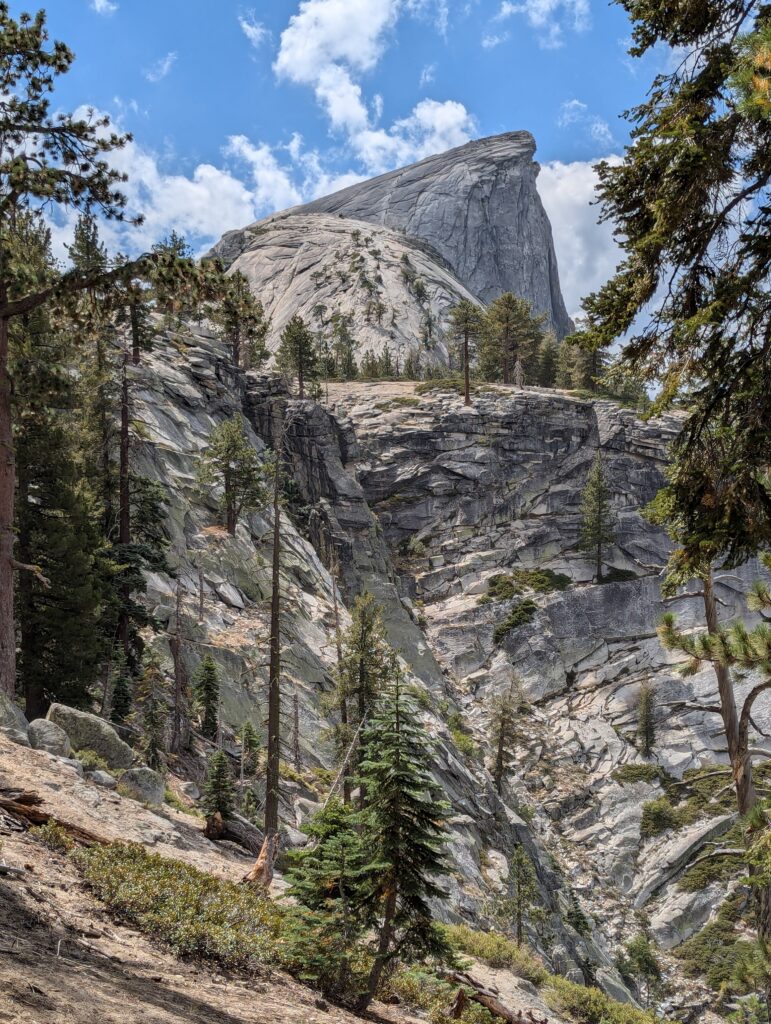
Some people will say that getting up Subdome is harder than getting up Half Dome. While I don’t necessarily agree, I understand where they’re coming from. There are cables on Half Dome and there aren’t on Subdome. And you’ll gain around 500 feet of elevation in a little over 0.25 miles with some “don’t slip or it’s over” spots. After the switchbacks to start, you’ll head up a steep, smooth section. Here you basically pick whatever part looks easiest to you and may want to consider using 3 points of contact with the ground. While you’ll see it all on your way down, make sure to turn around from time to time and admire the views.
After a tough feat getting up Subdome, you’ll flatten out with nothing but the cable section left. Take a quick break and mentally prepare for one of the best hiking experiences on earth!
The cables to the summit of Half Dome
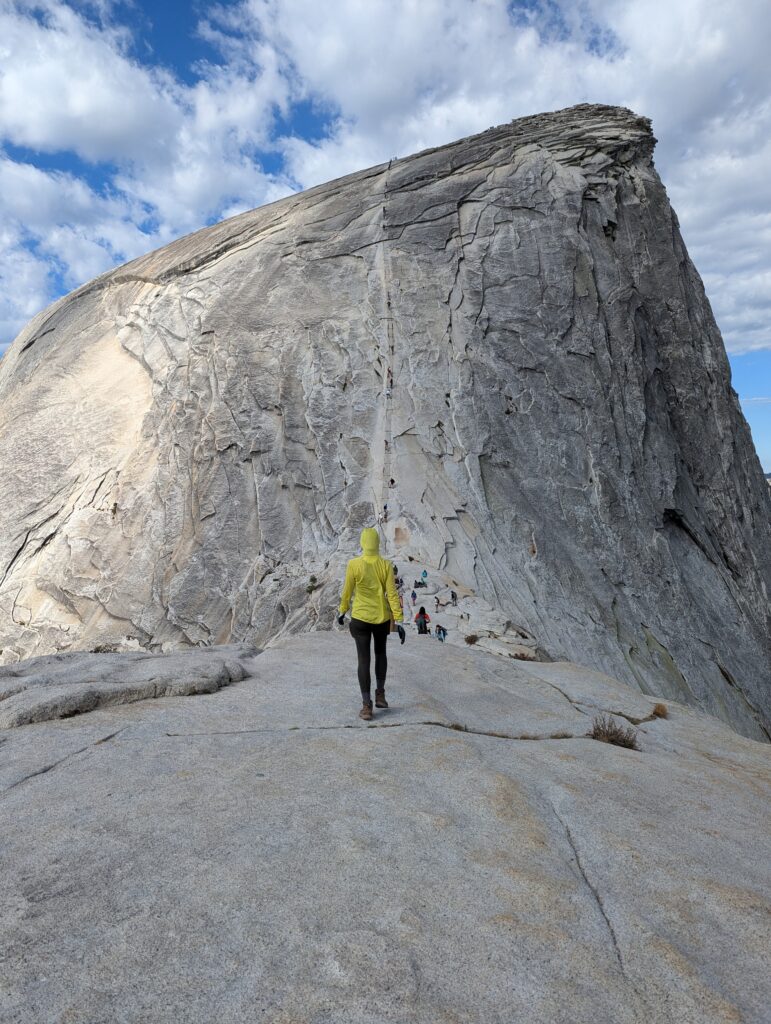
I highly recommend putting gloves on. If you had hiking poles, hopefully you can attach them to your pack securely. You’ll probably see other hikers’ belongings that they don’t want to take all the way up among the rocks, but please take everything with you so nothing gets accidentally left behind.
There isn’t too much of a warmup on the cables as you start heading up the last 400 vertical feet at a 45-degree angle, all in less than 0.25 miles. There may be 2-way traffic and there is not enough width for 2 people between the cables. Communicate, be patient, and make your way up plank-by-plank. We used both hands the whole time on the same cable, as opposed to one hand on the left cable and the other on the right. The granite can be somewhat slick even in perfect weather, as it’s been worn down by hundreds of hikers every day, so be careful.
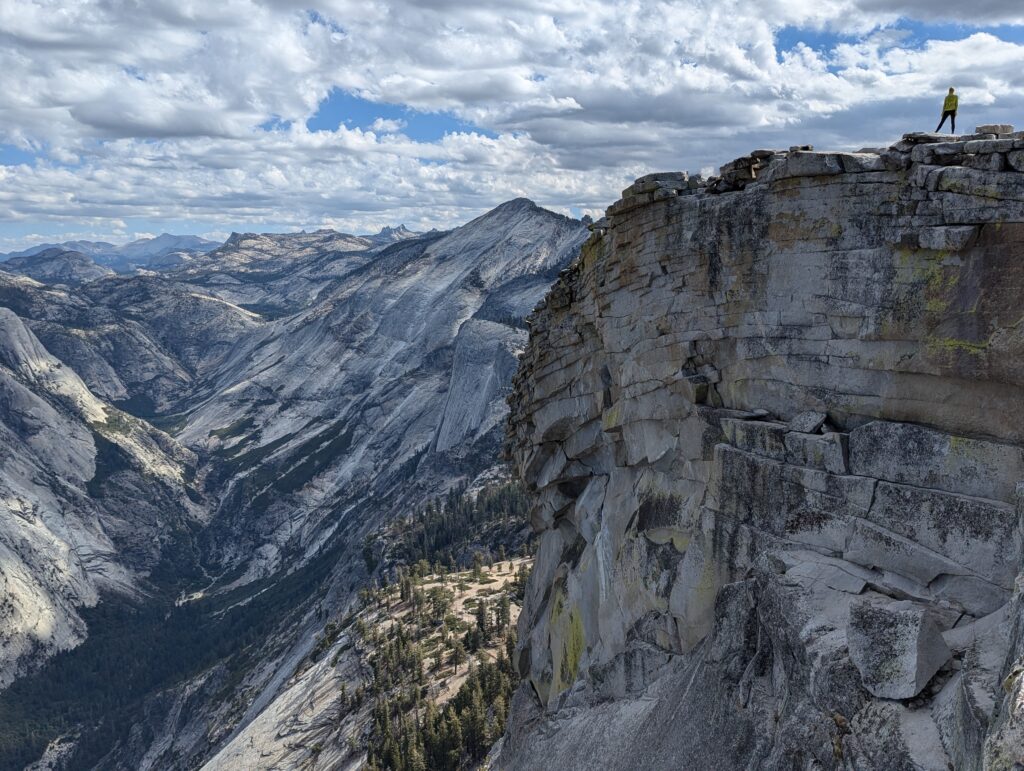
Once you reach the top of the cables, head up and to your right a bit for the very top. You can see all the way down to the valley and you can even pick out Glacier Point. Have a seat and snack, and revel in your accomplishment!
The return
I thought going up the cables was the most nerve-wracking part but my wife thought going down was. There were people descending on the outside of the cables, which I thought was a bit much but it worked out for them. Hopefully you don’t have anyone traildozing on the way up or down, but again be patient and communicate when passing others. Retrace your steps all the way back to the intersection with the Mist Trail (the spot with the great outhouse). You can take the shorter, steeper way back past Vernal Fall, but going over Nevada Fall and coming back via the John Muir Trail is worth the extra steps. It’s easier on your knees, too.
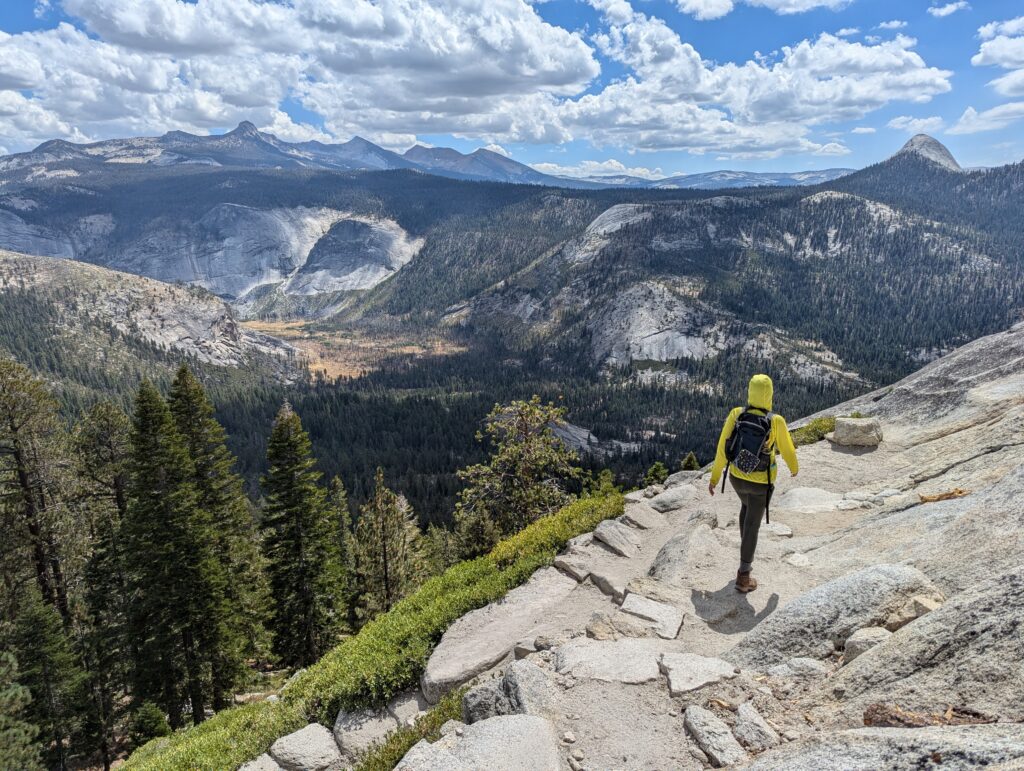
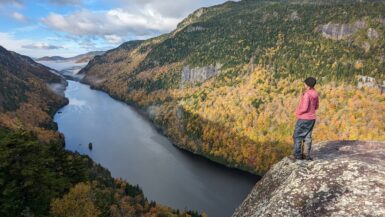
Shortly after the outhouse and intersection with the top of the Mist Trail, you’ll cross over the water at the top of Nevada Fall. It’s pretty straightforward after crossing Nevada Fall. The John Muir Trail goes for about 2 miles back down to the Mist Trail. You may develop a kink in your neck from constantly looking right while admiring arguably the most stunning view on this trail: Liberty Cap towering over Nevada Fall. The view below is after you cross over Nevada Fall – you can’t miss it.
There is an intersection at Clark Point for another trail that will also take you back to the Mist Trail. It’s not too much further in terms of mileage, but will add elevation. You’ll want to take a left to stay on the Muir Trail.
After the scenery so far on the hike, the last stretch back to the trailhead is pretty nondescript. Plus, you’ve already hiked part of it. Don’t miss the left turn when you get back to the Mist Trail. That will take you all the way back down to the trailhead.
That’s it! Have you ever done Half Dome, or have any questions? Leave a comment below!

Leave a reply