
The most important thing on this page: please follow the 7 principles of Leave No Trace whenever hiking (and all the time, actually – most are pretty good general life tips, too):
- Plan ahead and prepare
- Travel and camp on durable surfaces
- Dispose of waste properly
- Leave what you find
- Minimize campfire impacts
- Respect wildlife
- Be considerate of other visitors
Now, on to Angel’s Landing. Here are the quick facts:
- Where: Zion National Park near Springdale, Utah
- More specifically, where: Starting along the West Rim Trail at The Grotto shuttle stop.
- Distance and elevation: 5.4 miles (8.7 km) total with 1,500 feet (457 meters) of elevation gain.
- Highest point: 5,790 feet (1,765 meters) on Angel’s Landing.
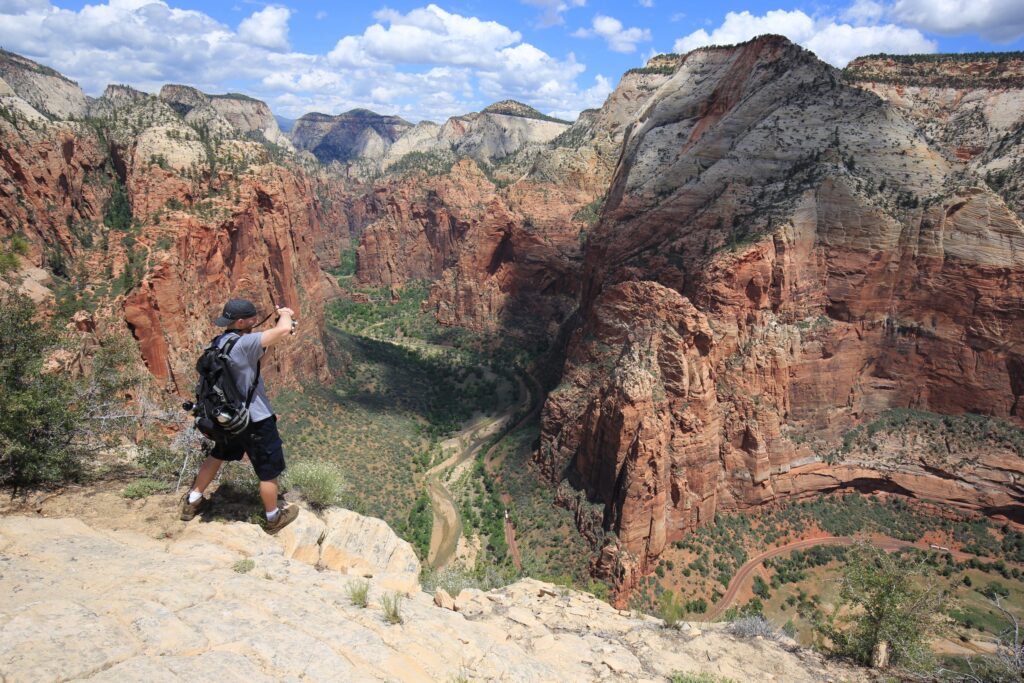
- Why you should hike this trail: one of the most famous hikes in the United States with chains and sheer cliff drop-offs.
- Fee or permit? Both – National Park entrance fee plus seasonal and day-before lotteries. More below.
- Best time of year: Shoulder seasons of spring (April – May) and fall (September – October). Ultimately, the best time is whenever you can get a permit!
- Closest commercial airport: Las Vegas, Nevada (LAS) is about 3 hours from the visitor center parking lot. St. George, Utah (SGU) is about an hour’s drive but has far fewer flight options.

Tips to remember for the Angel’s Landing hike
- Get there as early as possible. You’ll get a free parking spot at the visitor center and miss some of the crowds on the cables.
- Make sure you have your permit printed out or downloaded for offline access.
- The planning is more difficult than the hike itself.
- Angel’s Landing is the name of the final destination. It’s also the trail name of the last 0.5 miles of the hike only. You’ll be on the West Rim Trail for most of the way.
- Deaths happen on this trail, unfortunately. Always be mindful of what you’re doing during the entire Angel’s Landing portion of the hike.
- It can be very windy at the top so make sure all your belongings are secured.
- Gloves aren’t necessary but aren’t a bad idea for the cables.
- Make sure you have hiking shoes or boots with excellent grip. If you get a new pair for this one, break them in well.
- There can be snow and ice on the trail during winter so crampons may be helpful.
- Get a cell phone harness that you can clip to your clothes or gear.
- Bring your patience. You’re likely going to have 2-way traffic on narrow sections with steep drop-offs. Be safe and considerate, please.
- If you don’t get a permit, the trail to Scout Lookout is still worth doing. You can also continue on the West Rim Trail past Angel’s Landing for some additional great views. More on this near the bottom.
- Stay in Springdale to make getting there easy and enjoy a post-hike meal and drink at Zion Pizza and Noodle.
Getting a permit for Angel’s Landing
A permit is always needed to hike Angel’s Landing. Every day of the year and every hour of the day. Even if you go up the trail before rangers are posted at the start, you can get caught on the way back down and have a hefty fine.
As of this writing there are 4 seasonal lotteries plus day-before lotteries. Every day has multiple time slots, too, and you won’t be able to access the Angel’s Landing trail outside your designated window. Verify information and apply for a permit here – scroll down to find the exact lottery for your dates. If you don’t see the day-before lottery, it is closed and the next one will open at midnight local time.
Getting to the trailhead
This can be challenging and time-consuming. The trailhead is at a stop along Zion Canyon Scenic Drive called The Grotto. There are multiple ways to get there:
By shuttle
This is the most common option. Free shuttles run from the visitor center up the canyon and back. Sounds simple, right?
Well, shuttles only run from early March until late November, plus the week around the Christmas and New Year’s holidays. When the shuttle is running, you cannot drive a private vehicle on Zion Canyon Scenic Drive. Check the shuttle season dates here.
If you’re in that window when the shuttles are running, then comes the hardest part: finding a place to park. The visitor center is the best spot as it’s the closest and free, but fills up even before 7 am regularly. The earliest shuttle into the canyon at any time during the year doesn’t run until 7 am (as of this writing; make sure to check the shuttle season dates and times). So, all those people who filled up the lot are waiting for the same shuttle. Then add all the people who parked in Springdale and you could be waiting a very long time.
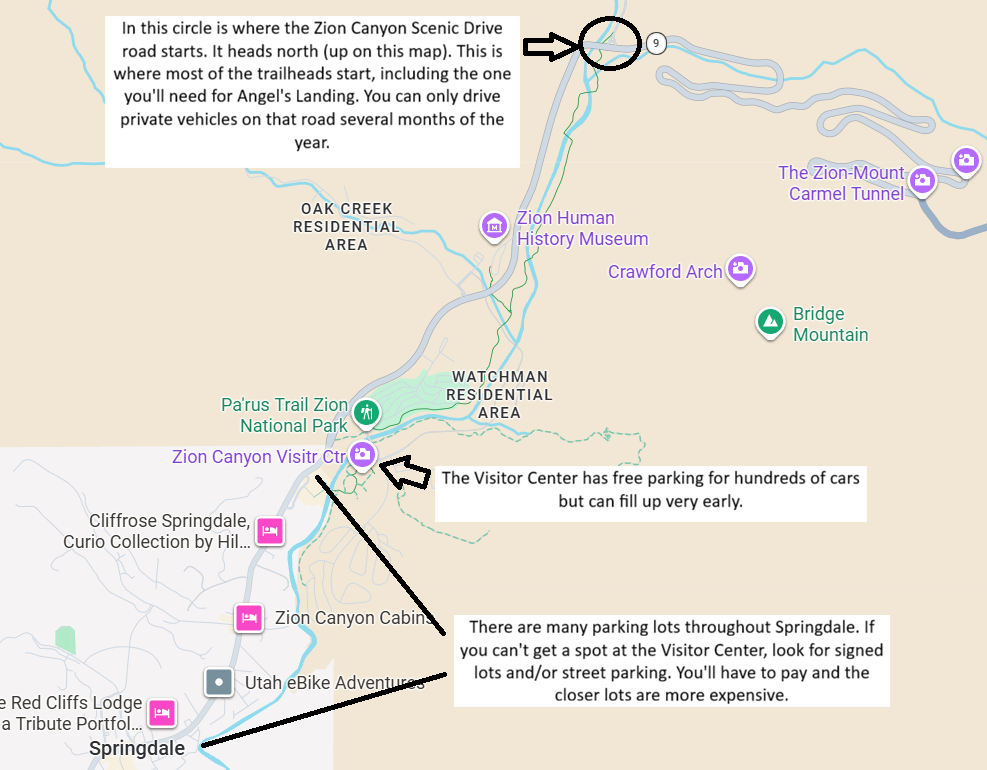
Staying in Springdale and/or getting to the park as early as possible are absolute musts. Here’s a very realistic scenario after arriving to Springdale:
- Wait in traffic to get near the visitor center, only to learn that it’s full.
- Backtrack to Springdale and look for an open spot in a paid lot.
- Walk (could be more than a mile) or take the free Springdale shuttle (might be waiting in the same traffic as everyone else to get close to the visitor center).
- Wait to get on the shuttle (could be more than an hour).
- Ride about 25 minutes to The Grotto stop.
So you could arrive at the visitor center but still be hours away from actually starting your hike. On our most recent visit in April 2026, the visitor center was full by 7:30 am. We had to pay to park and wait at the visitor center for an hour for the shuttle. Not ideal at all. Read up on Springdale parking options and shuttle information here in case the visitor center is full.
On the plus side, the shuttle system is very efficiently managed and they run in quick succession.
By bike
You can ride a pedal bike or an e-bike on the Zion Canyon Scenic Drive year-round. This is a popular option because you can go on your own schedule, but renting them can be costly.
By car
As mentioned, you can only drive your own vehicle on the Zion Canyon Scenic Drive when the shuttles are not running. That would be late November through early March, with the exception of the holiday week when shuttles are back up and running. However, they can and do close the road when there is no parking available throughout the canyon.
If the road is open, try to find a spot as close to The Grotto as possible. The Zion National Park Lodge is the closest place with a decent amount of spots but it’s about 0.75 miles away from the trailhead. If the road is not open, you’ll have to rent a bike, wait for the road to open, or walk a very long way (not really a viable option).
Trailhead to Scout Lookout
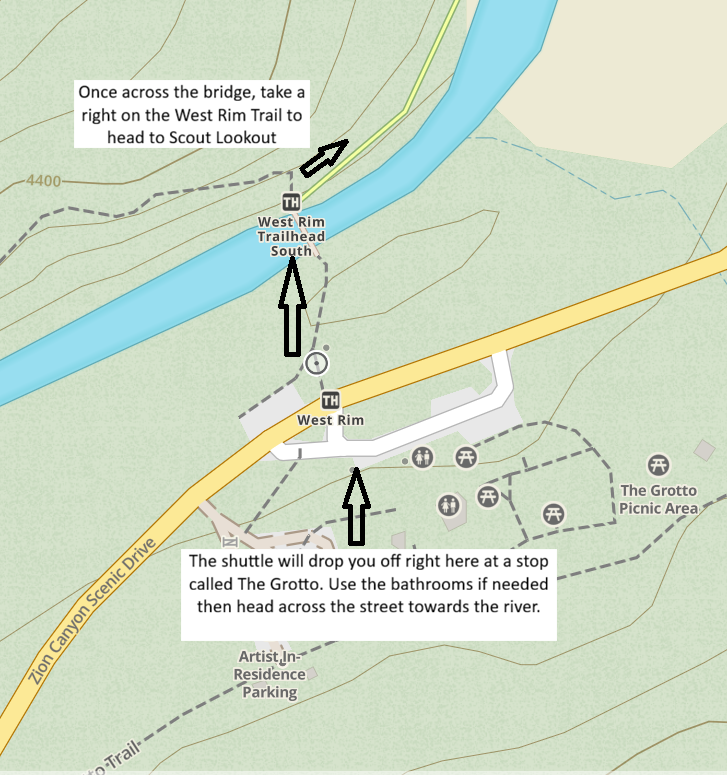
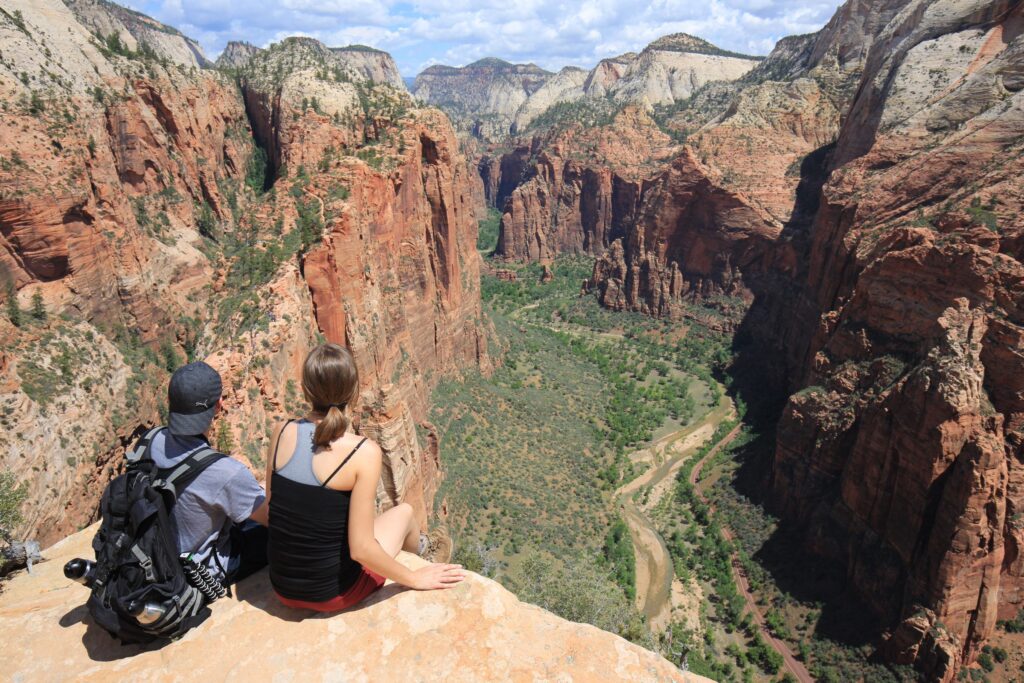
You made it to the trailhead – congratulations! Head across the road from the shuttle stop, cross the footbridge over the Virgin River, and take a right to follow signs for the West Rim Trail. The first stretch is fairly tame as the paved trail follows the river. There are several points to access the water and you can get a great view of Angel’s Landing. I think that’s best saved for the return, as you could let your feet cool off in the river and marvel at where you just were.
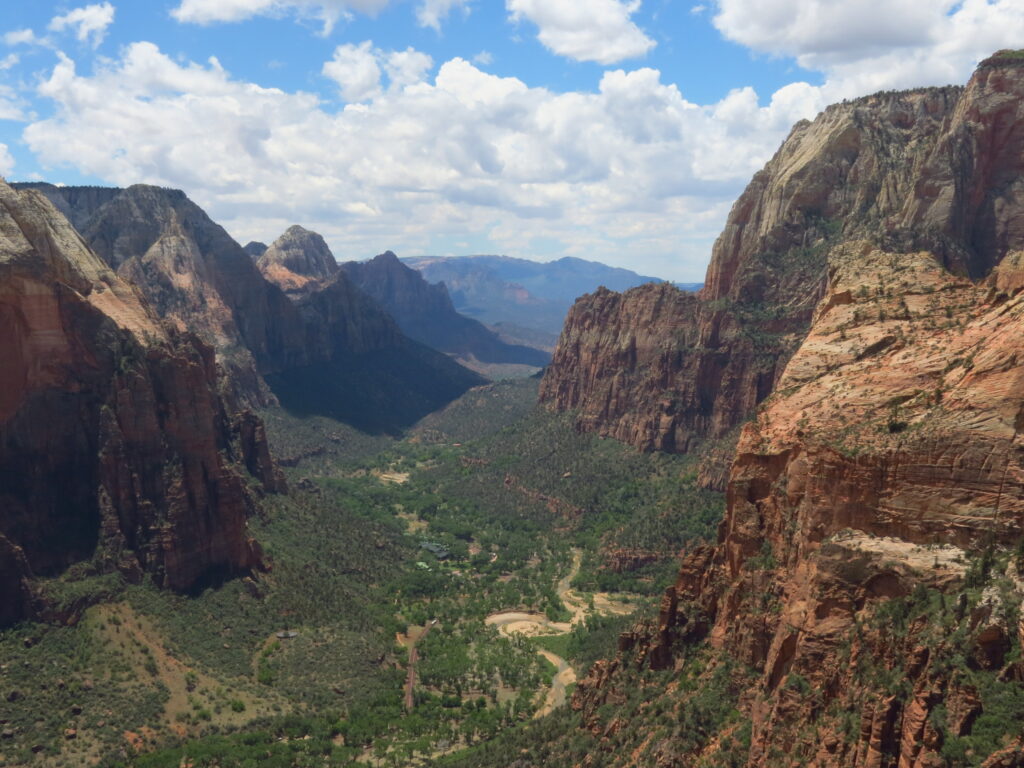
Eventually the elevation gain starts creeping in and then the winding switchbacks start. The views looking down the canyon as you ascend are phenomenal. Just over 1 mile from the start is a sharp bend in the trail to the left that takes you away from the canyon. This spot is my favorite view on the trail and I always stop there and gaze for a bit.
The trail goes straight for a good stretch and you may feel a noticeable difference in the temperature as you pass through Refrigerator Canyon. Eventually you’ll come to the start of Walter’s Wiggles, which are 21 switchbacks that go up 250 feet in quick succession.

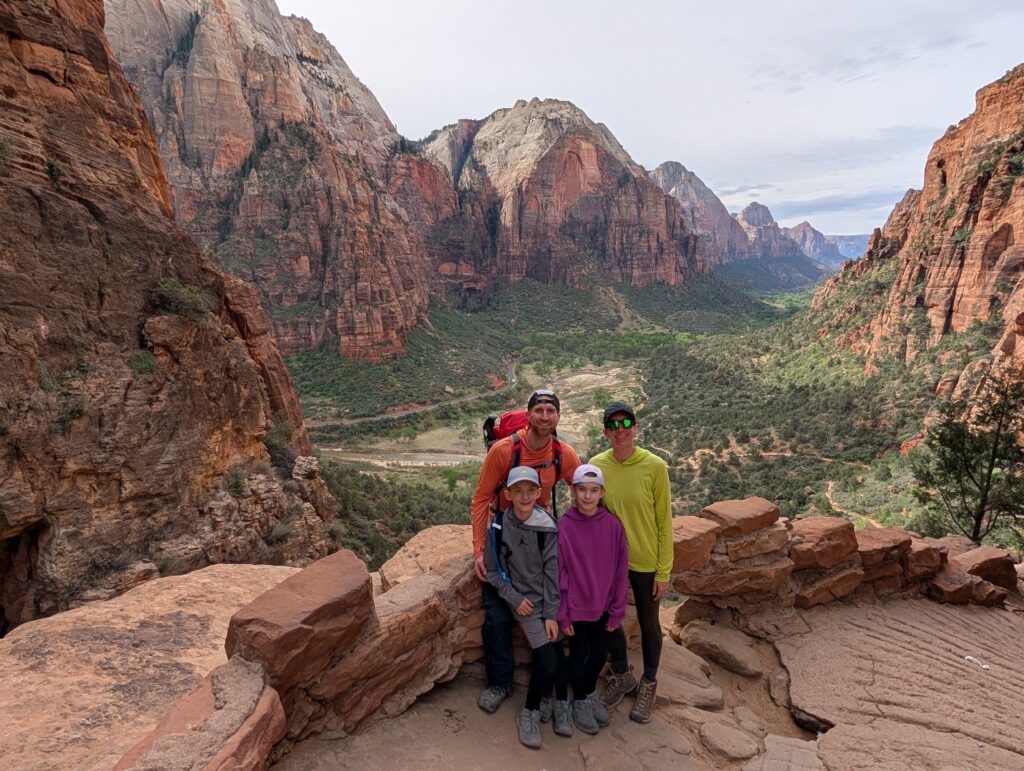
Steps from the top of the wiggles is Scout Lookout!
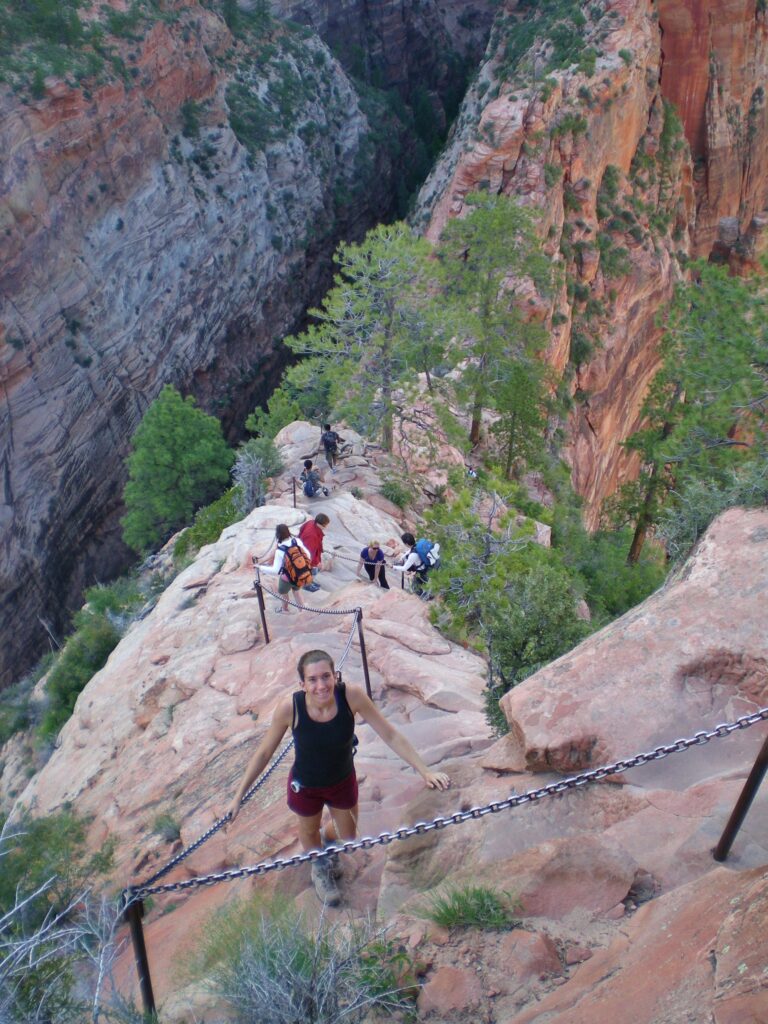
Scout Lookout to Angel’s Landing
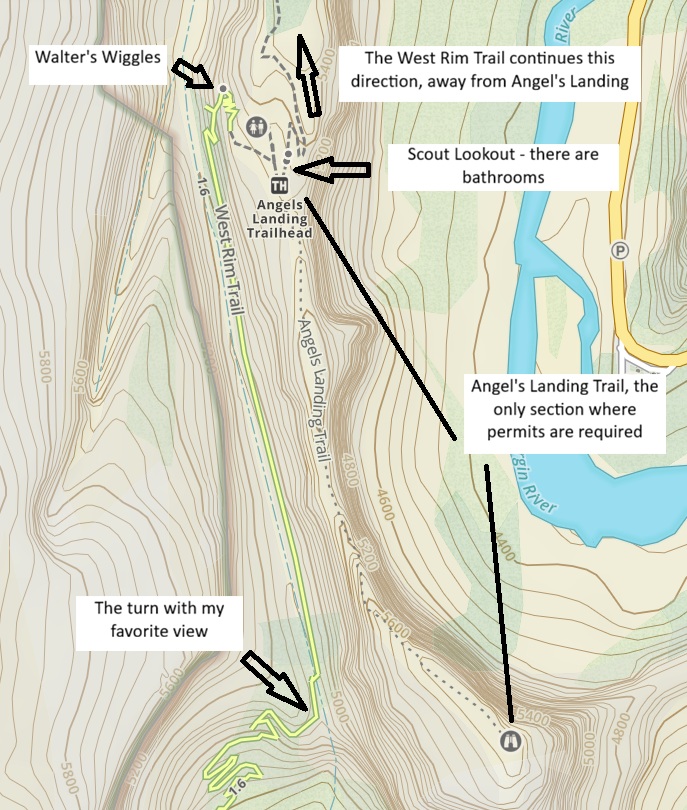
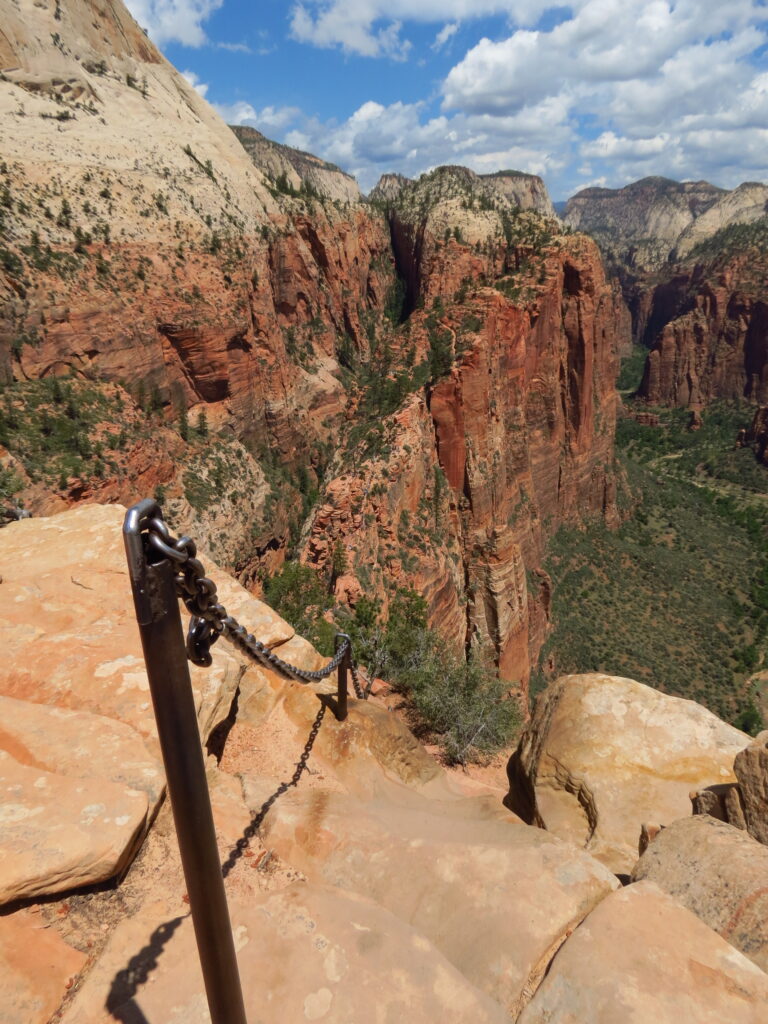
This is a good spot to take a drink, eat a snack, and use the bathroom before the last 0.5 miles up to Angel’s Landing. There will likely be rangers checking permits at the start of the chain section. The first part is pretty tame as you descend along the side of the rock first.
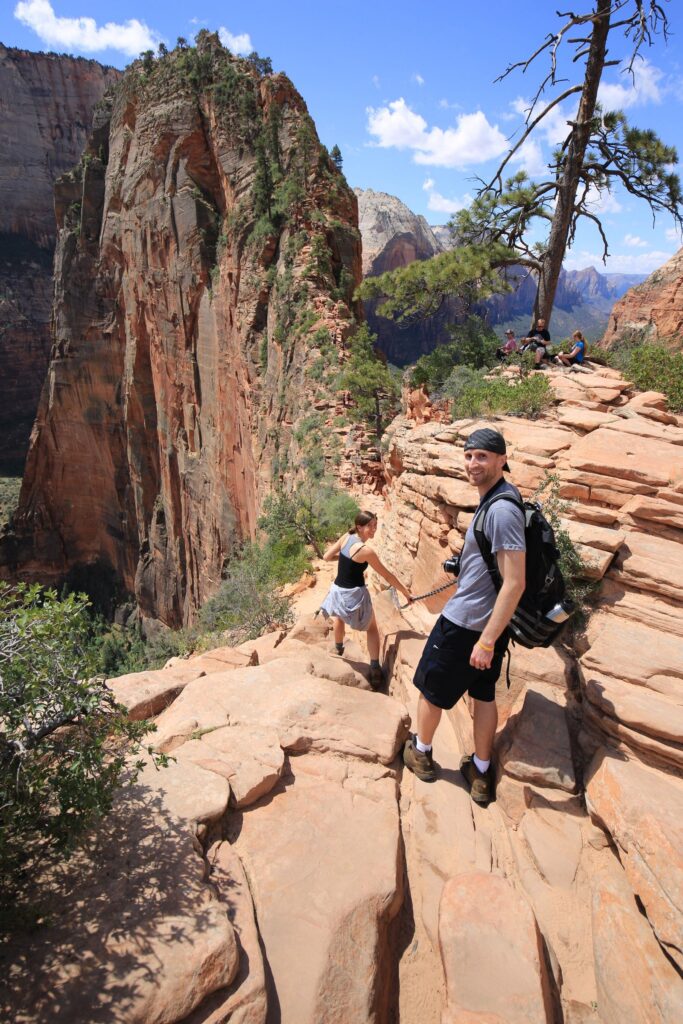
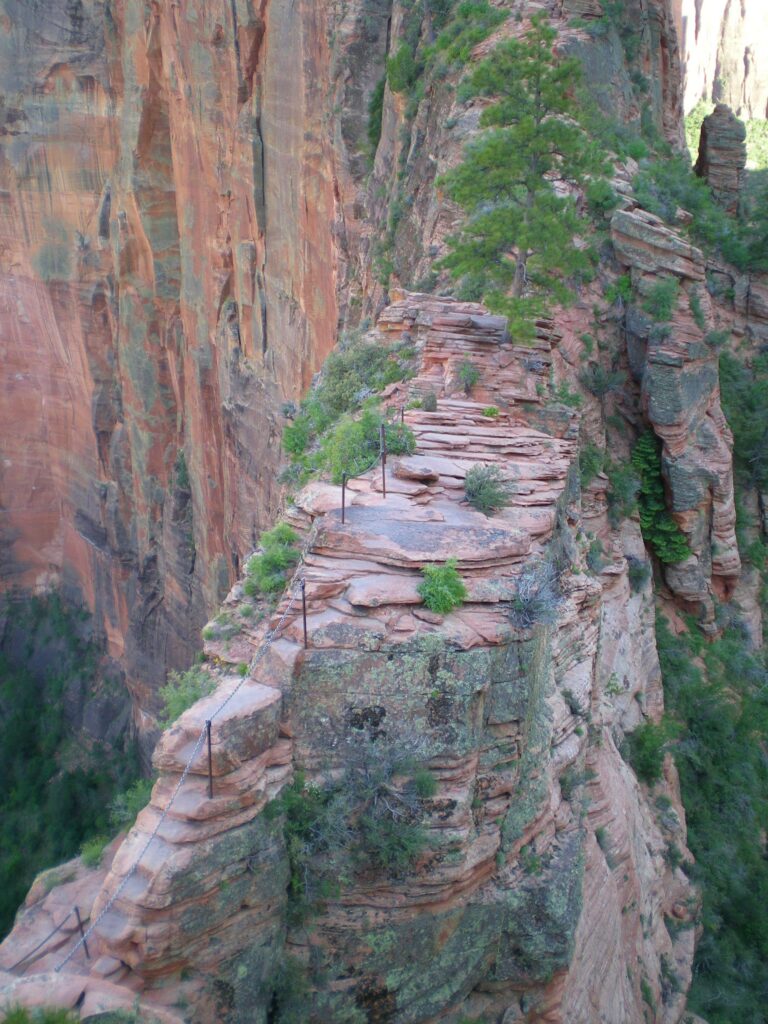
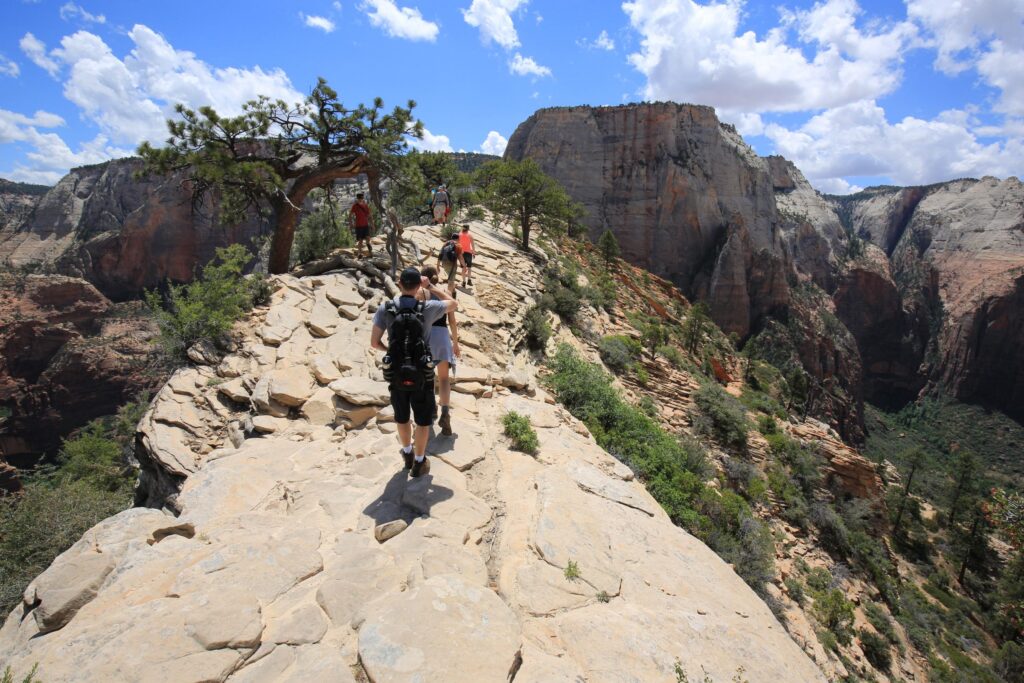
The last stretch is along and up a ridge with steep terrain and sheer drop-offs. I was actually too scared the first time I attempted this hike and didn’t make it the whole way.
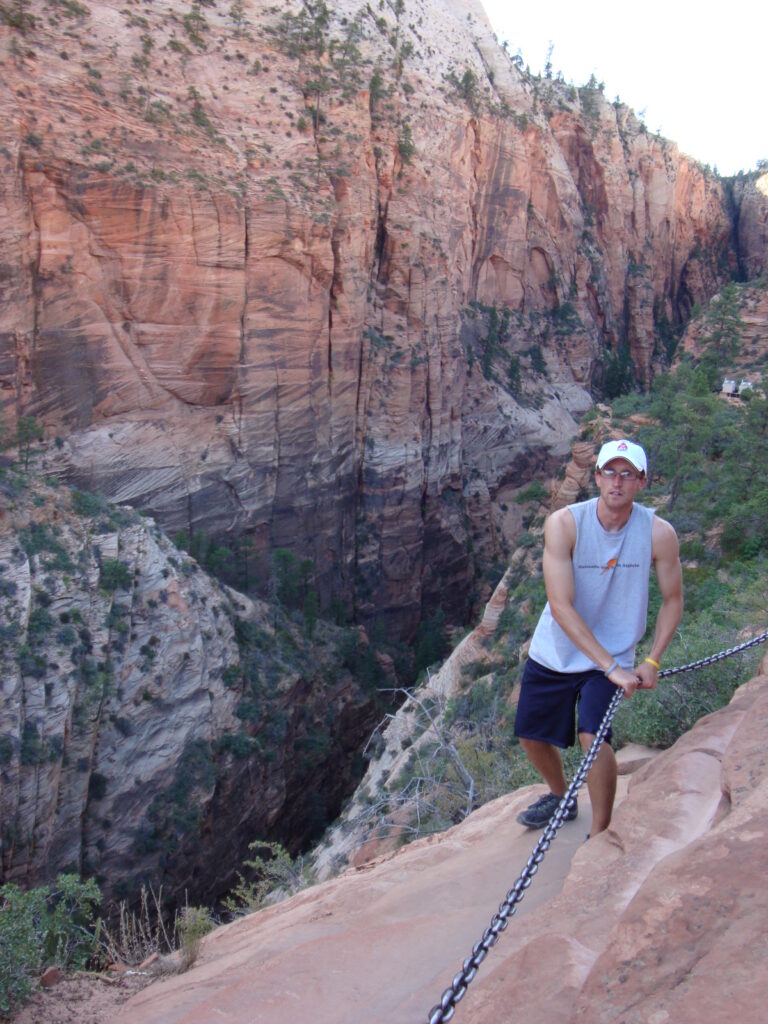
There is one section where you have several steps up, and the trail is only a couple of feet wide. If you can get past that, then everything else should be smooth. Be mindful of every step and enjoy the views on the way up. There isn’t too much to detail here as it’s up, up, up to the top.

That’s it! Retrace your steps back the way you came. You won’t really have a choice, but note that it can be scarier coming back down than it is going up. You’re looking down at deadly drops most of the way. If you’re having trouble with that, keep your eyes down at the path immediately in front of you and focus on where your next step is.
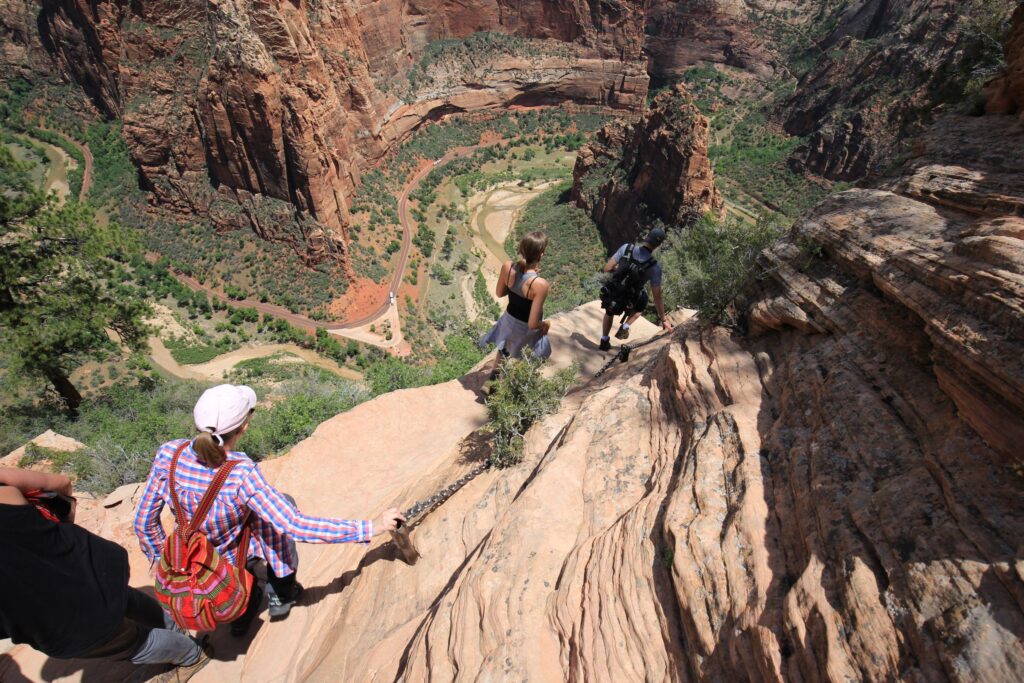
Take a break when you get back to Scout Lookout and look back at what you’ve conquered! Last but not least, make sure you end the day with a beer and some carbs at Zion Pizza and Noodle in Springdale.
My honest thoughts
Zion National Park holds a special place in my heart. It’s the first spot my wife and I ever went hiking, back in 2009. I was too scared to do Angel’s Landing then but thankfully have done it multiple times since. We have not hiked it since permits were instituted, however, and our most recent visit in April 2026 changed my feelings about it. Not in a positive way, unfortunately.
There were so many other people at every step along the trail, which isn’t my favorite kind of hiking. Plus, Angel’s Landing is not the most demanding hike at less than 6 miles total and under 1,600 feet of elevation gain. The chains and sheer drop-offs look great on social media, so it attracts all kinds of people that want to do it for the clout. I think my heart broke a little when some were fixing their makeup before heading up the chains.
It’s not the same as it was 10+ years ago, but Angel’s Landing earns the right to be one of the world’s most renowned hikes. It’s a big reason why we fell in love with Zion and I hope to do it with our kids someday.
Didn’t get a permit?
The trail to Scout Lookout is 100% worth it even if you can’t do the Angel’s Landing portion. That’s what we did on our most recent visit as we had a group of 10 that included 5 children. It’s around 4 miles RT with 1,100 feet of elevation gain. You’ll still get the amazing views down the canyon, go up and down Walter’s Wiggles, and get a close-up view of the Angel’s Landing trail and what it takes to get up there.
If you still have time and energy when you get to Scout Lookout, continue on the West Rim Trail and explore that for as long as you’d like. There are several great viewpoints you can find within 15-20 minutes past Scout Lookout.
That’s it! Please leave a comment below if you have any questions or feedback.
Leave a reply