The most important thing on this page: please follow the 7 principles of Leave No Trace whenever hiking (and all the time, actually – most are pretty good general life tips, too):
- Plan ahead and prepare
- Travel and camp on durable surfaces
- Dispose of waste properly
- Leave what you find
- Minimize campfire impacts
- Respect wildlife
- Be considerate of other visitors
Now, on to Tre Cime di Lavaredo. Here are the quick facts:
- Where: Dolomites, northern Italy
- More specifically, where: the trail starts at Rifugio Auronzo, 40 minutes northeast of Cortina d’Ampezzo
- Distance and elevation: 5.75 miles (9.25 km) with 1,100 feet (335 meters) of elevation gain for the “traditional” Tre Cime loop, but can add or cut mileage
- Highest point: 8,000 feet (2,440 meters)
- Why you should hike this trail: a relatively easy trail that goes around some of the world’s most impressive mountains and rock formations
- Fee or permit? yes – 30 Euros to drive to and park at Rifugio Auronzo (it’s worth it)
- Best time of year: June – October
- Closest commercial airport: Venice, Italy is a 2.5 hour drive
Tips
- Go counter-clockwise
- There are lots of variations and add-ons, so you could spend a lot of extra time exploring
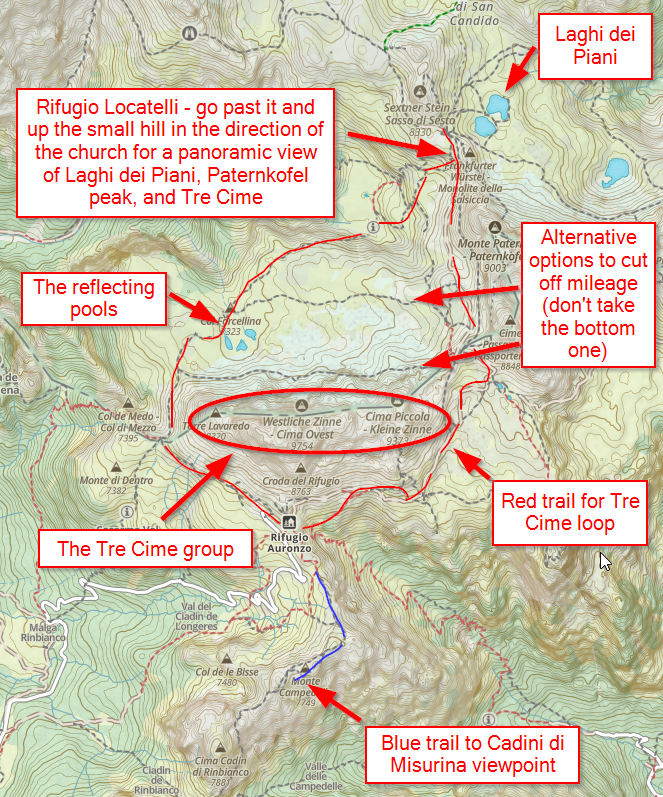
- Make sure to climb the small hill opposite Rifugio Locatelli for amazing views
- If you’re short on time, don’t take the trail right at the foot of Tre Cime – the views are much better further out and there’s another option to cut off mileage without doing the full loop.
- There are lots of “caves” to take the framed picture of Tre Cime. You can easily see the caves when doing the loop.
- Don’t miss the Cadini di Misurina hike, which also starts at Rifugio Auronzo. Hike Guide for that trail here.
- Lago di Misurina and Lago d’Antorno are both on the drive to Rifugio Auronzo, so make sure to at least stop for a minute to take a picture.
Getting there
There are countless places to stay in the Dolomites, so I’ll detail this as coming from Cortina d’Ampezzo, the closest “bigger” town. The road to Rifugio Auronzo (a rifugio is a mountain hut) branches off from Strada Provinciale 49 di Misurina, right by Lago di Misurina. Shortly after turning down the dead-end road, you’ll pass Lago d’Antorno then come to a pay station which will display how many parking places are available. There are hundreds of spots and while quite rare, it can fill up in the middle of the day.
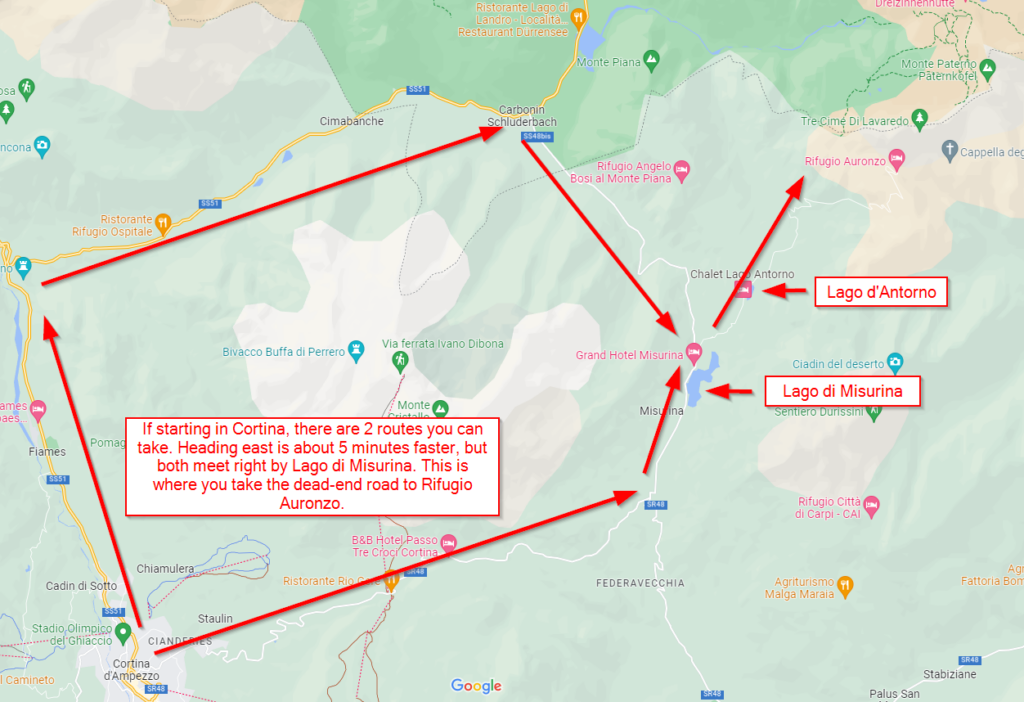
You can start on either side of the rifugio, but heading east (to the right when looking up at Tre Cime) will put you on what I think is the better route.
Rifugio Auronzo to Forcella Lavaredo
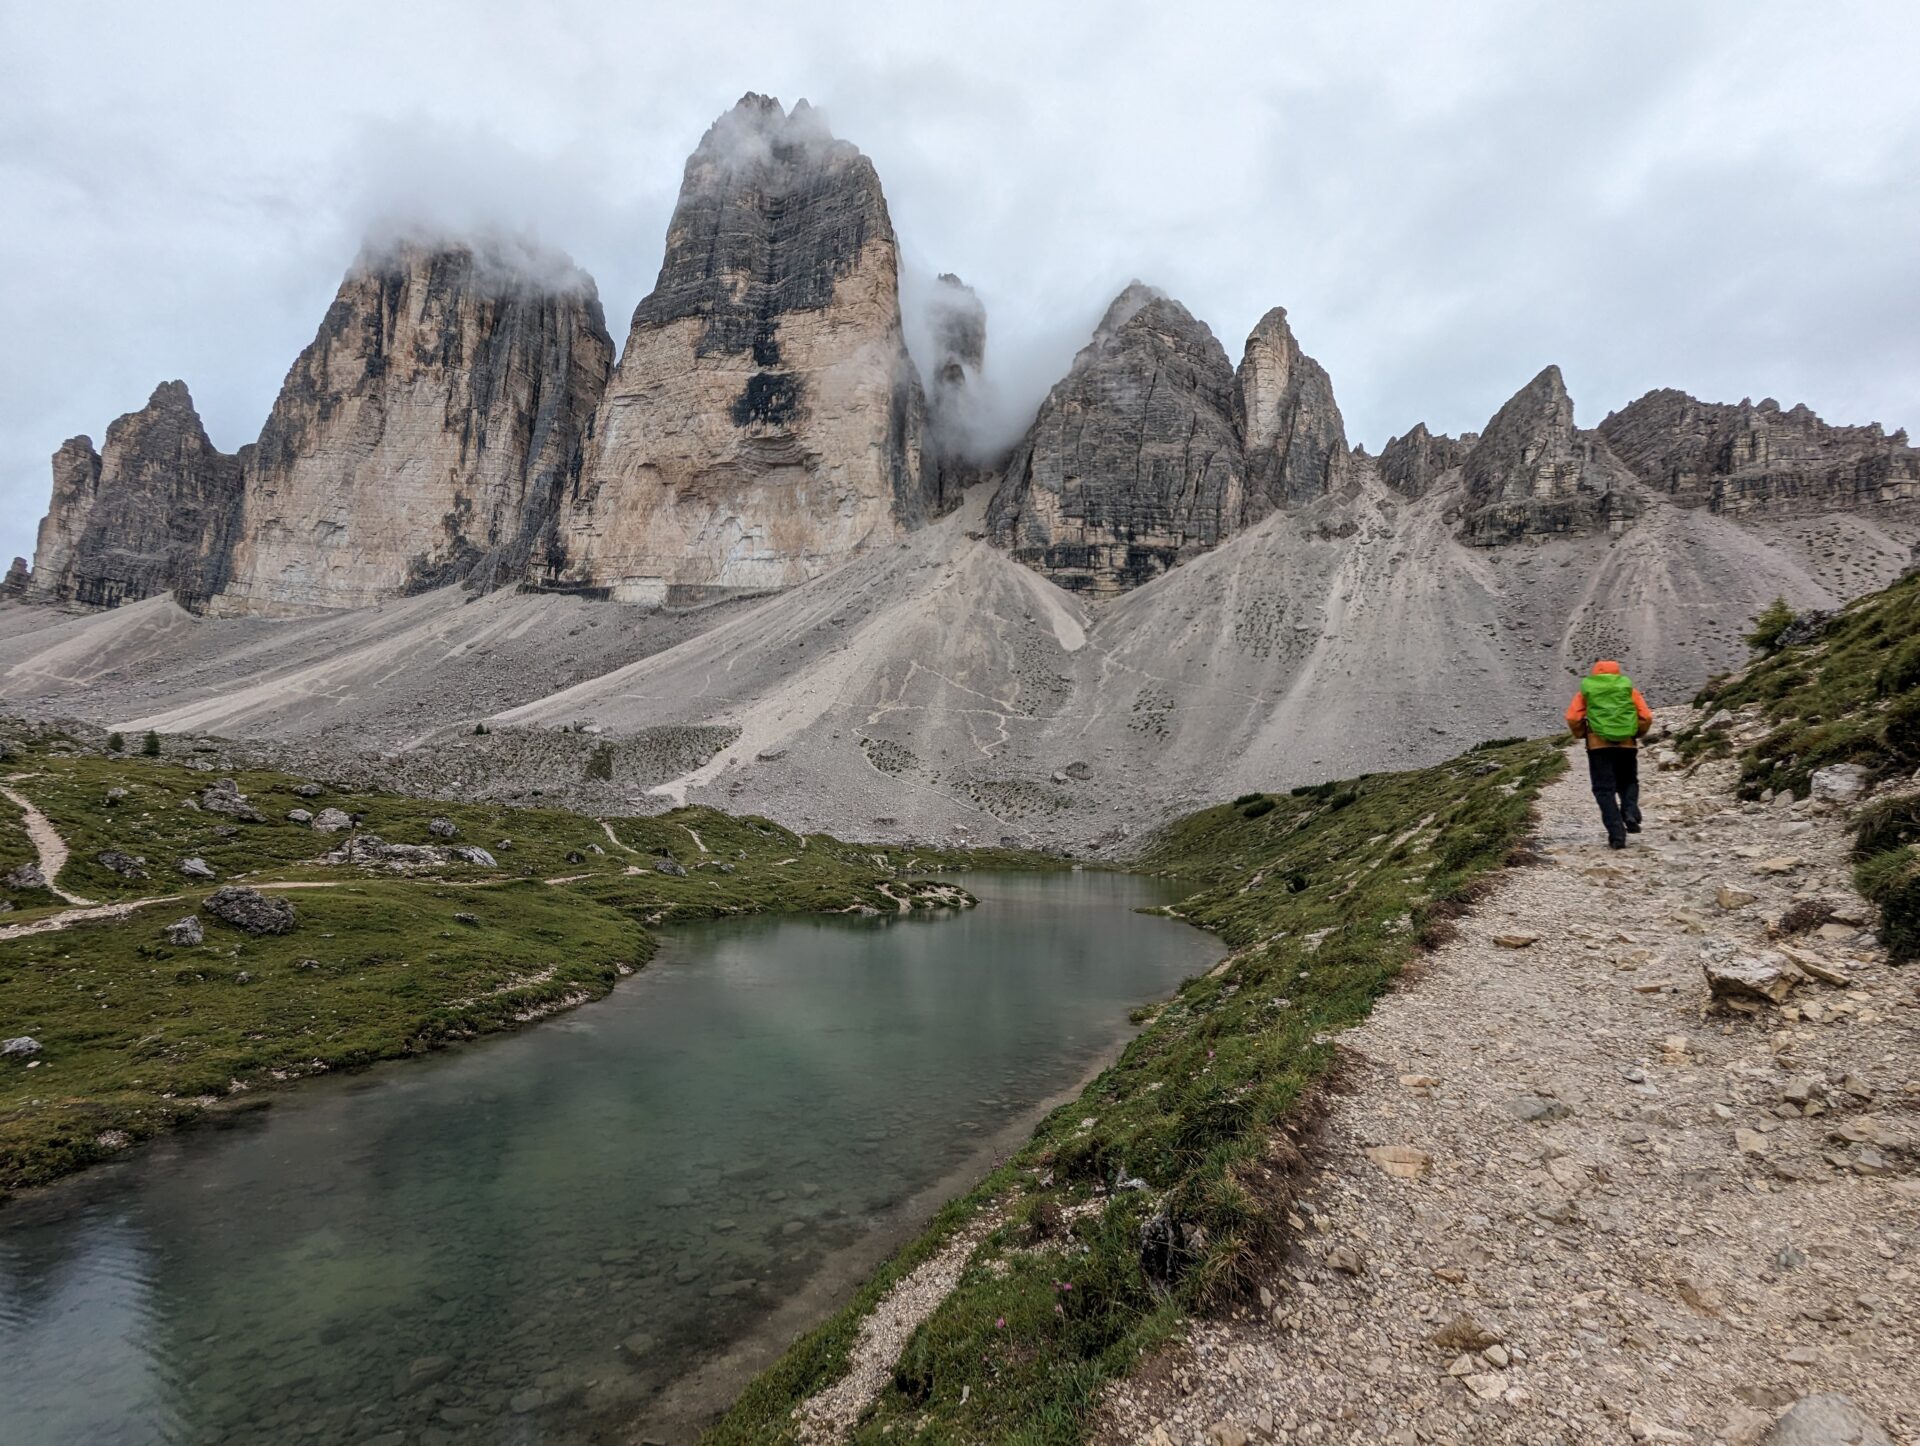
The first 30 minutes when going counter-clockwise consist of an easy, flat walk. The trail traverses one of the length-wise sides of Tre Cime and is quite close to the large rocks.
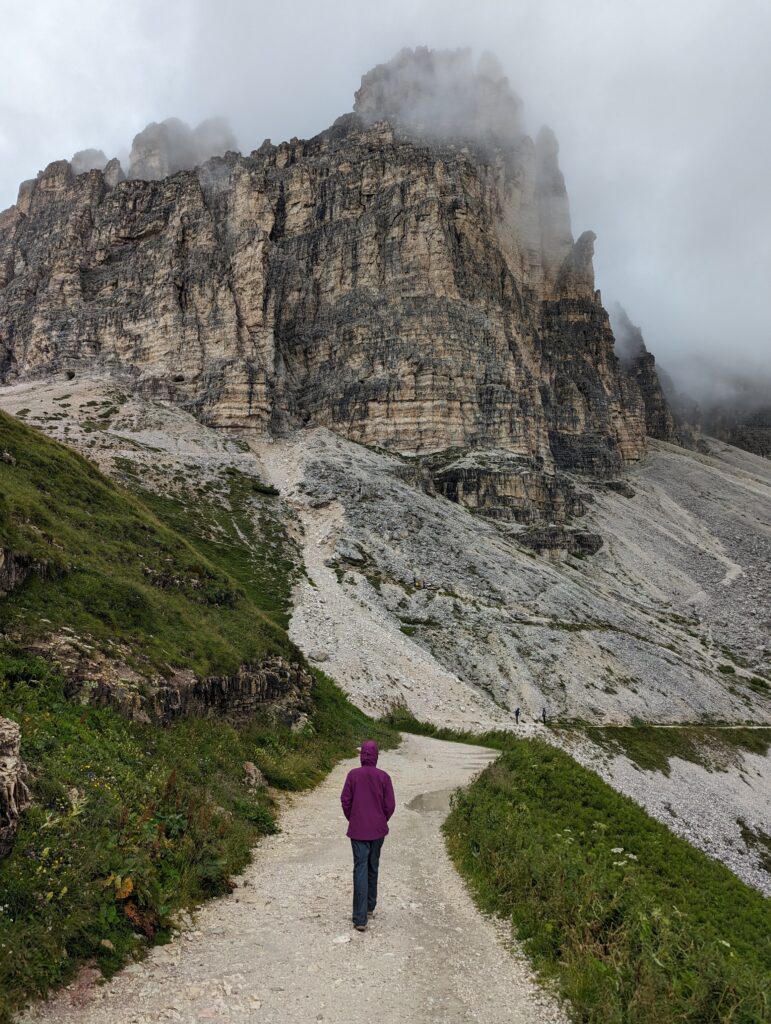
You’ll pass a small church and arrive at Rifugio Lavaredo after almost exactly 1 mile from Rifugio Auronzo. The main trail continues straight past Lavaredo and starts ascending gently. From Lavaredo, there is an option to take a steeper trail up and to the left that leads directly to the same pass as the winding main trail. The pass is called Forcella Lavaredo.
We took the main trail and I’m glad we did – the views were great and I found Tre Cime to always be better when viewed from afar. Here’s what it looks like when peering back at Rifugio Lavaredo from the main trail.
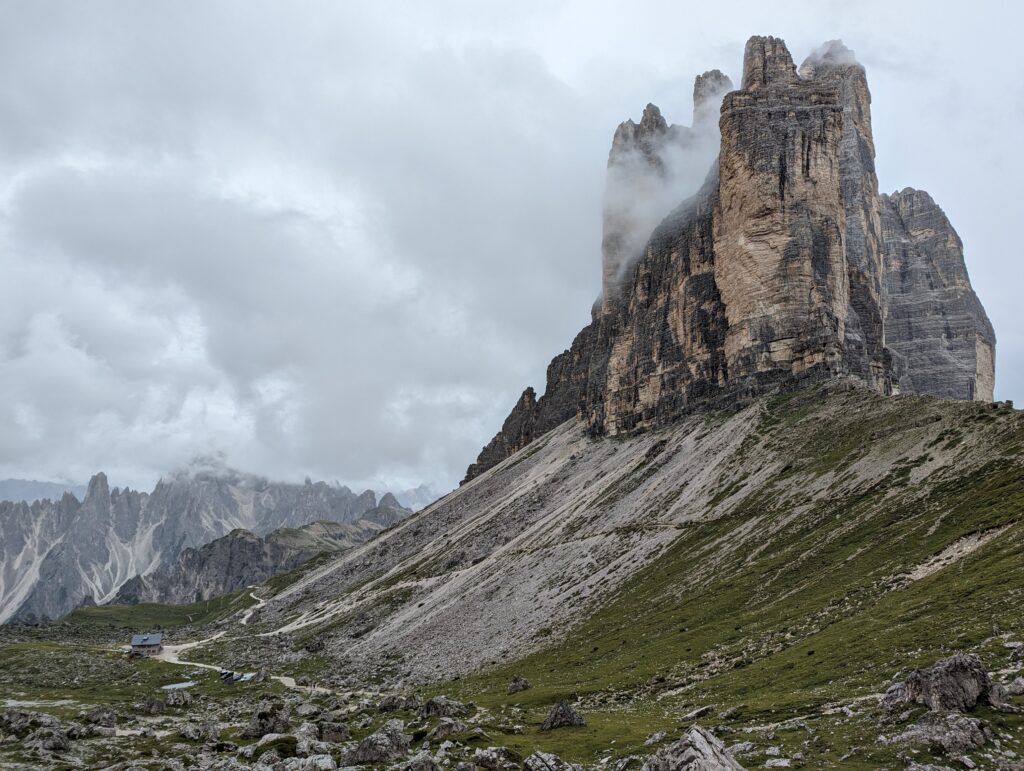
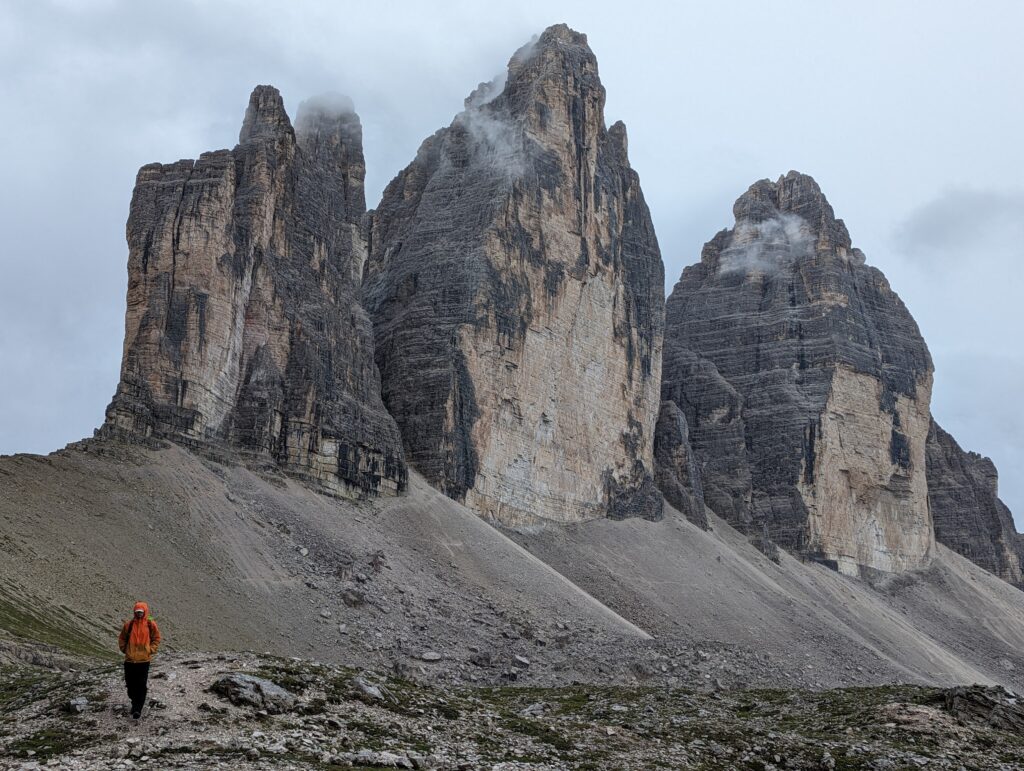
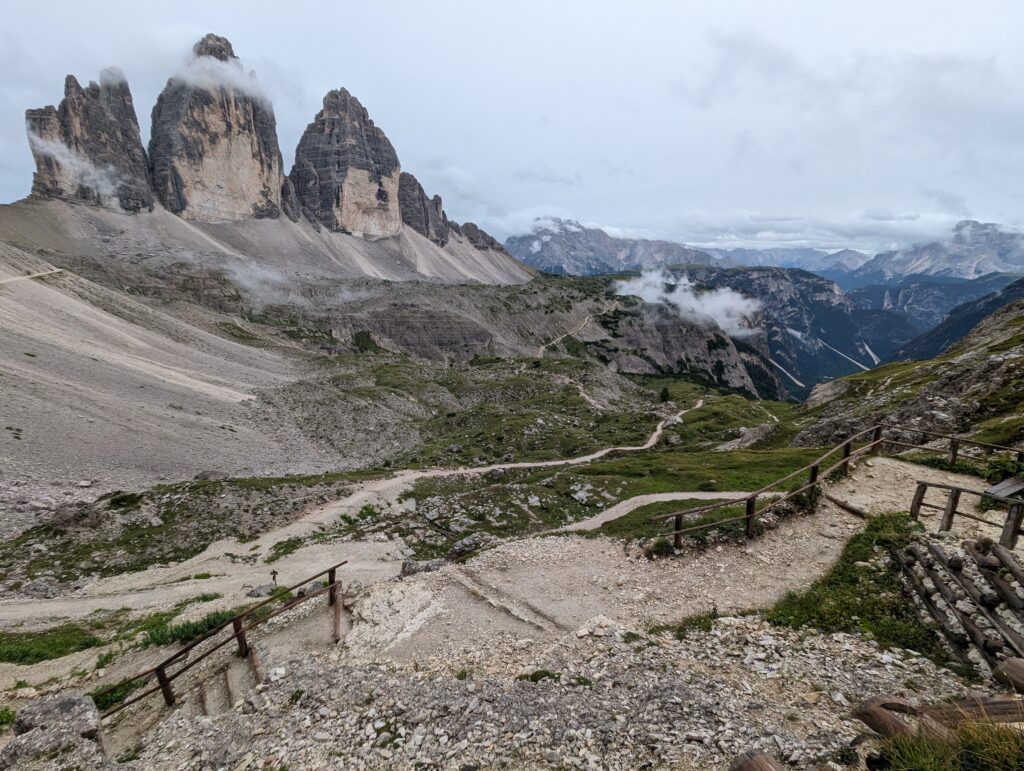
As you gain some elevation and approach the pass, you’ll be looking at Tre Cime at its thinnest. There are several trail intersections at the pass, and the main trail marker points towards Rifugio Locatelli.
Forcella Lavaredo to Rifugio Locatelli
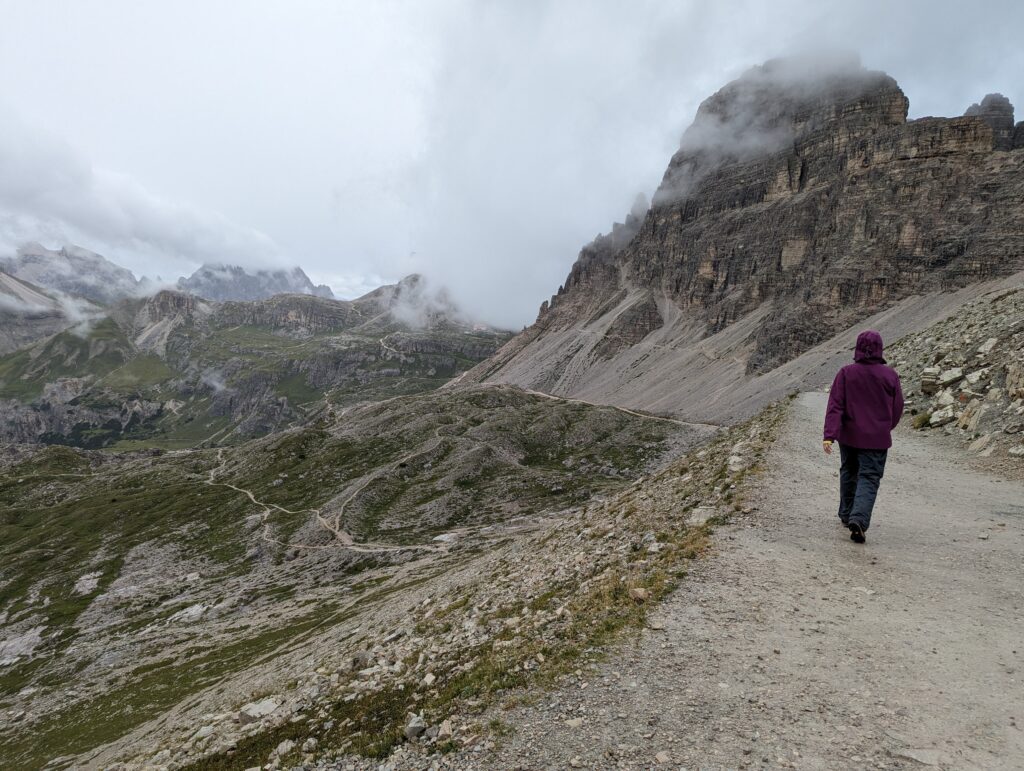
The main path from Forcella Lavaredo is relatively wide and obvious. As you head away from Tre Cime, there is a large rock formation up and to the right. This is where some of the caves are that you can go in and get a shot of the cave framing Tre Cime (we did not).
The trail gently descends and you’ll have a choice when nearing Rifugio Locatelli. There is 1 long, easy switchback on the left or several short, aggressive ones on the right.
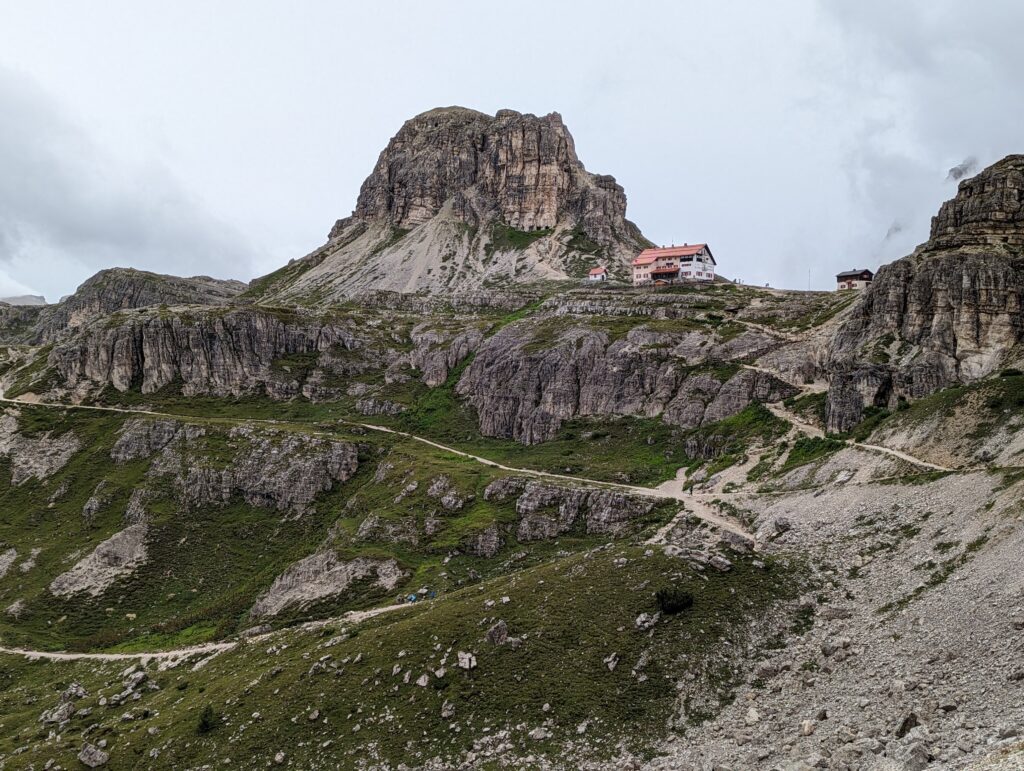
I went right for the steeper switchbacks, then went straight for the hill on the opposite side of Locatelli. Here’s the view of the church and hill as seen from Rifugio Locatelli. You can see the path on the right to take for the elevated view.
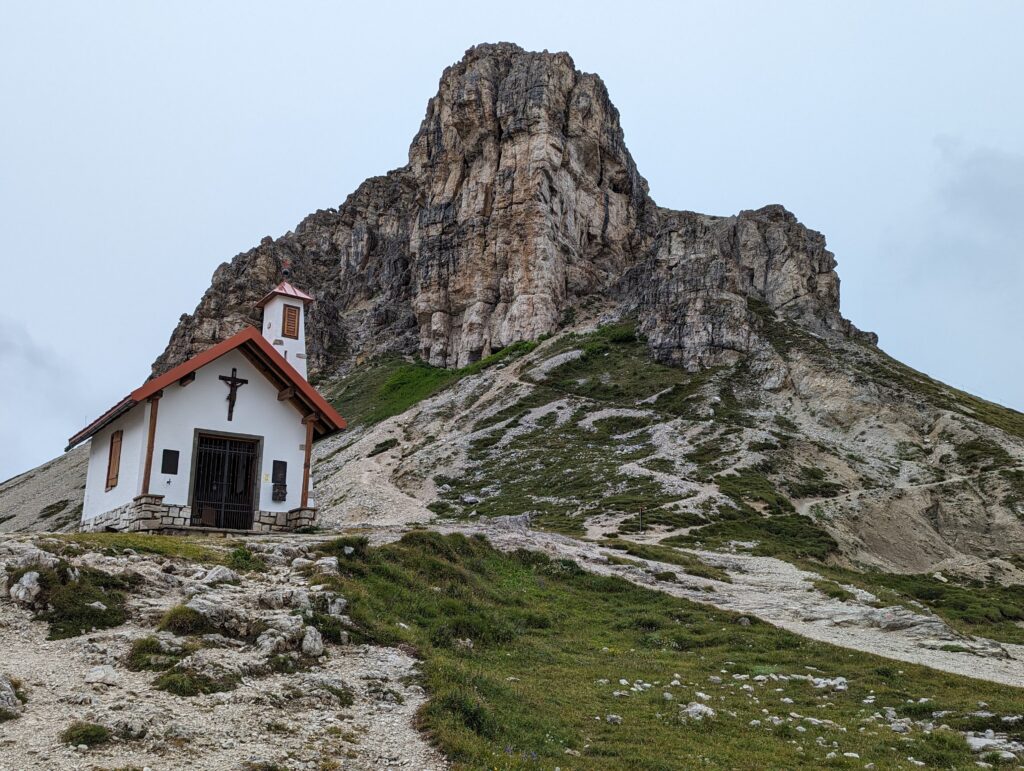
Walking uphill to the right for only a minute or two and looking back gives you a stunning panorama.
Rifugio Locatelli back to Rifugio Auronzo
You could spend a while exploring around the abundance of trails around Locatelli, but when you’re ready to head back, the “regular” loop trail goes to the right. There is a decent descent and you’ll have to re-gain that elevation loss.
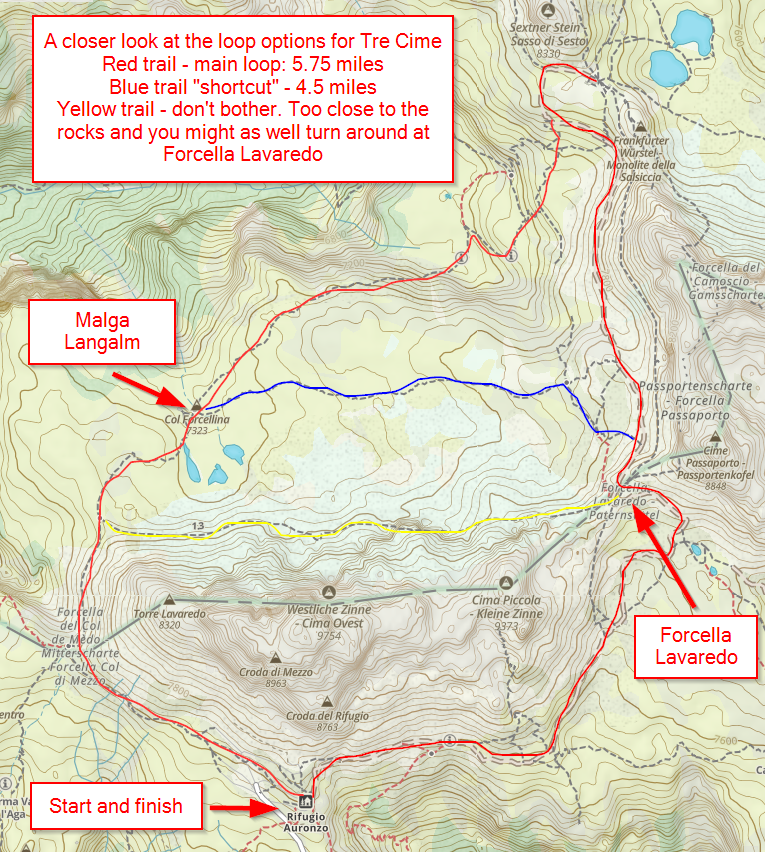
I actually backtracked towards the middle to meet back up with my wife, who did not go to Locatelli. We then took the blue trail on the map below that cuts straight across, parallel to Tre Cime. This is an option for the Tre Cime loop if you want to save mileage and elevation gain, and don’t go to Locatelli. This loop would be 4.5 miles total with 750 feet of elevation gain.
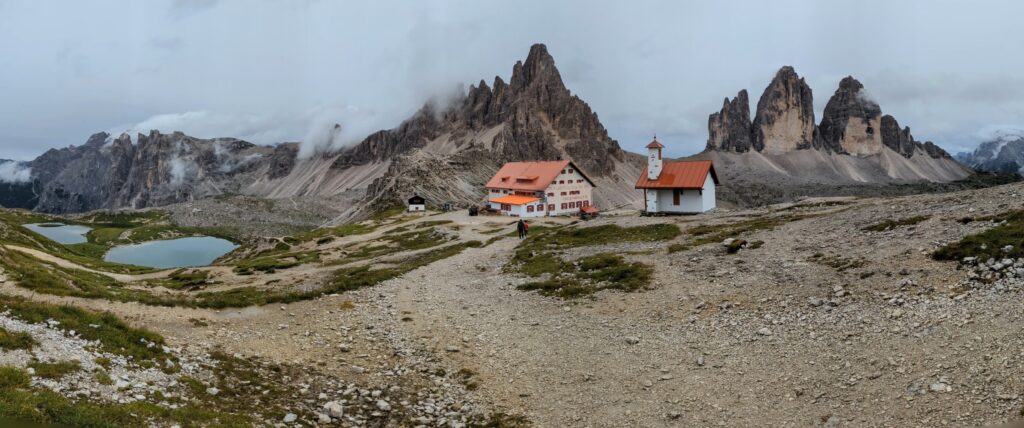
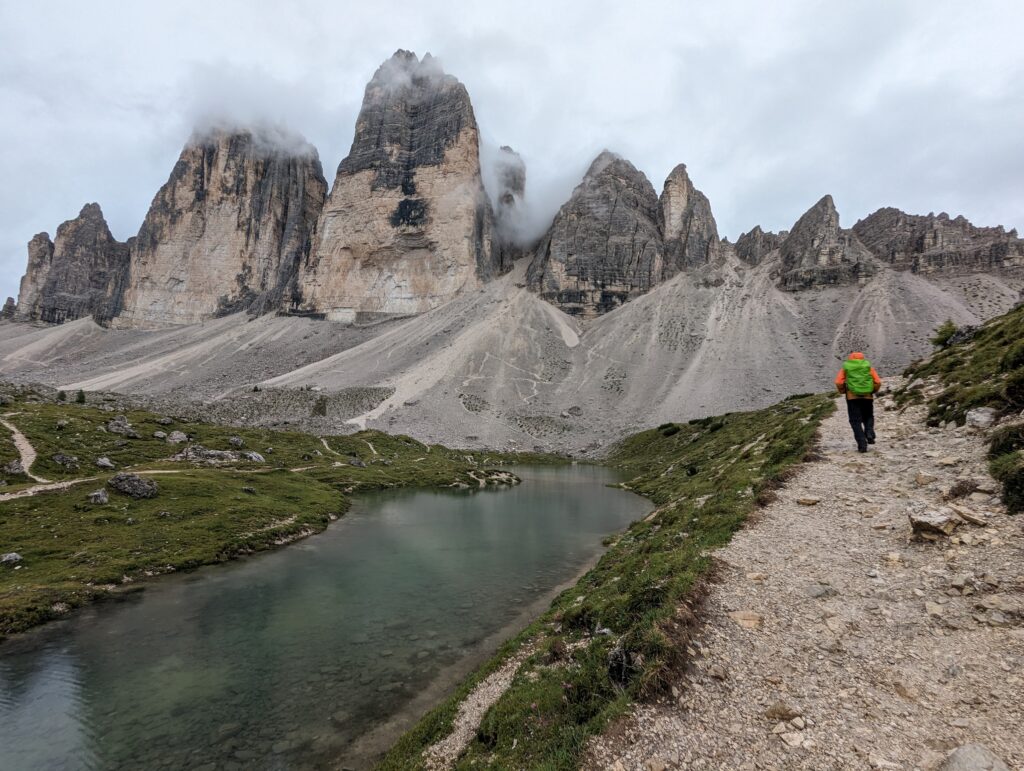
Whether you go to Locatelli and continue on the main loop trail, or skip it and cut across just after Forcella Lavaredo, both options lead to another hut called Malga Langalm. Just past Malga Langalm are the reflecting pools. The path goes right along the water so you won’t miss them.
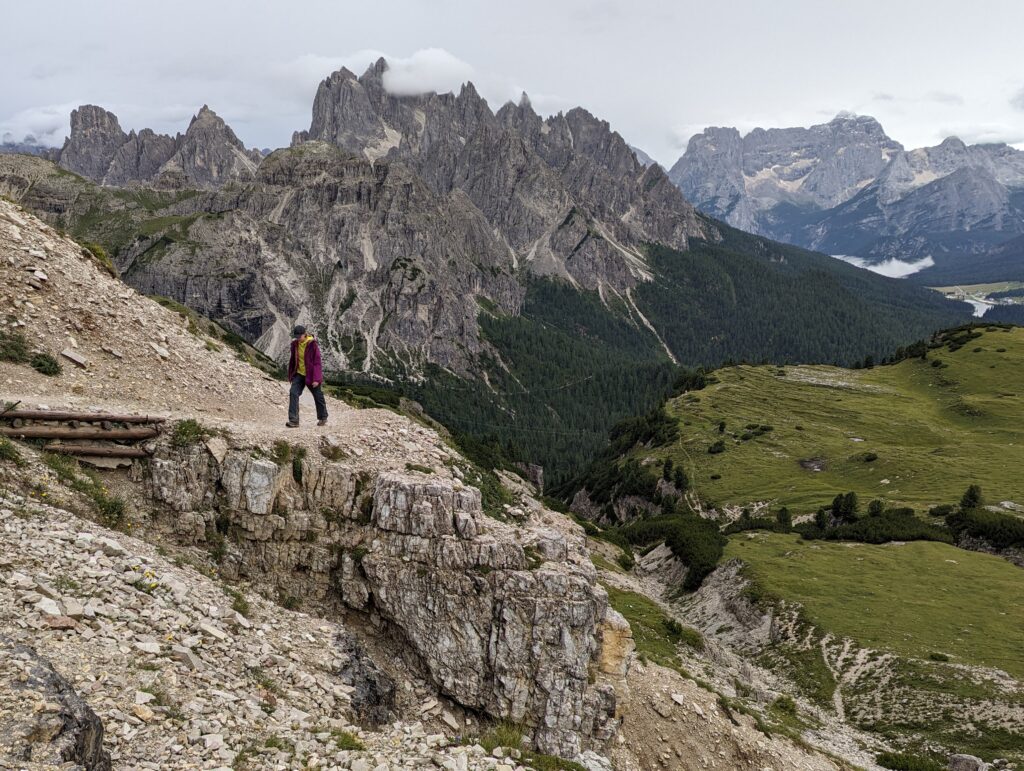
The rest of the loop is very straightforward. The best, and really only, views are looking out at the Dolomites and the Cadini group.
That’s it! Have you ever done this hike, or have a question? Leave a comment below!

Leave a reply