
If you take away nothing else from this page: please follow the 7 principles of Leave No Trace whenever hiking (and all the time, actually – most are pretty good general life tips, too):
- Plan ahead and prepare
- Travel and camp on durable surfaces
- Dispose of waste properly
- Leave what you find
- Minimize campfire impacts
- Respect wildlife
- Be considerate of other visitors
Now, on to Trolltunga. Here are the quick facts:
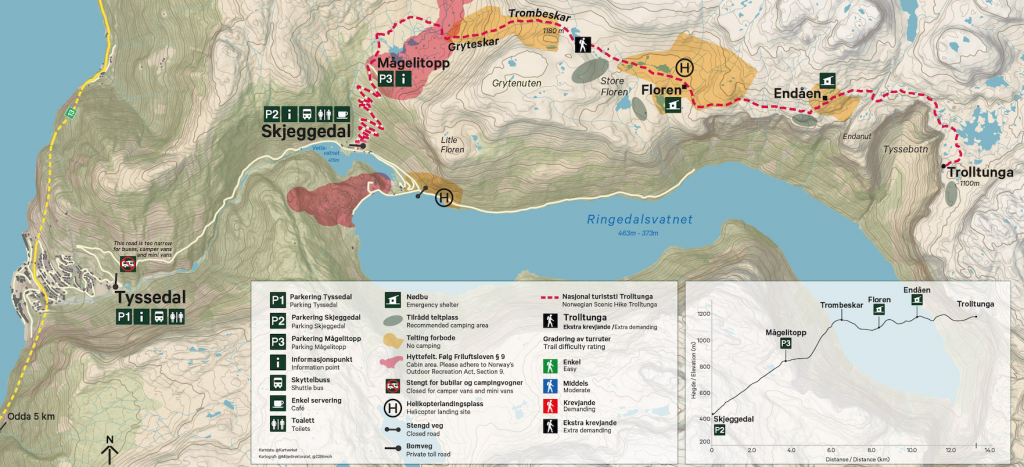
- Where: Odda, Norway
- More specifically, where: there are 3 places to park (far, closer, closest) and all have fees. Go here for the most up-to-date information, including costs and directions.
- Distance and elevation: ~17 miles (27 km) out-and-back with ~2,600 feet (790 meters) elevation gain from P2, the most common starting point
- Highest point: 3,609 feet
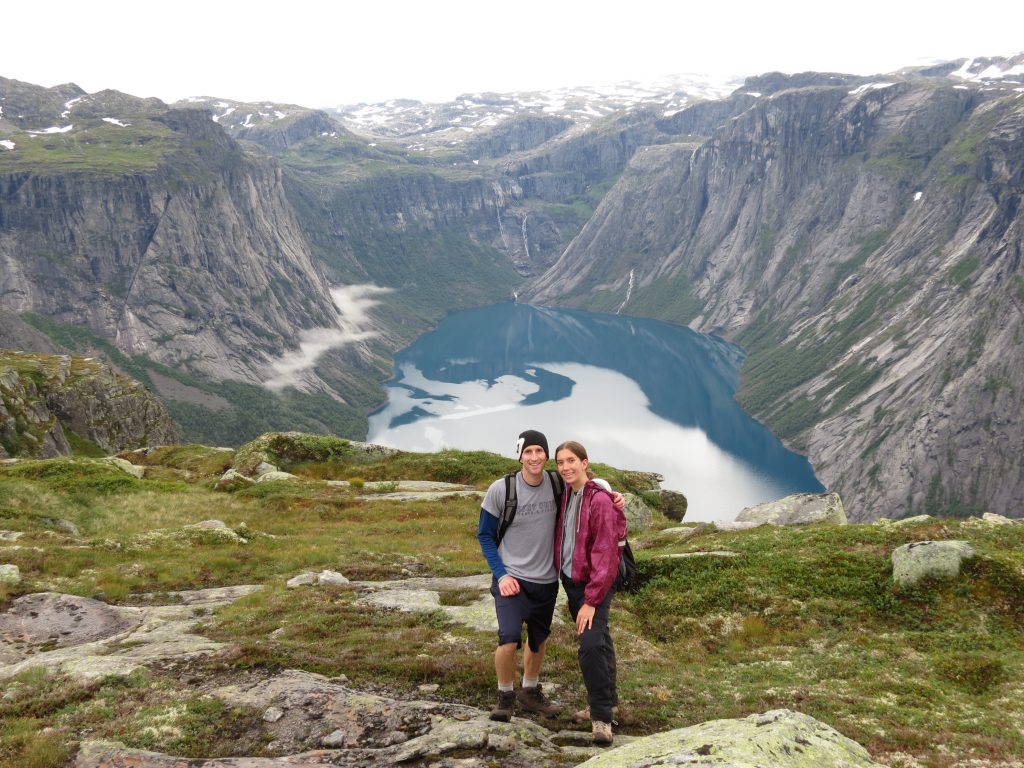
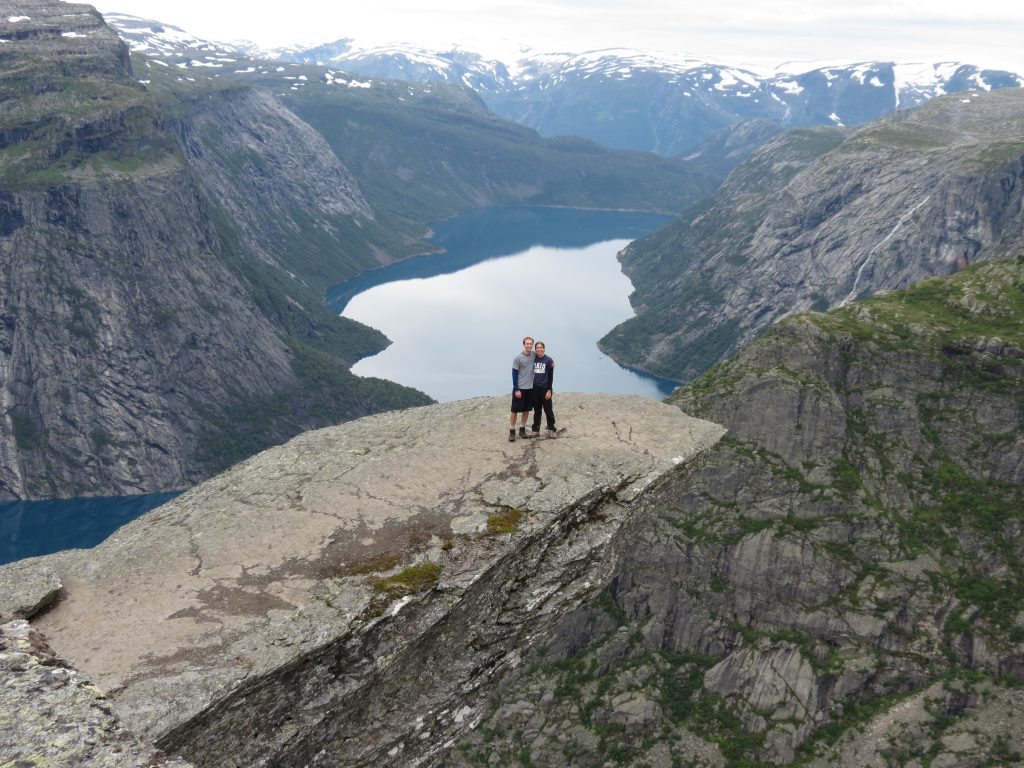
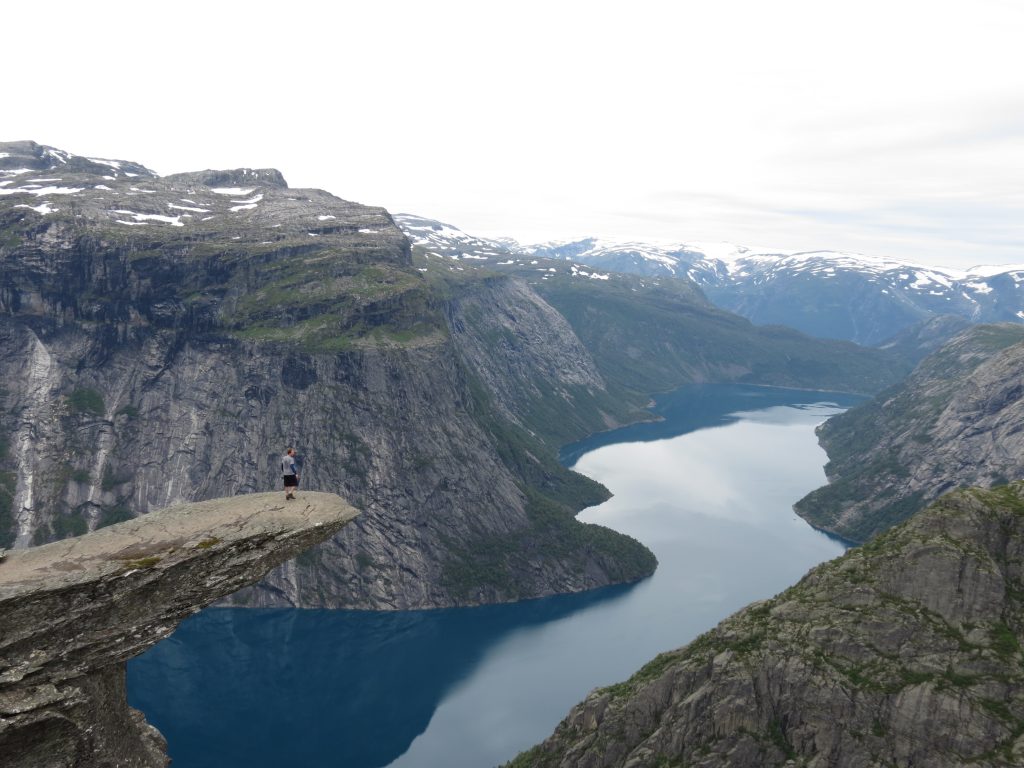
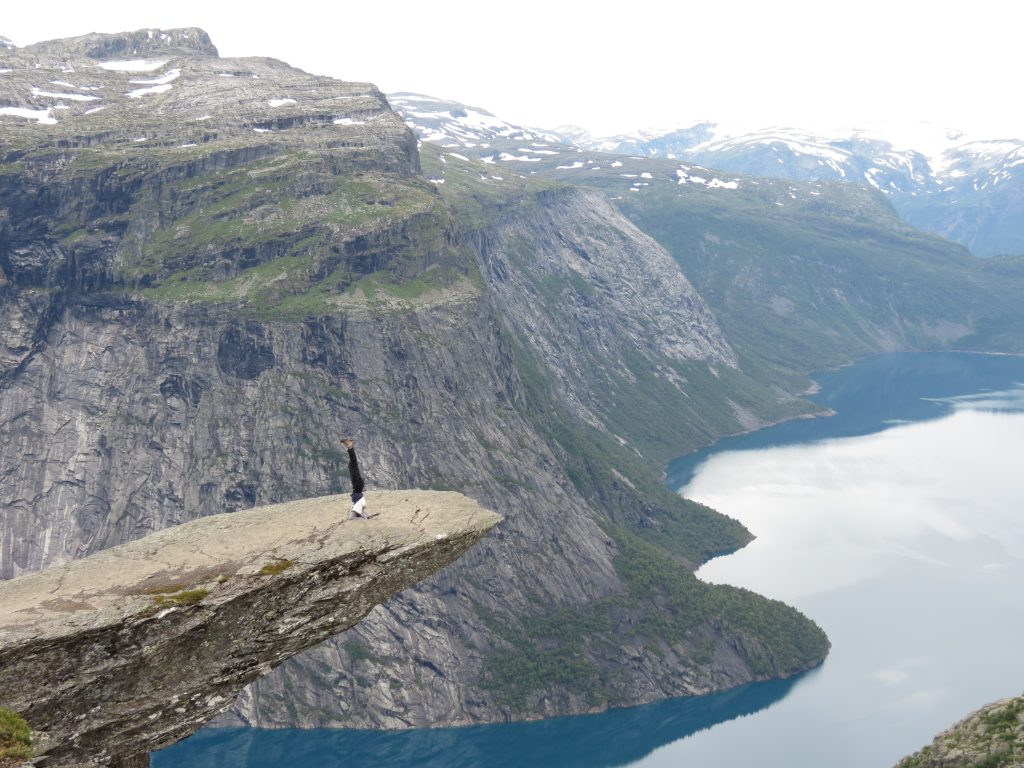
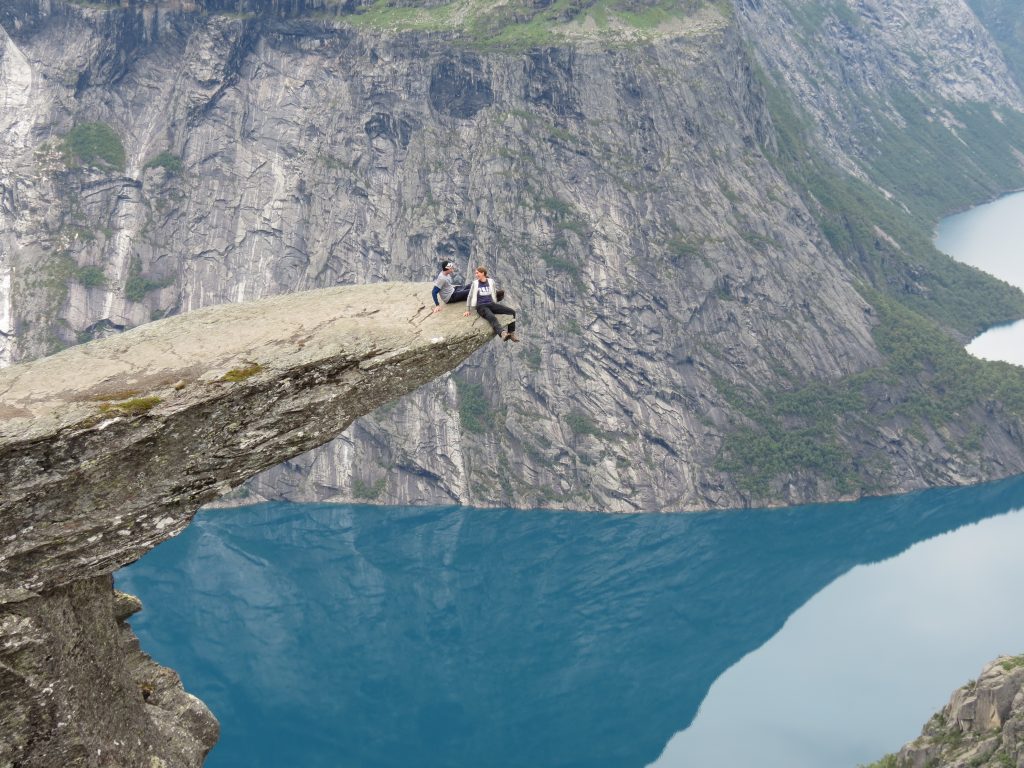
- Why you should hike this trail: one of the world’s most unique payoffs with the “Troll’s Tongue” rock hanging over a fjord
- Fee or permit? Other than parking fee or reservation, no
- Best time of year: June-September. All other months are guided hiking only.
- Tip: If you want to do this as quickly as possible with the least mileage, book ahead for the closest parking at P3 (link above)
- Tip: scope out your favorite angle for a picture on the rock and don’t be afraid to ask someone to take your picture with specific instructions – if you have to wait in line, make sure you get the picture you want. Offer to return the favor if they’re near you in line.
- Tip: consider camping to avoid the line to get your picture on the rock (no permit needed, but make sure you pay accordingly for parking)
Getting there
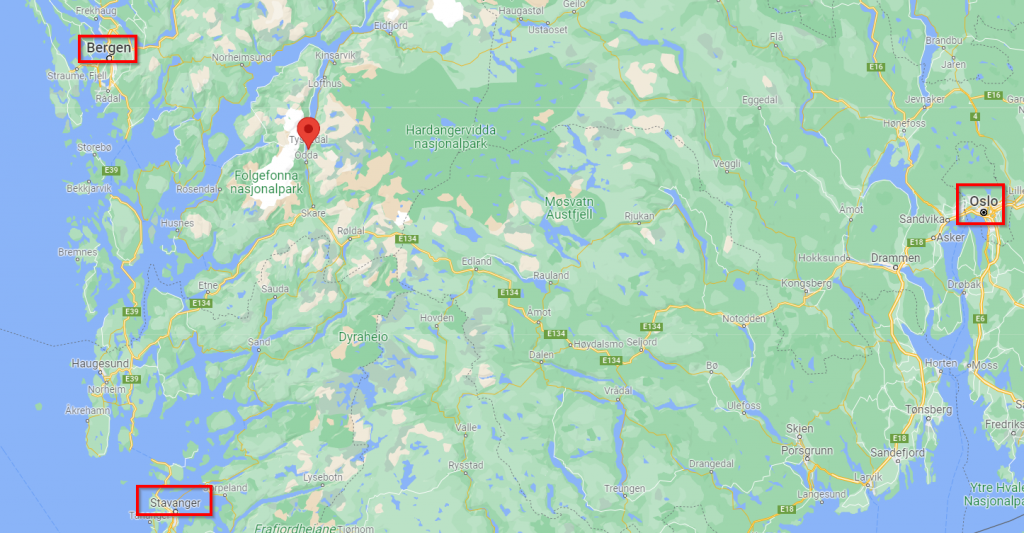
First: Odda isn’t really close to big cities. If you want to hike Trolltunga, you’re most likely going to spend some time driving to get there. It’s 3 hours from Bergen, 3.5 hours from Stavanger (where we were based on our trip), and 5.5 hours from Oslo. To get an early start on the hike, you’ll want to stay in Odda or Tyssedal. We stayed at the Tyssedal Hotel and it was very convenient.
You have 4 options to start this hike.
- Park at Tyssedal (P1) and take the shuttle to P2 or P3. I wouldn’t even consider starting the hike from P1 (~23 miles RT with ~3,400 feet of elevation gain).
- Park at Skjeggedal (P2) and start your hike going up the steep hill with lots of switchbacks, or take the shuttle to P3. P2 is the most common starting point (~17 miles RT with ~2,600 feet of elevation gain)
- Park at Magelitopp (P3) and have the shortest hike with much less elevation gain (~12.5 miles RT with ~1,000 feet of elevation gain).
- Try to hitchhike (we picked up a couple on our way).
Since information could change at any time, I won’t post all the specifics. You can view the number of parking spots, costs, payment methods accepted, and logistics here.
Parking to Trolltunga
If parking at P2, the first part is pretty much all switchbacks. You’ll reach P3 after ~2.25 miles and 1,500 feet of elevation gain. The trail from there is very straightforward. You follow the red Ts painted on the rocks until you get to Trolltunga.
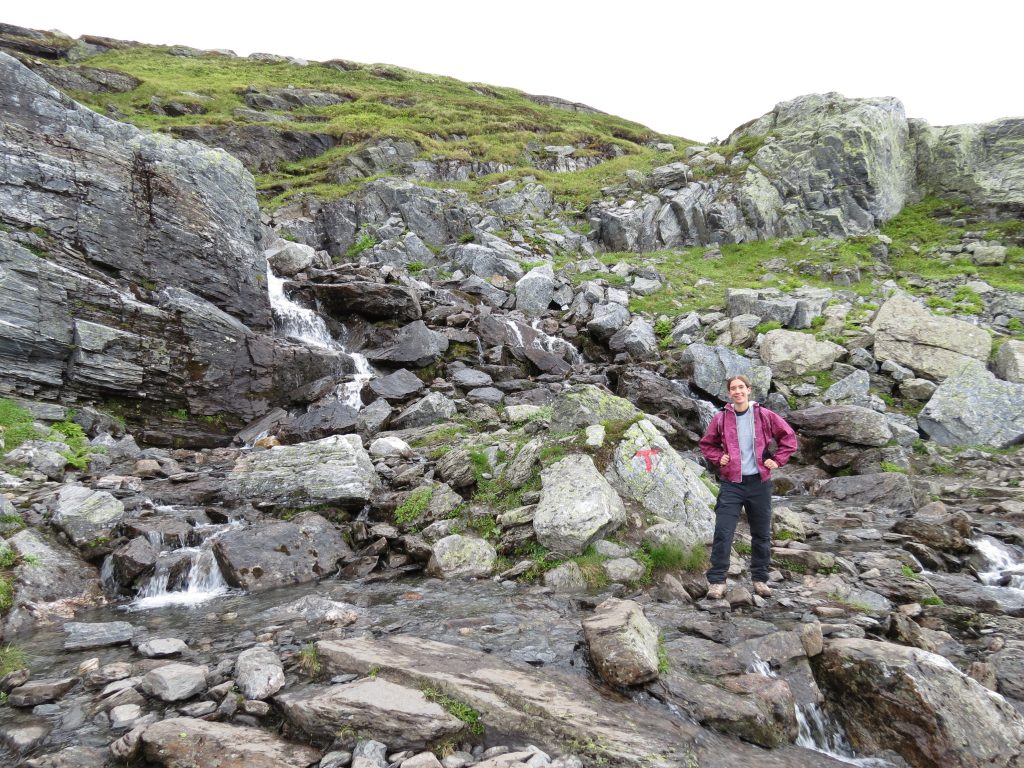
The terrain varies between relatively smooth granite, boulders, and soil. The stretch from P3 to “The Troll’s Tongue” is pretty easy with a mostly gradual elevation gain (1,000 feet over 6+ miles).
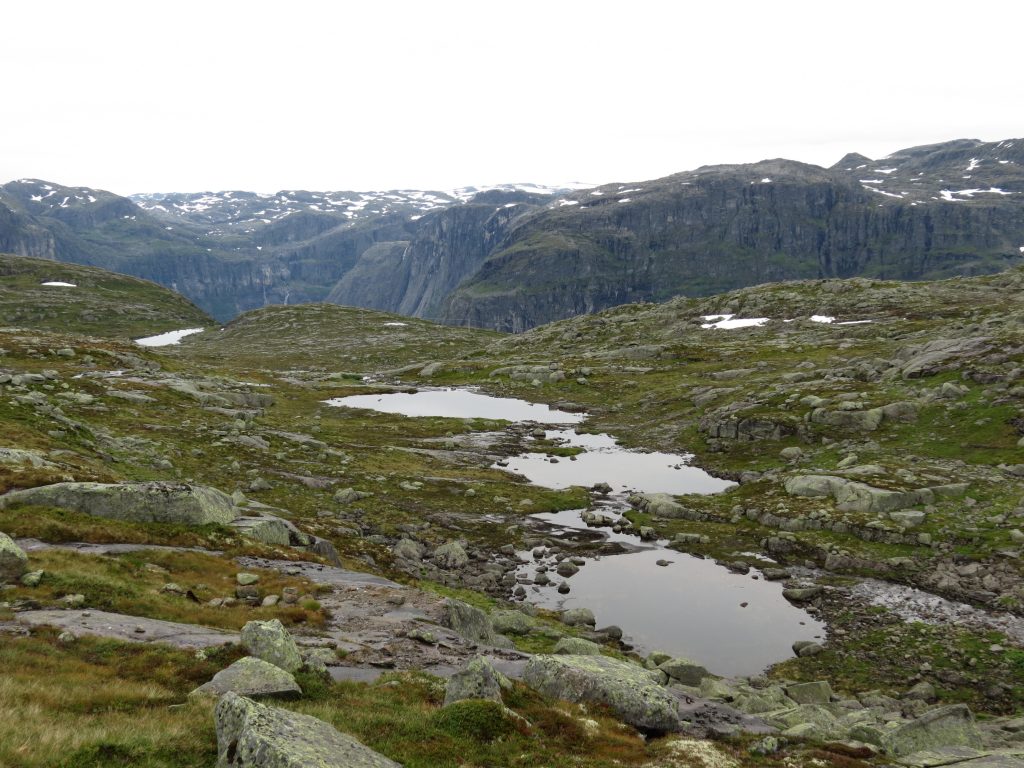
There really isn’t much to report, but there is one area along the way that will drop your jaw.
When you get to the end, you might need to wait hours to get your picture on the rock. Make sure you account for that when planning your trip. Go as early as you can, or consider tent camping to beat the line.
If you have a long wait, use that time to scope out what angle you want, as the photographer’s vantage point does make a difference. It’s also a good idea to wear bright clothing so you stick out more when getting a photo from afar.
Nothing confusing about the way back, either: same path back to your car.
Additional info
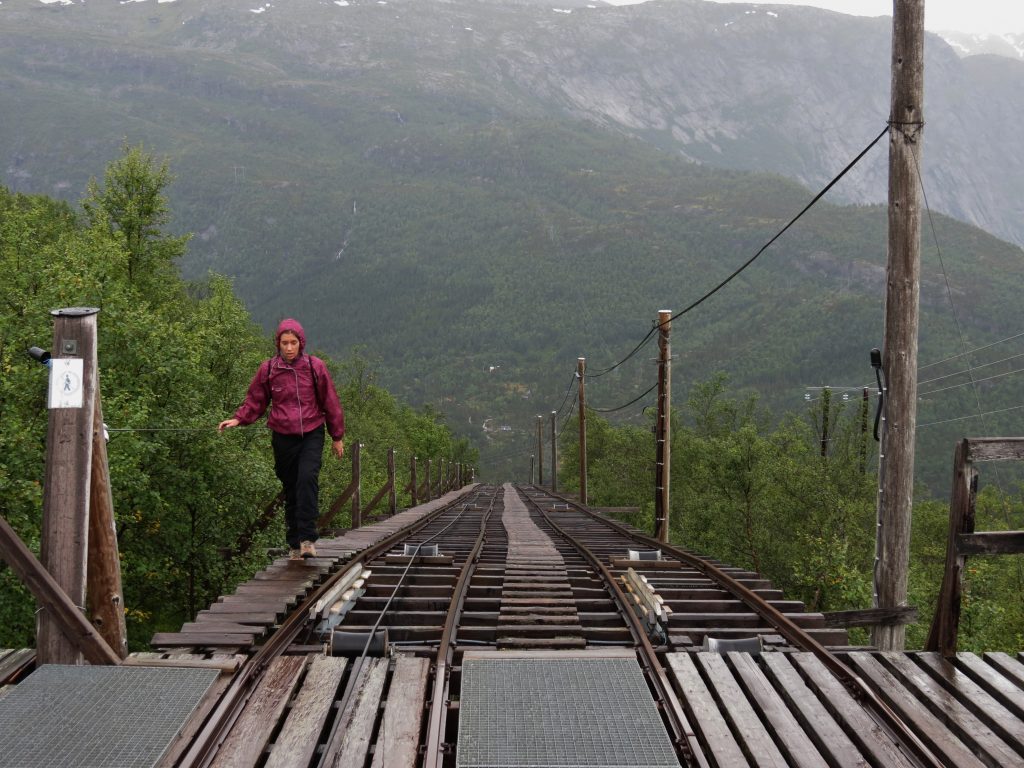
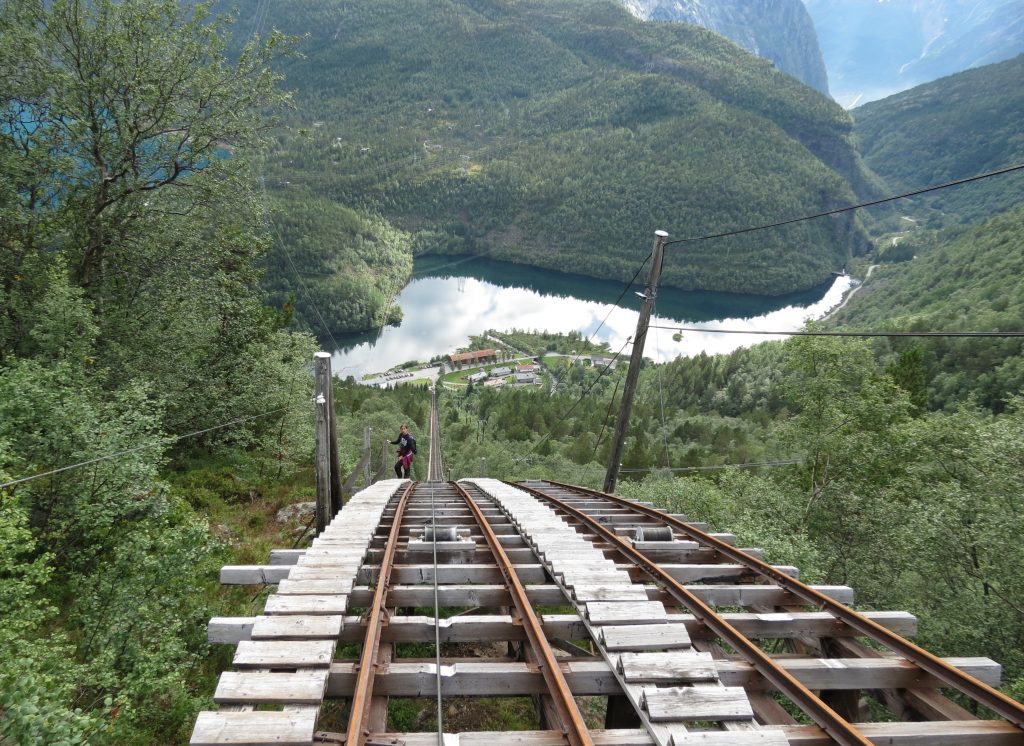
In 2012, when we did this hike: P3 didn’t exist, there was no shuttle, and there were remnants of an old funicular that we took up and down instead of winding through the new-at-the-time trail through the woods. This was one of the neatest parts of any hike we’ve ever done, but is no longer possible since they took it down to build the road to P3.
To give you an idea of how much the popularity of this hike has increased over the past decade, there were 3 other couples the whole time we were at Trolltunga. We went out on the rock multiple times, together and separately, and felt lucky there were others to take our photo!
This is an all-day hike, can be crowded, and most likely involves a flight plus a lengthy drive. However, after 10 years it still sticks out as one of the best hikes we’ve ever done and is 100% worth it!
Leave a reply