
If you take away nothing else from this page: please follow the 7 principles of Leave No Trace whenever hiking (and all the time, actually – most are pretty good general life tips, too):
- Plan ahead and prepare
- Travel and camp on durable surfaces
- Dispose of waste properly
- Leave what you find
- Minimize campfire impacts
- Respect wildlife
- Be considerate of other visitors
Now, on to Olomana 3 Peaks. Here are the quick facts:
- Where: Oahu, Hawaii, United States
- More specifically, where: the trailhead is on Loop Road, which leads to the Royal Hawaiian Golf Club
- Distance and elevation: 4.5 miles (7.25 km) with 1,600 feet (490 meters) of elevation gain to the first peak (lose and gain more if you do peaks 2 and 3)
- Highest point: 1,600 feet (490 meters) at the first peak
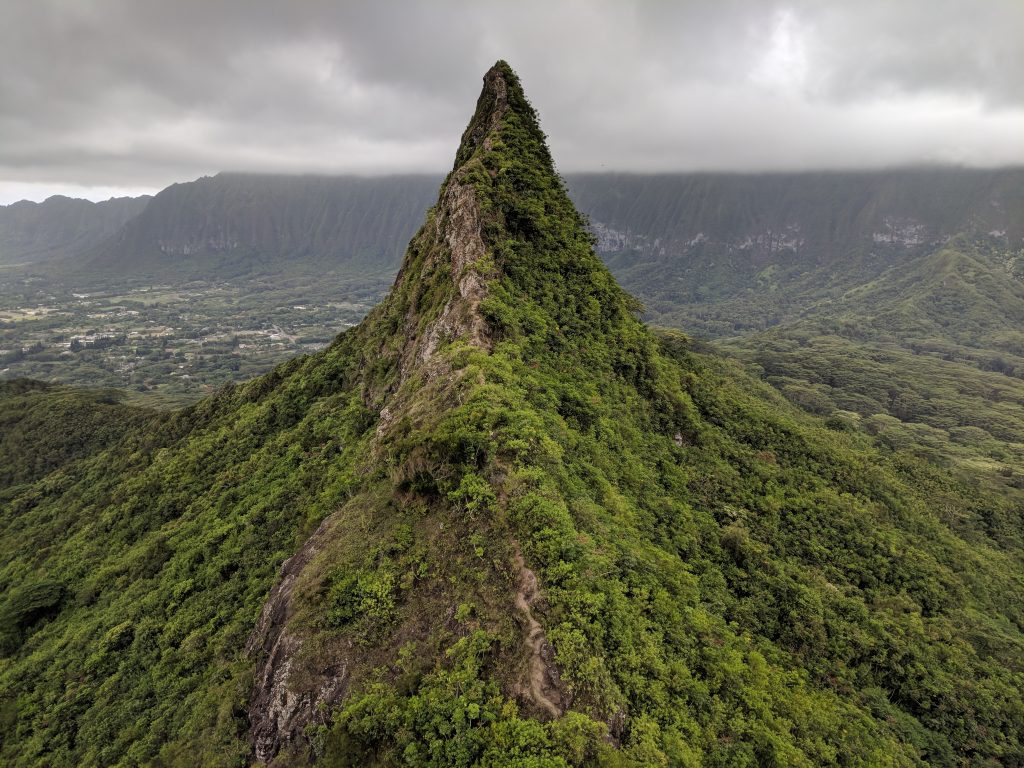
- Why you should hike this trail: a very fun, technical hike with one of the most unique mountains in the world
- Fee or permit? no, but be careful about parking (more below)
- Best time of year: it’s Hawaii – all year
Tips
- Olomana 3 Peaks is a dangerous hike, make no mistake about it. Several people have died on this trail in recent years so please know your limits and be as safe as possible.
- Even if you don’t plan on doing all 3 peaks, getting to the first one involves at least a class 3 (use of all 4 limbs) section.
- If you get to the first peak, definitely do the second. The stretch between the first and second peaks is the easiest part of the hike and the view of the third peak is awesome.
- Going from peak two to peak three and back is the most difficult and dangerous part.
- Do not fully rely on the ropes. You can use them for stability but make sure you would be okay if they snapped as they are not maintained in any official way.
- Gloves can be helpful on this trail.
- Consider getting a ride. It will cut mileage and the potential for a parking ticket or break-in.
Getting there
The trailhead for Olomana 3 Peaks is along the dead-end Loop Road to the Royal Hawaiian Golf Club. There is no parking at the trailhead, but some people have had luck parking at the intersection of Aulola Road and Loop Road just off the Kalaniana’ole Highway (61). This is the closest place to the trailhead that you can park, but I saw cars get ticketed and they are very particular about all 4 tires being off the pavement. There is limited space here and the closest neighborhood parking is not very close.
There have been an increasing number of break-ins in Hawaii, especially of tourist/rental cars, so I’d recommend getting a ride for this hike if you can. You’ll get closer to the trailhead than if you parked and you won’t run the risk of a ticket or break-in.
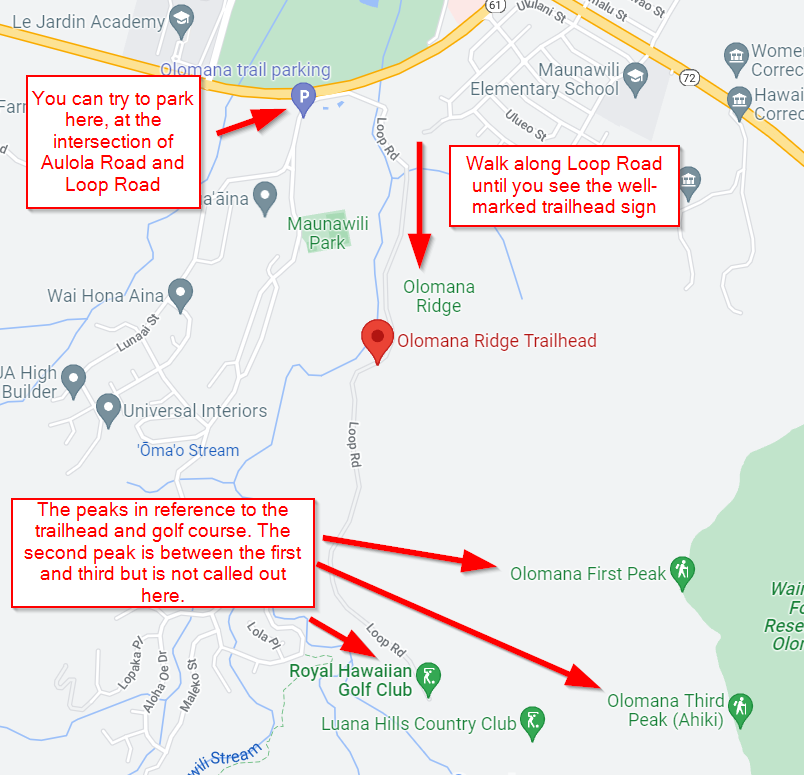
However you arrive, you’ll have to walk along Loop Road towards the golf course and past a guard station. If you look closely you’ll see a couple unmarked trails on the left before the guard station. You can take these to get to the official trail but you’ll see the very clear, well-marked sign indicating the start of the hike on your left if you keep walking along the road. I’m sorry I don’t have a picture of this, but you can’t miss it.
Peak 1: Olomana
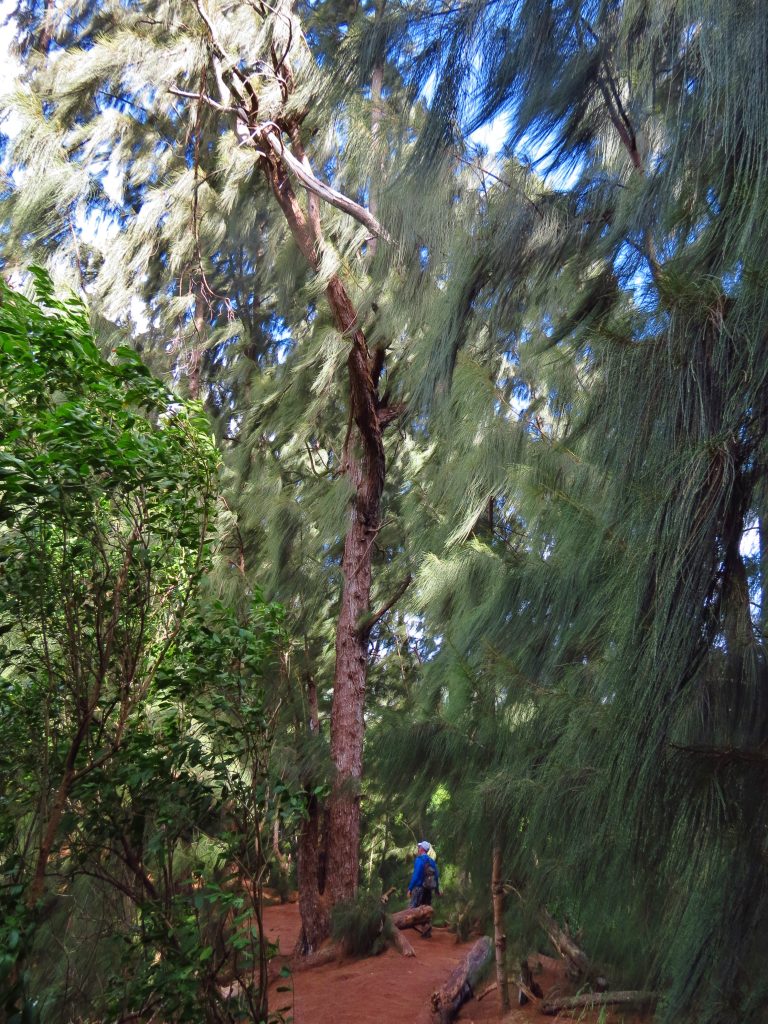
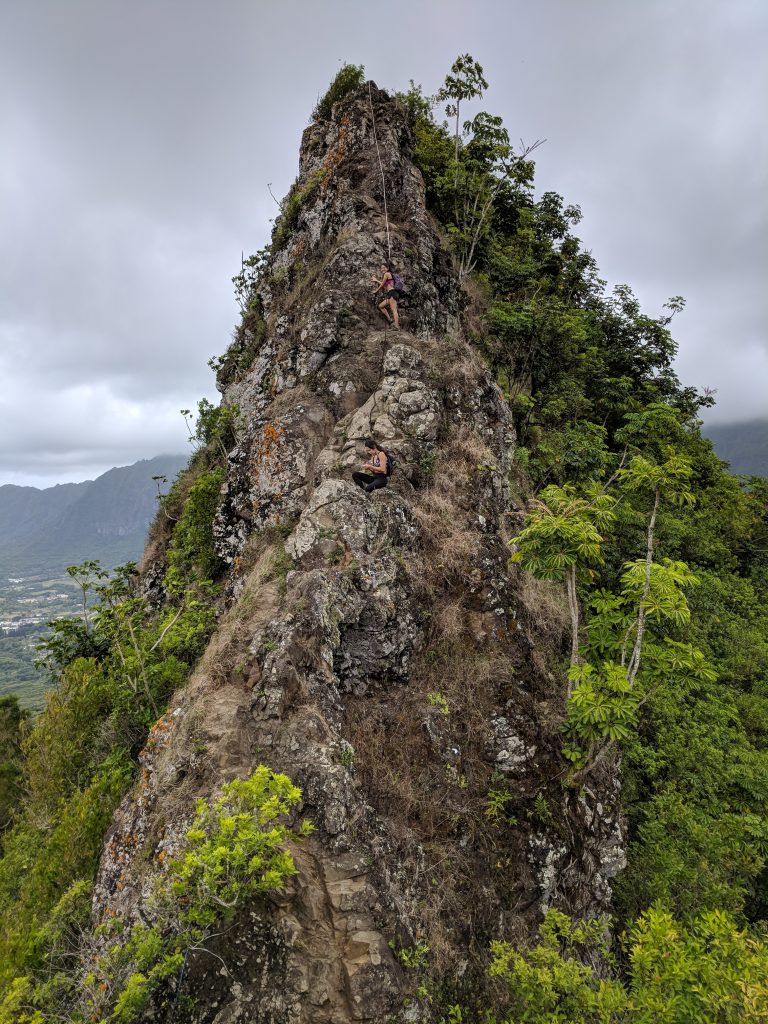
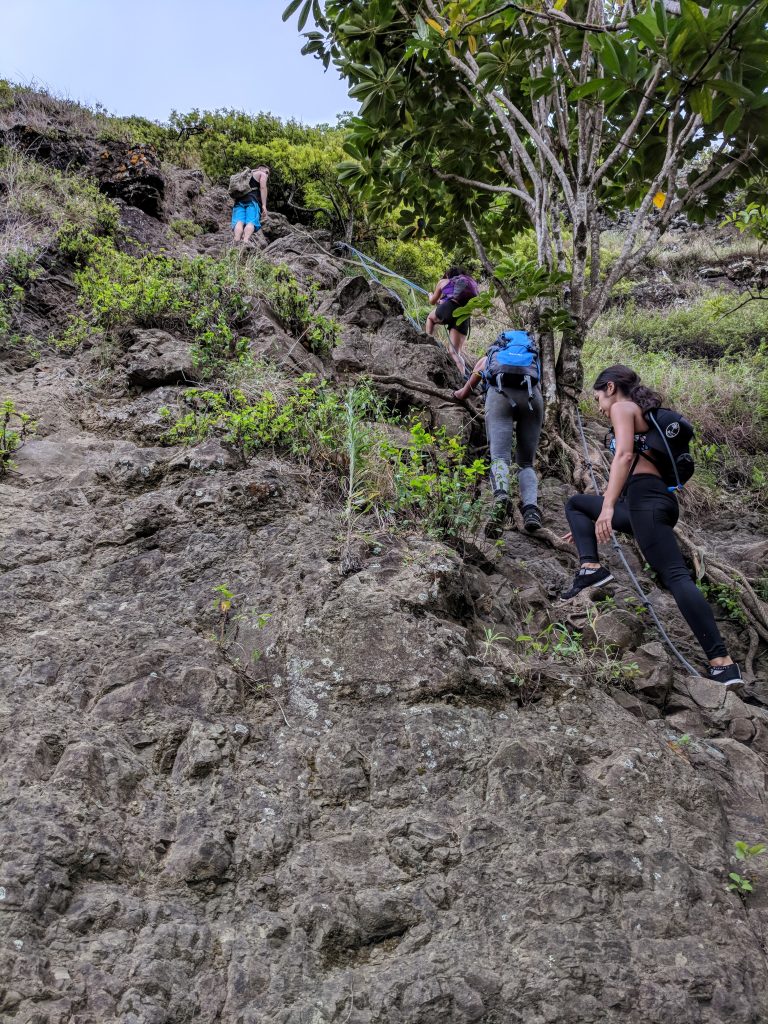
The trail immediately goes into the canopy and is flat for the first part. The trail is obvious so there shouldn’t be any issues with venturing off. Eventually the trail takes a noticeable turn turn to the right, the ground changes to red dirt, and you’ll start gaining elevation until you get to the first rope (around 20-30 minutes into the hike). It gets pretty steep and technical from there so please use caution and know there is no shame in turning around if you’re uncomfortable. It can be quite muddy and slick if it has rained recently.
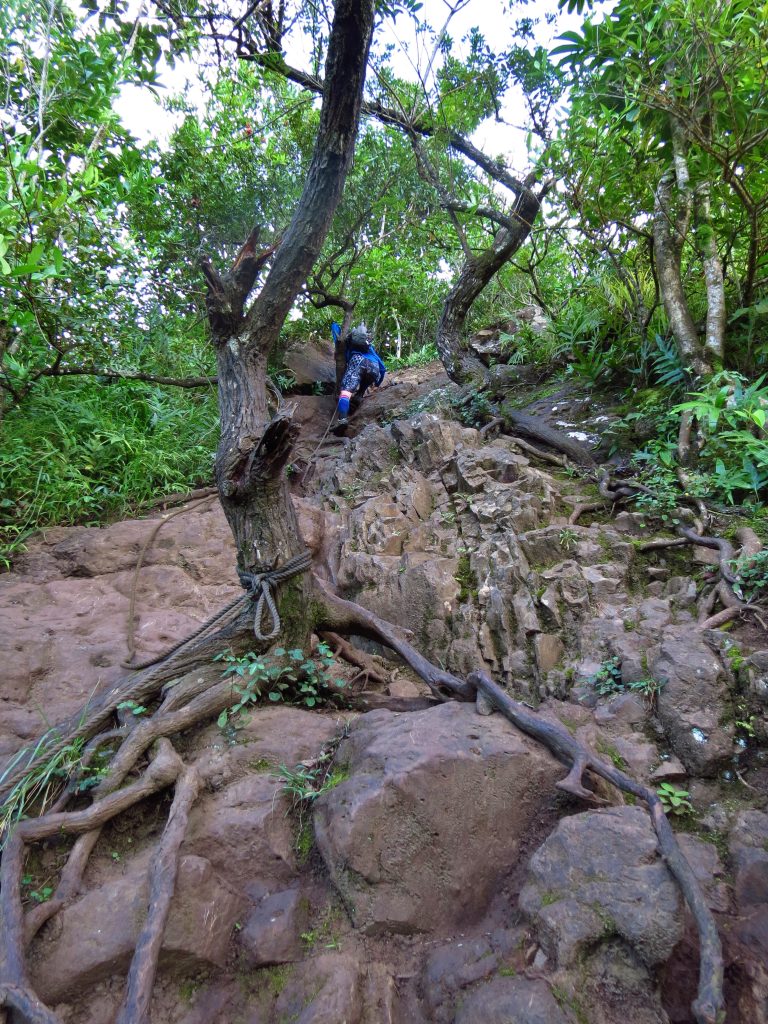
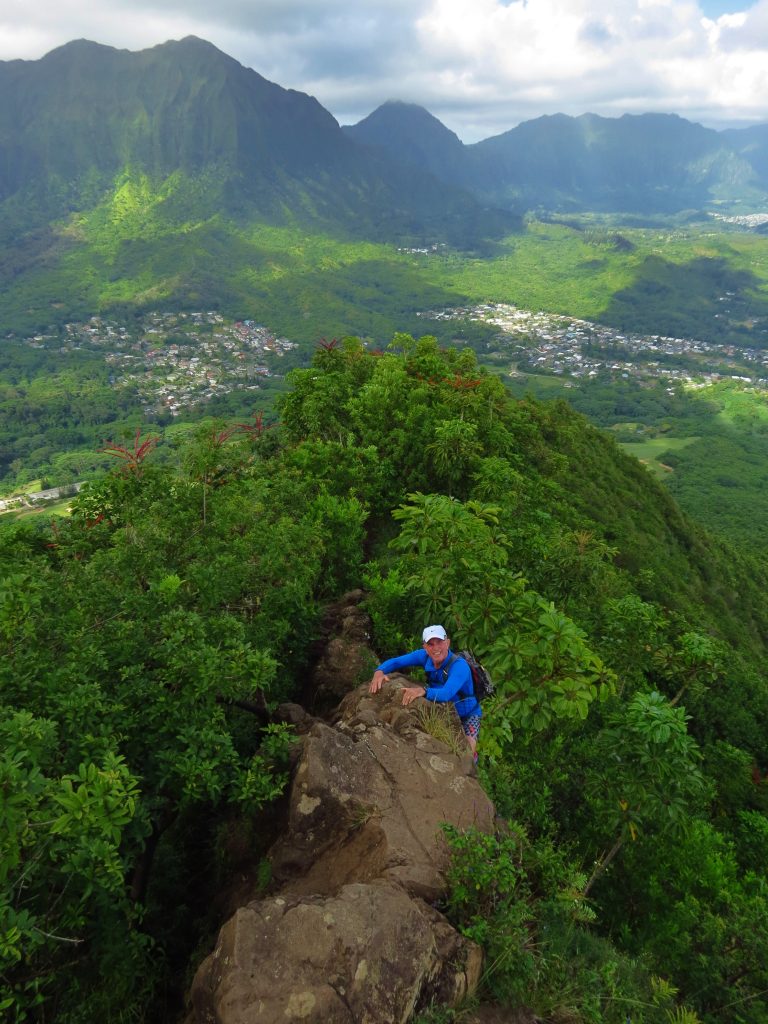
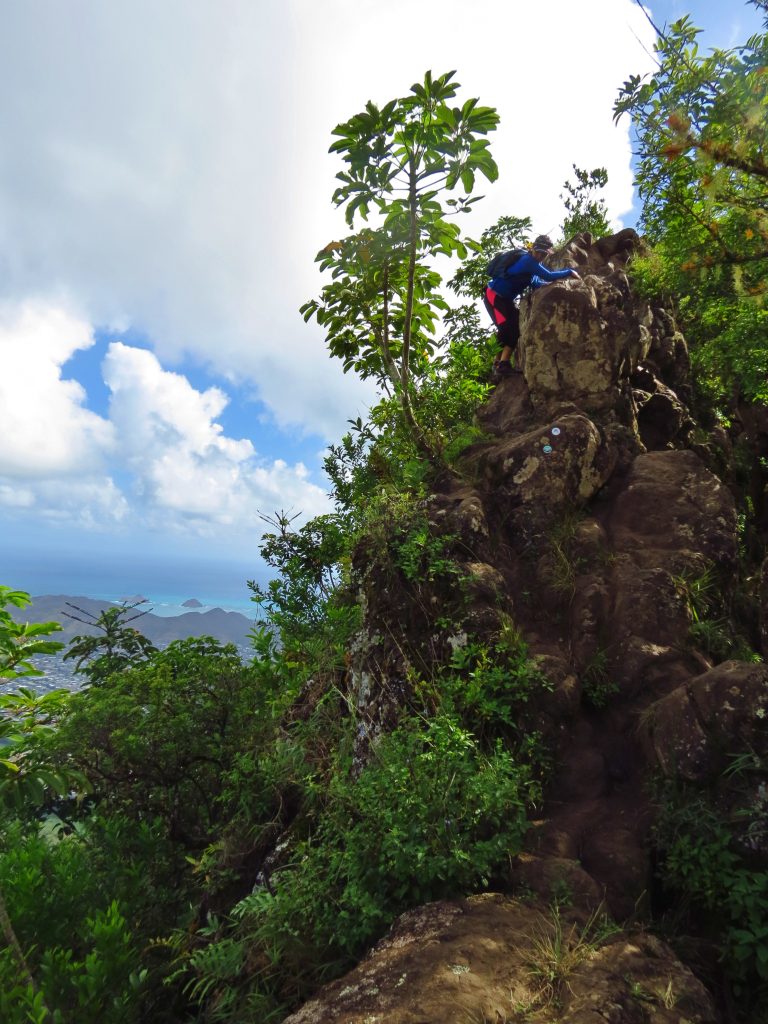
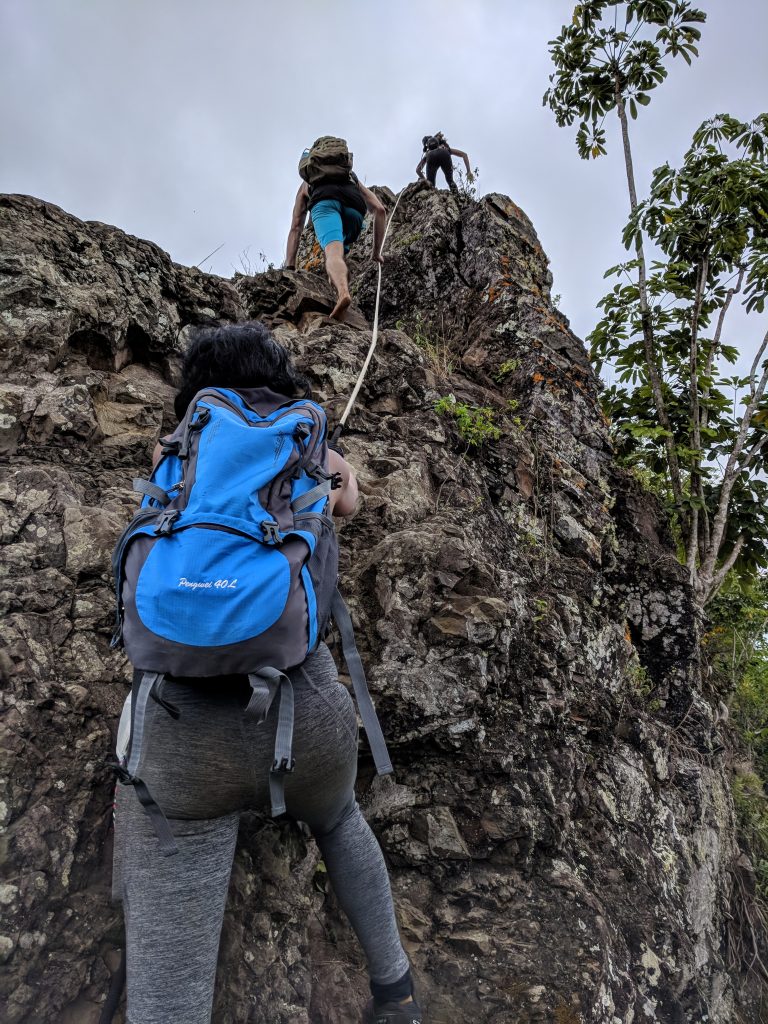
There is one section, and you’ll know it when you get to it, where the only option is up or around the rocks. Up is pretty much straight up and around involves some serious exposure – there is no easy route. The bottom two photos in the gallery immediately above show this part.
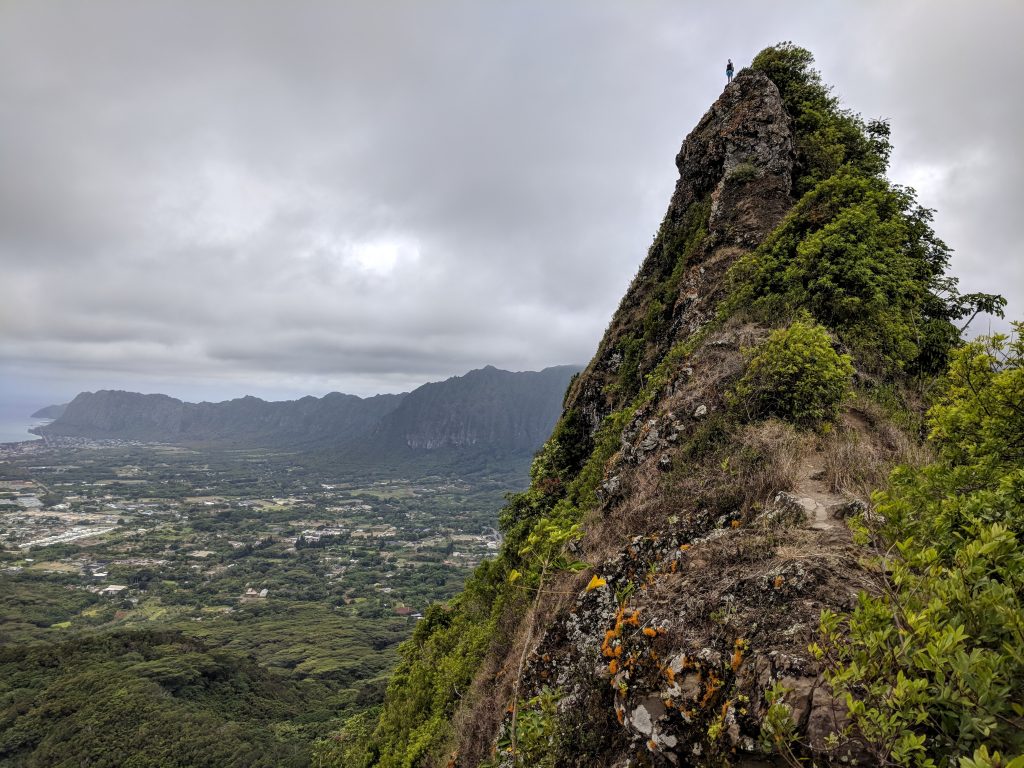
Once you get past that section, you’ll be at the top of Olomana Peak shortly. I’d plan on somewhere between 1.5 – 2 hours to get to the top of peak 1 and back. The 360-degree views are incredible.
Peak 2: Paku’i
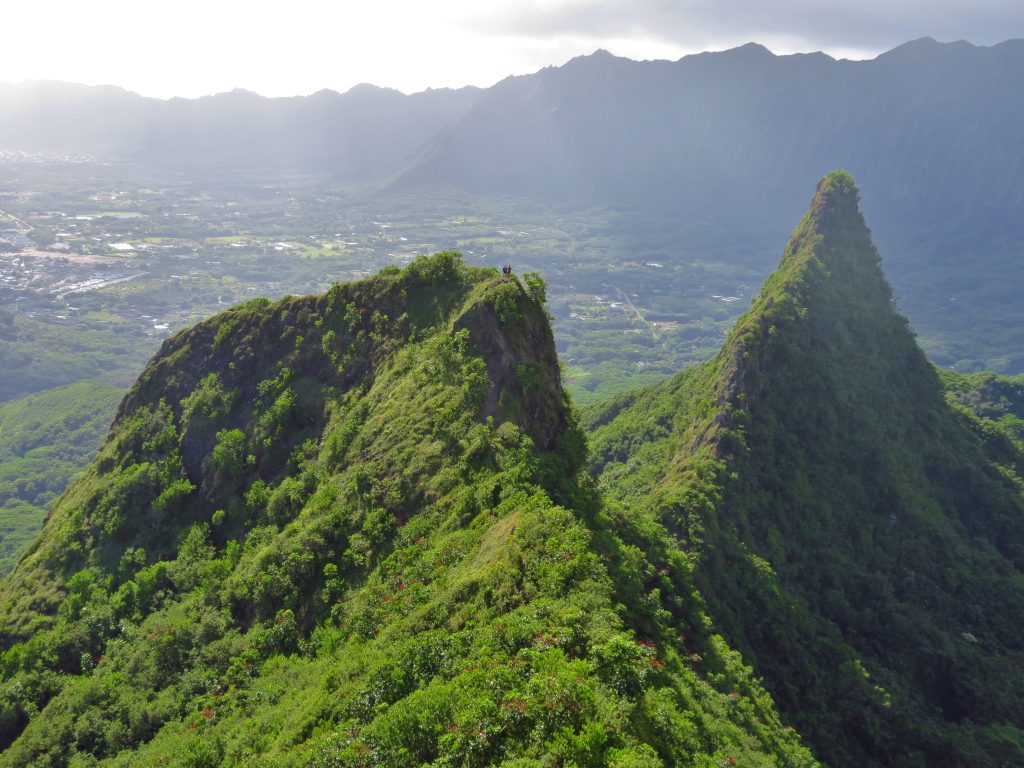
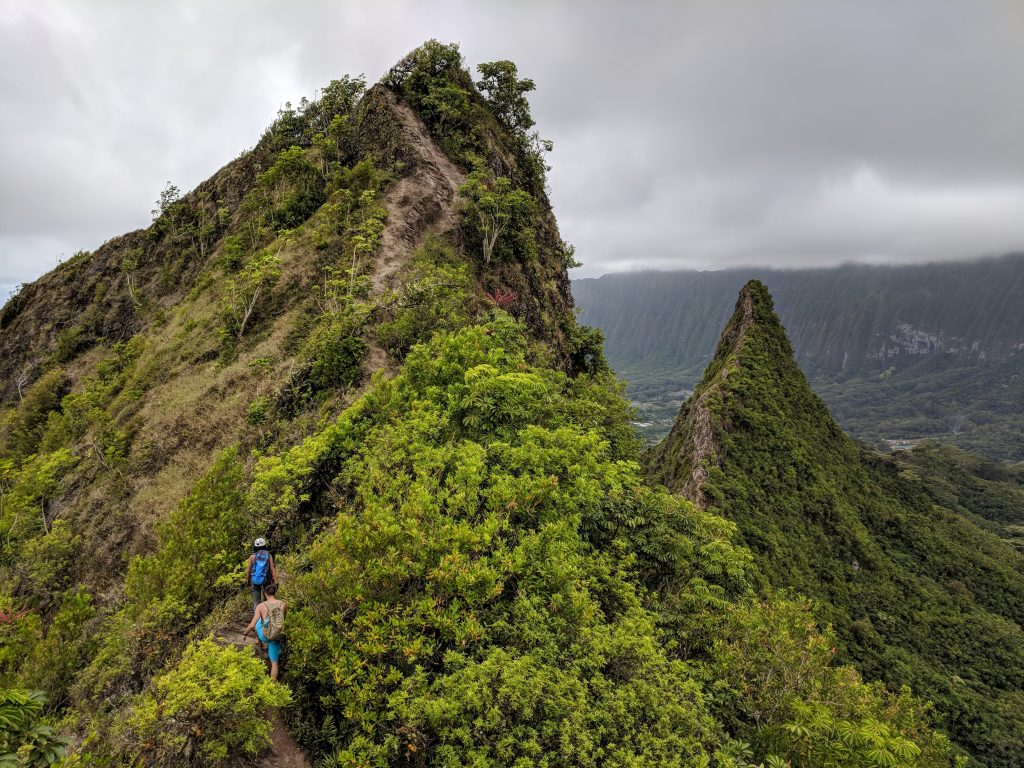
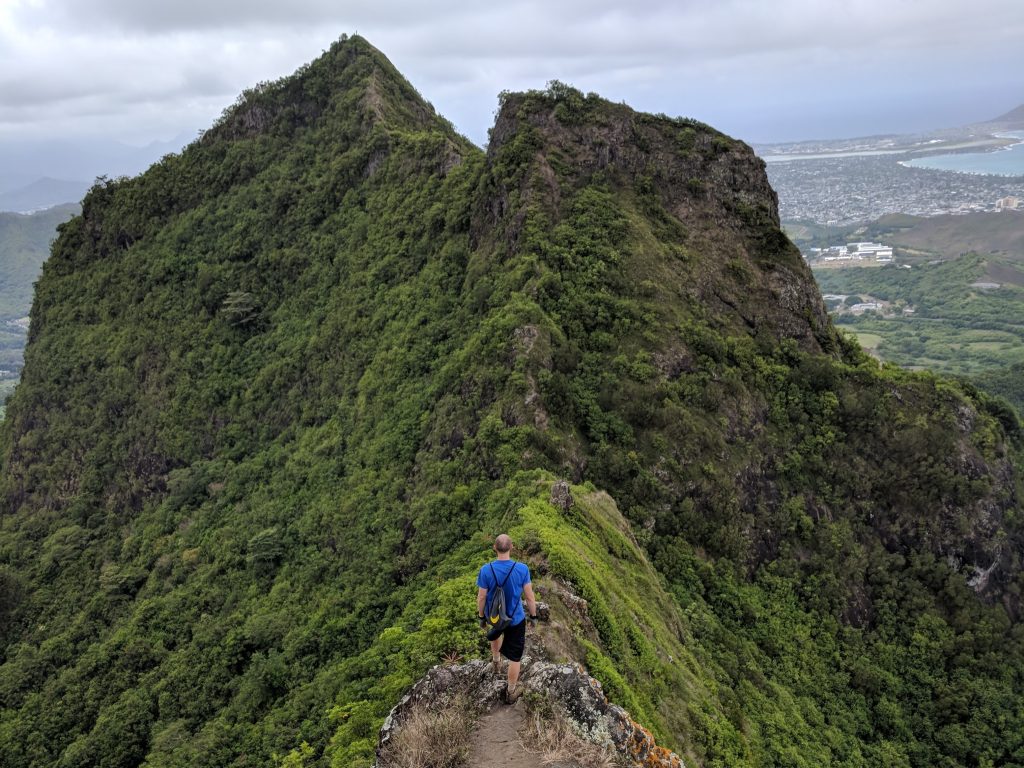
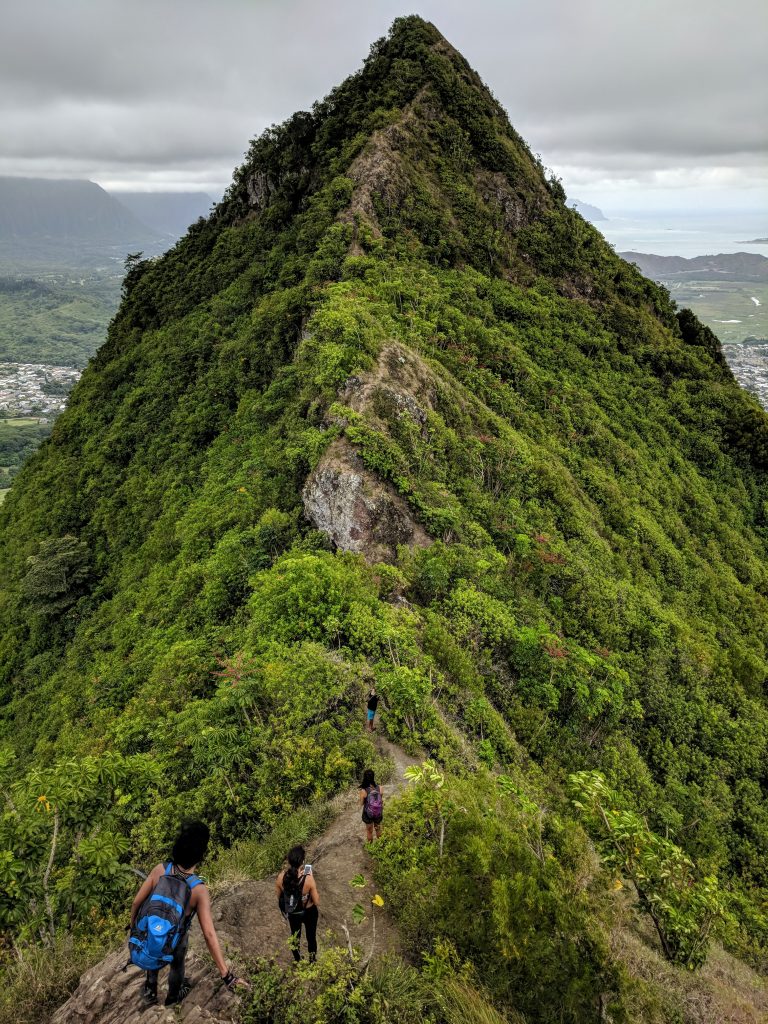
If you make it to the top of peak 1, I think you should definitely go to peak 2. It’s a relatively easy down and up venture and the view of the third peak from the second is worth the extra steps. You can see 2 people standing atop peak 2 along with much of the trail in the picture immediately above. It’s very straightforward section – not much to detail. If you’re going to the top of peak 2 and back, I’d plan on somewhere around 2 – 2.5 hours.
Peak 3: Ahiki
The first time I was here, it was Olomana 2 Peaks instead of Olomana 3 Peaks. I didn’t have time to attempt peak 3. To be honest, I don’t know that I would have been comfortable doing so. There is no shame in heading back at any point along this hike (or any hike, ever), but peak 2 is a great ending spot.
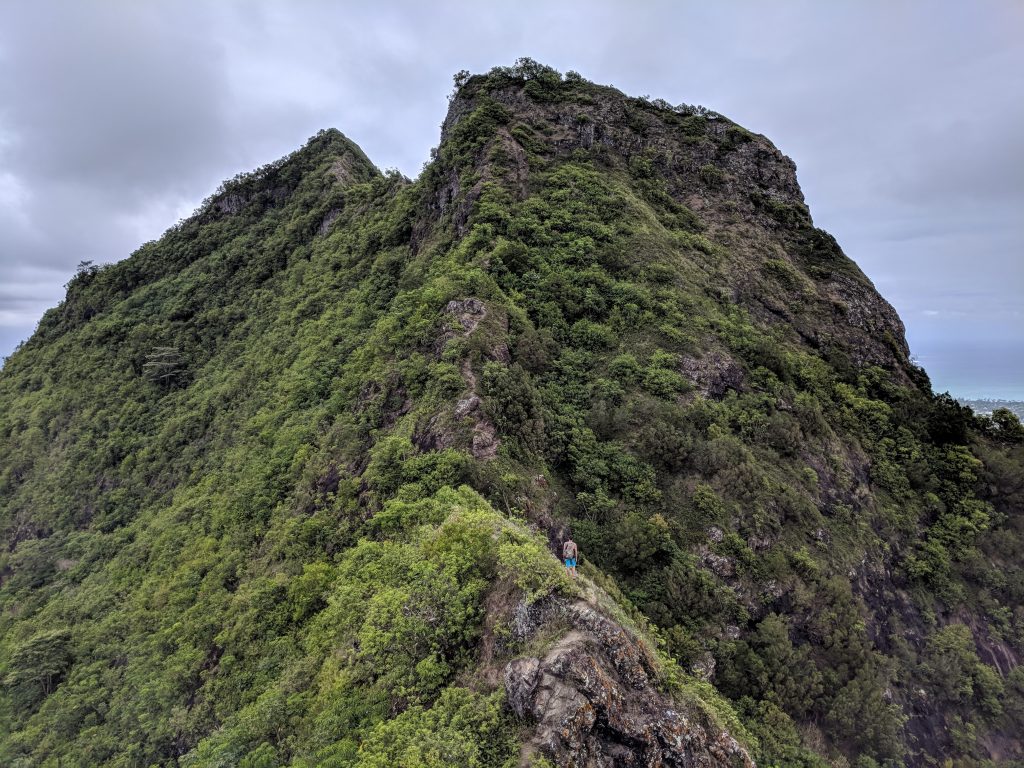
When I returned 2 years later, I made it to the top of Ahiki. The section from peak 2 to peak 3 is very technical and steep and you’ll know right away if it’s something you should try. Starting down peak 2 is very steep and there are ropes to help you get down. I saw people going down on their rear and others essentially rappelling using the rope.
I wouldn’t fully rely on the ropes; take your time and descend using whatever method you’re comfortable with. This part can be especially tricky if there are people trying to come up at the same time when you’re descending. Also, it can be very slick if it has recently rained. I would not attempt it if it’s slippery. Once you get past the initial steep part, it levels out before you get to the steepest and most dangerous part: summitting peak 3.

While the ropes show you where to make the ascent and may give you a sense of security, I think each advance should be secure enough with your feet and one hand that you wouldn’t fall if the rope snapped. You have no way of knowing how old or frayed the ropes are and there is no official agency or group maintaining this trail.
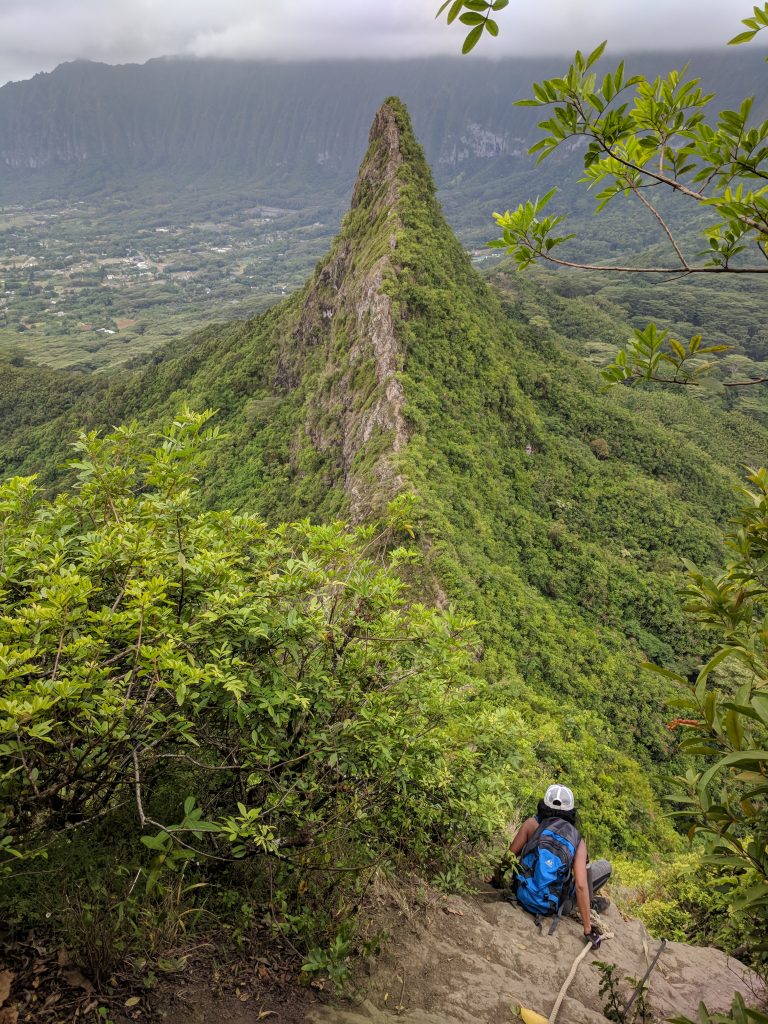
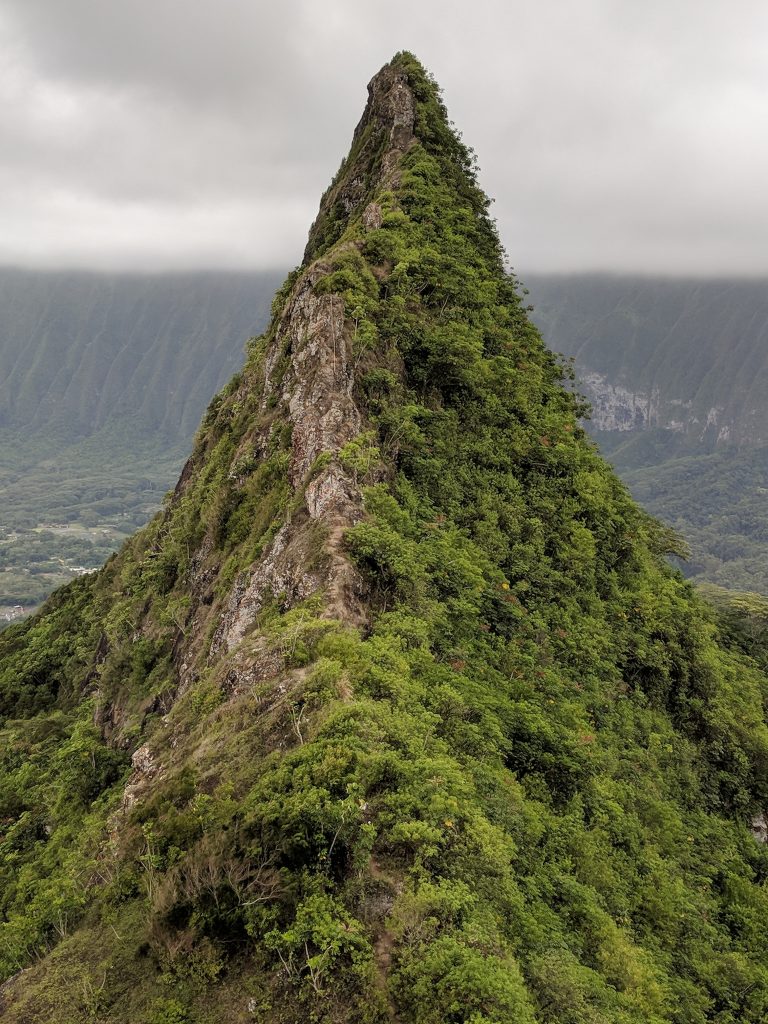
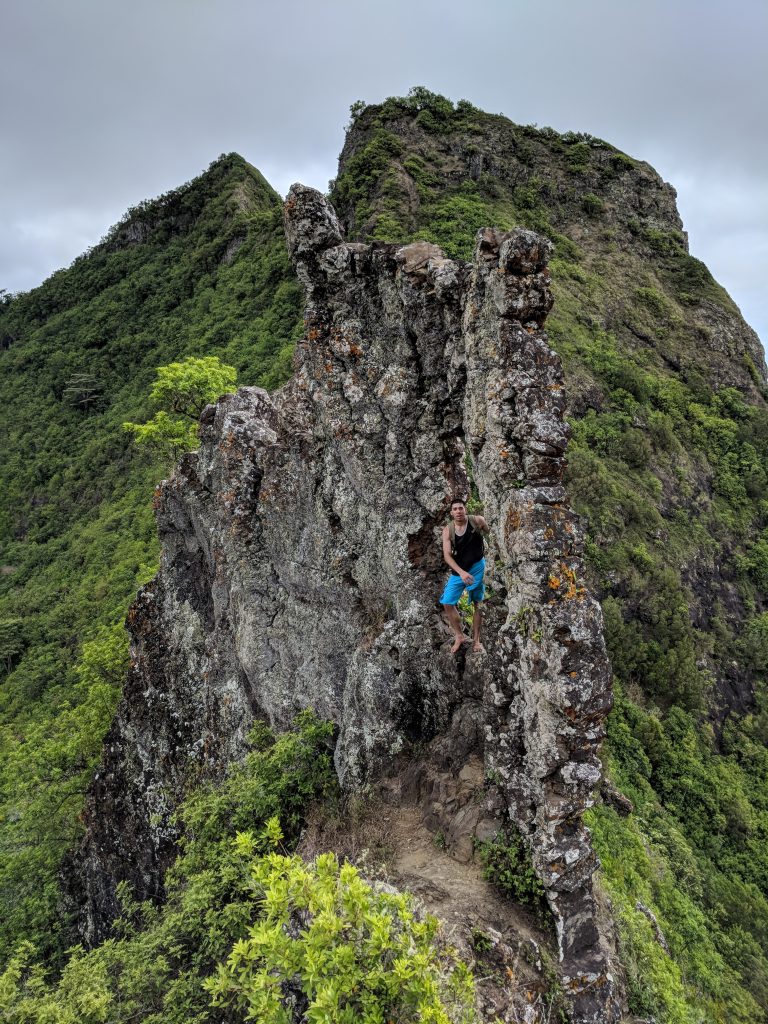
Peak 3 is all about the accomplishment for me. The view isn’t any better than peaks 1 and 2, and it’s one of those things that the view of it is better than the view from it. However, to look at a picture and know that you climbed that razor-like peak jutting up out of the earth is pretty awesome. Since the third peak takes the most time, I’d plan for 3.5 – 5 hours for the whole hike.
The return
After summiting the third peak, you still have a lot of work to do. Getting back is just as difficult, if not more so because your eyes will be focused down instead of up. That first part where it’s completely vertical can be very challenging and fear-inducing since a fall would result in serious injury or death.
Take your time, and I can’t stress how important it is to make sure your limbs are securing you, not the rope. Once you get to the end of the ropes, you have that nice, easier section before you start the very steep ascent to get to peak 2.
Back atop peak 2, the hardest part is over. Look back at peak 3, marvel at what you just did, and head down then up again to peak 1.
Retrace your steps from peak 1 back to the trailhead and you’re done!
Have you ever climbed the Olomana 3 peaks, or have questions on it? Please leave a comment below!
Leave a reply