The most important thing on this page: please follow the 7 principles of Leave No Trace whenever hiking (and all the time, actually – most are pretty good general life tips, too):
- Plan ahead and prepare
- Travel and camp on durable surfaces
- Dispose of waste properly
- Leave what you find
- Minimize campfire impacts
- Respect wildlife
- Be considerate of other visitors
Now, on to Fimmvörðuháls. Here are the quick facts:
- Where: Icelandic highlands
- More specifically, where: It is a point-to-point hike that can be done in either direction. The two points are Thorsmork (Icelandic: Þórsmörk) and Skogafoss.
- Distance and elevation: there are multiple huts in Thorsmork that you can start/finish at. The hike ranges from 15 – 18.5 miles (24 – 30 km) with ~3,000 feet (915 meters) of elevation gain.
- Highest point: 3,500 feet
- Why you should hike this trail: just look at the pictures. Most varied and unbelievable landscapes on earth: waterfalls, mountains, canyons, volcanoes, glacial pools, and more.
- Fee or permit? No
- Best time of year: late June – early September, but this can be a very dangerous hike with unpredictable and life-threatening conditions at any time. Make sure to check the forecast and plan accordingly.
Tips for Fimmvorduhals
- A GPS and way to contact emergency services is a must. People had to be rescued each of the next 2 days after we did this hike. Visit SafeTravel Iceland to view all their resources, submit a Travel Plan, and download their app.
- Take the logistics and extra travel time out of the end of your hike: hike to your vehicle instead of starting your hike where you park. I’d recommend starting in Thorsmork and ending at Skogafoss.
- Hitchhiking is your friend when trying to coordinate how to get to your starting point.
- Light is also your friend – over 20 hours of sunlight in the summer means you have plenty of time to do this without worrying about it getting dark.
- I have no idea how to pronounce it.
Step 1: choosing which direction to hike
There are lots of challenges with Fimmvörðuháls (English spelling of Fimmvorduhals to be used from here on out): figuring out where and how to start and end; the weather; the varying terrain; the distance and elevation gain; wanting to take a million pictures. To get started planning, you need to determine which direction you want to hike. We started in Thorsmork and ended in Skogafoss, and even though that’s not what most people do, we are glad we did. I don’t think there’s a wrong choice, but here are things to consider:
- Starting at Skogafoss: the waterfalls are in front of you as you hike uphill.
- Starting at Skogafoss: a steady, gradual incline with a steeper descent into Thorsmork.
- Starting at Skogafoss: have to stay in Thorsmork or have a bus/pre-arranged ride back. This means you might be hiking against a deadline, which we did not want.
- Starting in Thorsmork: must arrange transportation into Thorsmork (more on that below).
- Starting in Thorsmork: an aggressive incline up to Fimmvorduhals, possibly with snow, and a gradual descent.
- Starting in Thorsmork: you’re approaching the waterfalls from the top-down, so the views may not be as appealing (solved by simply turning around).
- Starting in Thorsmork: you don’t get time to explore Thorsmork (unless getting there at least a day before you start the hike).
The distance ranges from 15 – 18.5 miles, and it’s 15 miles from the closest hut (Basar) to Skogar. There is another hut, Langidalur, that adds about a mile, and the third and furthest hut from Skogar is called Husadalur. That one is by the Volcano Huts (book accommodation here) and is 18.5 miles from Skogar. If you’re doing the day hike, I would just plan on starting or stopping at Basar since the buses stop there and it’s the least mileage. There is only food by the Volcano Huts, however, so if you’re ending in Thorsmork you’ll have to go the full 18.5 if you’re planning on buying food when you get there.
Step 2: lining up your transportation
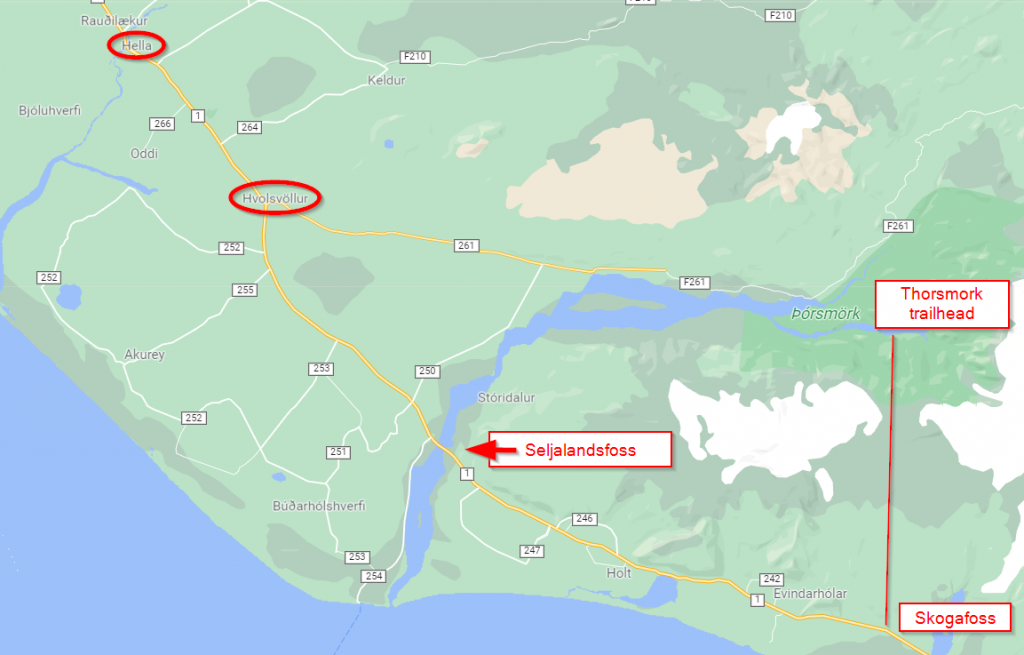
Now that you’ve decided the direction, next is figuring out transportation. Unless you’re booking a private tour/transportation, you’ll need to take a bus to or from Thorsmork. You cannot get there in a rental car, even with a 4×4 – please don’t try. The buses and tour vehicles are specially outfitted to handle the substantial and numerous water crossings.
If you’re taking the bus, which I recommend, one of the keys is making sure you know where and when the stops are. Things have changed over the years, as there used to be a bus schedule that allowed you to catch a ride from Thorsmork to Seljalandsfoss in time to catch another one back to your car at Skogafoss. Now they don’t stop at either place, so Hella (at the Kjörbúðin Supermarket) and Hvolsvöllur (at the N1 Gas Station) are your best options to catch a ride into Thorsmork as of 2022.
You’ll want to check the schedules to make sure you know all the options, and check them again leading up to your trip to make sure nothing has changed. There are 2 bus companies that go to Thorsmork: Reykjavik Excursions and Trex. It looks like the Trex buses are faster, but think around 2 hours into Thorsmork from Hvolsvöllur and around 30 minutes more from Hella. Buses only go to Thorsmork from around June 15 until the end of August, so that’s another reason to check the schedules before you plan your trip.
To make this all work in the Skogafoss to Thorsmork direction: park at one of the bus stops; hitchhike or arrange a ride to Skogafoss to start the hike from there; and then take the bus from Thorsmork back to your car. Alternatively, you could stage 2 vehicles but that’s never ideal unless you’re a local.
When we did this hike in late June 2018, we parked at Skogafoss around 7:45 am and hitchhiked to Seljalandsfoss. It’s just down the main Ring Road and not much of a burden at all on drivers that are heading that direction. Hitchhiking is common; we had no problem getting a ride and picked up several hitchhikers while in Iceland. From Seljalandsfoss we caught the 10:10 bus into Thorsmork. Sadly, that does not seem like it will be an option since the company, Sterna, is no longer operating. You might be able to catch a ride from Skogafoss to Hvolsvöllur, however, and hop on the bus there. In the event that we weren’t able to catch a ride, we were going to hike the “Waterfall Way” portion of the Fimmvorduhals trail, turning around at the footbridge (more on that below).
Even though most people start at Skogafoss, I thought it would be better to start in Thorsmork and still stand by that being the better option after doing it. Once we got to Thorsmork, we could take all the time we wanted on the hike. We knew we weren’t going to run out of daylight and didn’t have to be back by any certain time to catch a ride. What I viewed as the biggest benefit was knowing that we had a short drive in our vehicle to get some food and get back to our lodging in Vik. A long bus ride and then another drive, with no good food option, doesn’t sound like the best ending after this monster of a hike.
Step 3: have everything you need
I don’t like giving time estimates because there are a lot of factors that can increase or decrease your hike time. With 15 miles and thousands of feet in elevation gain, plan on the Fimmvorduhals trail taking most, if not all, of the day. Some necessities:
- Water – Thorsmork and the middle of the hike do not have water, and neither do the huts. There are a couple opportunities along Waterfall Way to grab and filter water, however, so unless you melt snow, you’ll want to have at least 2 liters per person.
- Food – have plenty of snacks, especially if you’re taking the bus out of Thorsmork at the end of your hike.
- Waterproof shoes and rain gear – I would take the rain gear even if rain isn’t in the forecast as it cuts the wind.
- GPS
- Camera
- Extra socks – always a good idea
Step 4: do the hike
It’s easy to divide Fimmvorduhals into 3 parts since they are all distinctly different: Thorsmork, the comparatively boring middle, and Waterfall Way. This guide will go over the hike from Thorsmork to Skogafoss, but hopefully you still find it helpful if starting from Skogafoss.
Thorsmork
There is a ranger station right by where the bus drops you off at Basar – I highly recommend stopping in and chatting with the ranger to check on the weather and anything else they’d want you to know about the conditions.
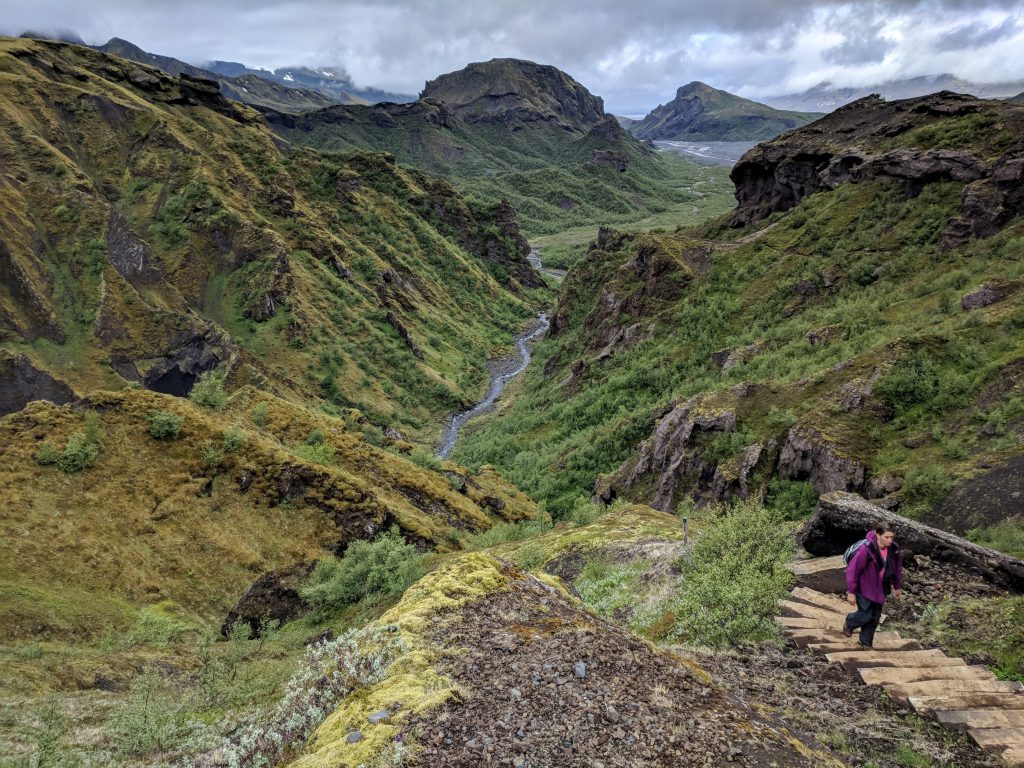
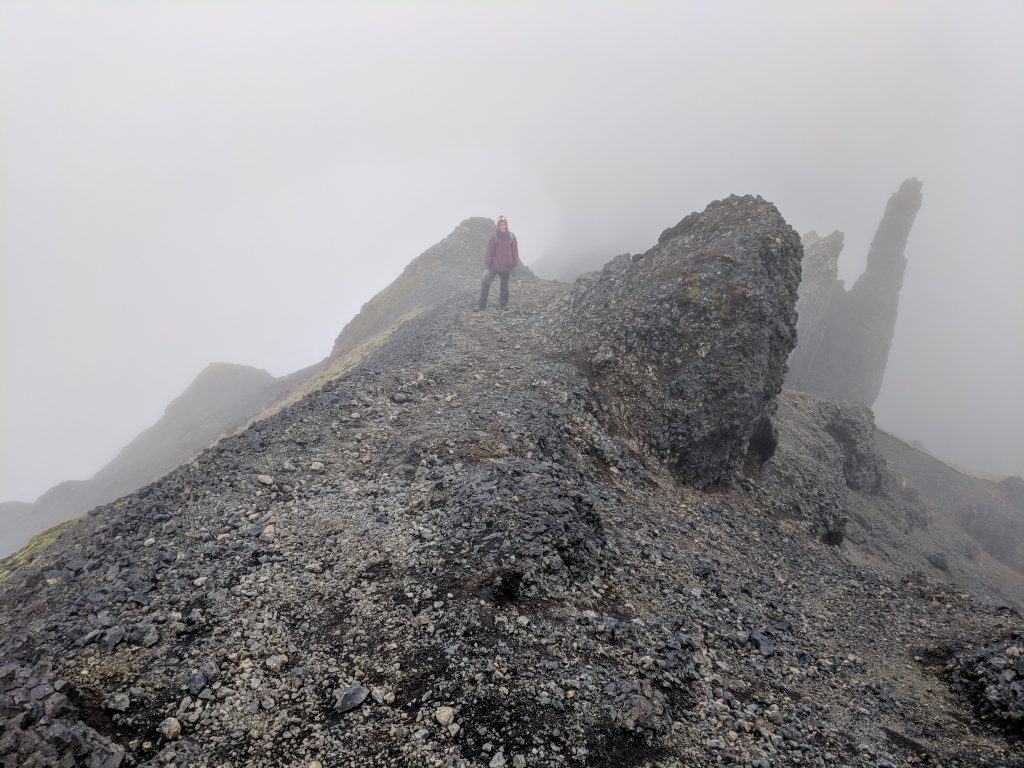
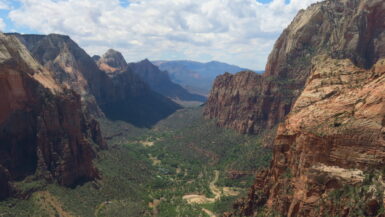
Hiking up and out of Thorsmork stands out as the most amazing part of the hike (and that’s saying something – wait until you see the waterfall photos). Maybe even the most amazing place we’ve ever been. There are some stairs but it’s mostly an ascent on dirt. There is one spot called the Cat’s Spine that some people have described as a very narrow, scary ridge. I think that’s an exaggeration, but it could be intimidating if you are very uncomfortable with drop-offs.
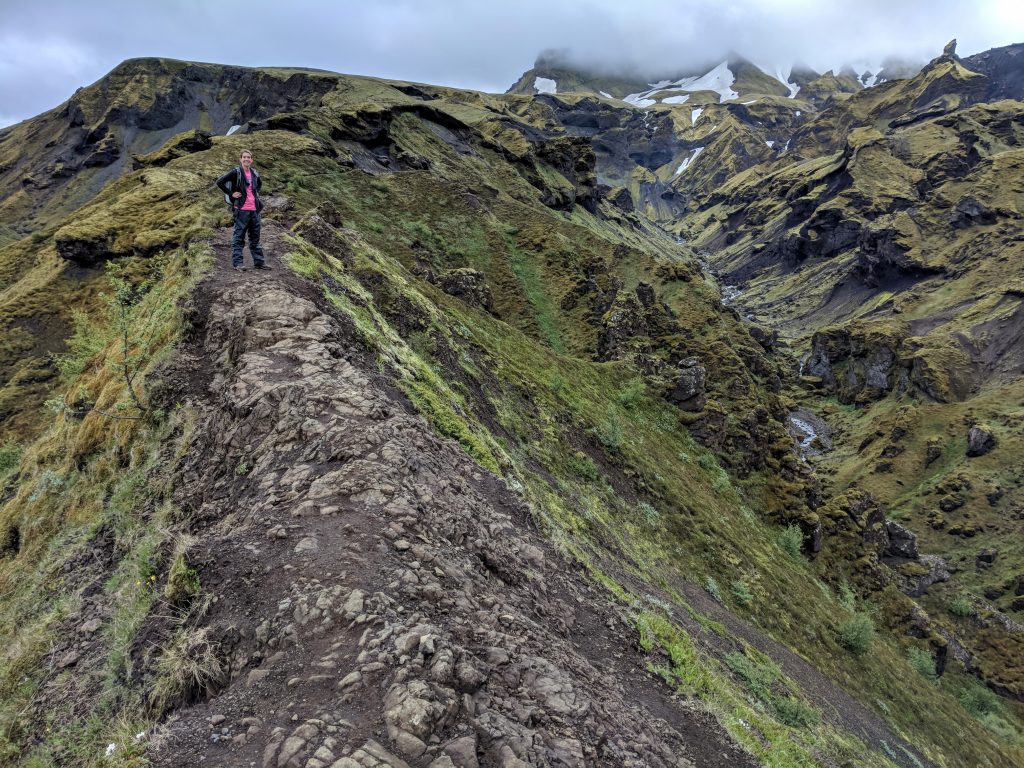
My wife and I both vividly remember being speechless along this stretch. What made it even more special was that we had it all to ourselves. We did not see another person until we had gotten into the clouds.
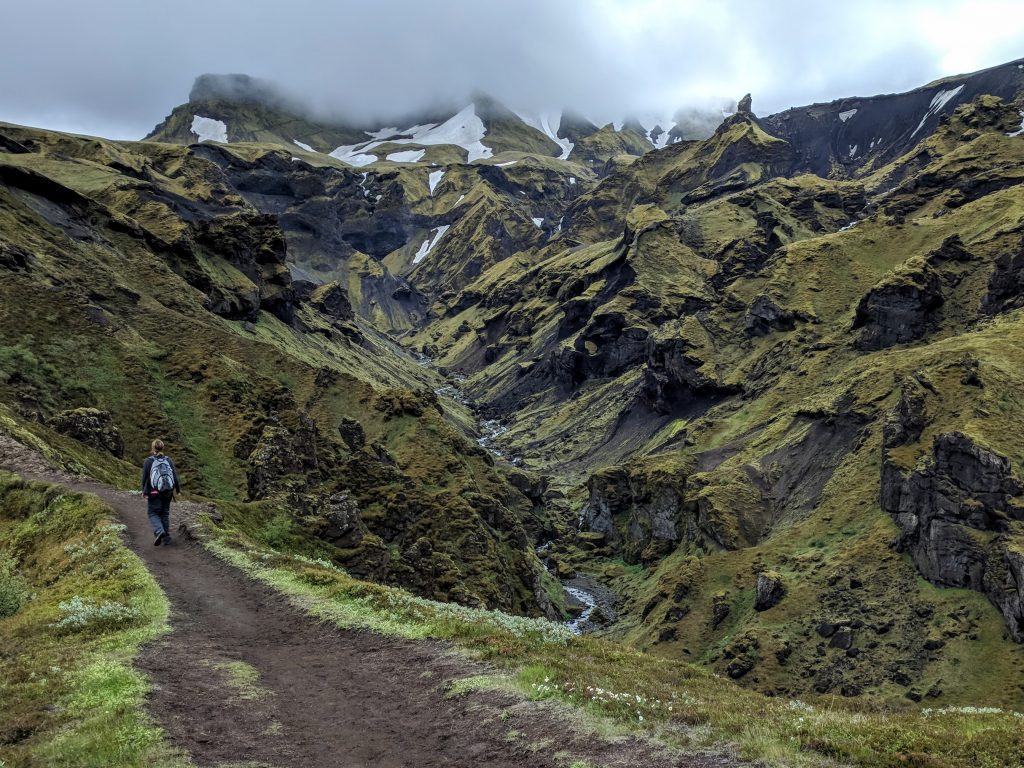
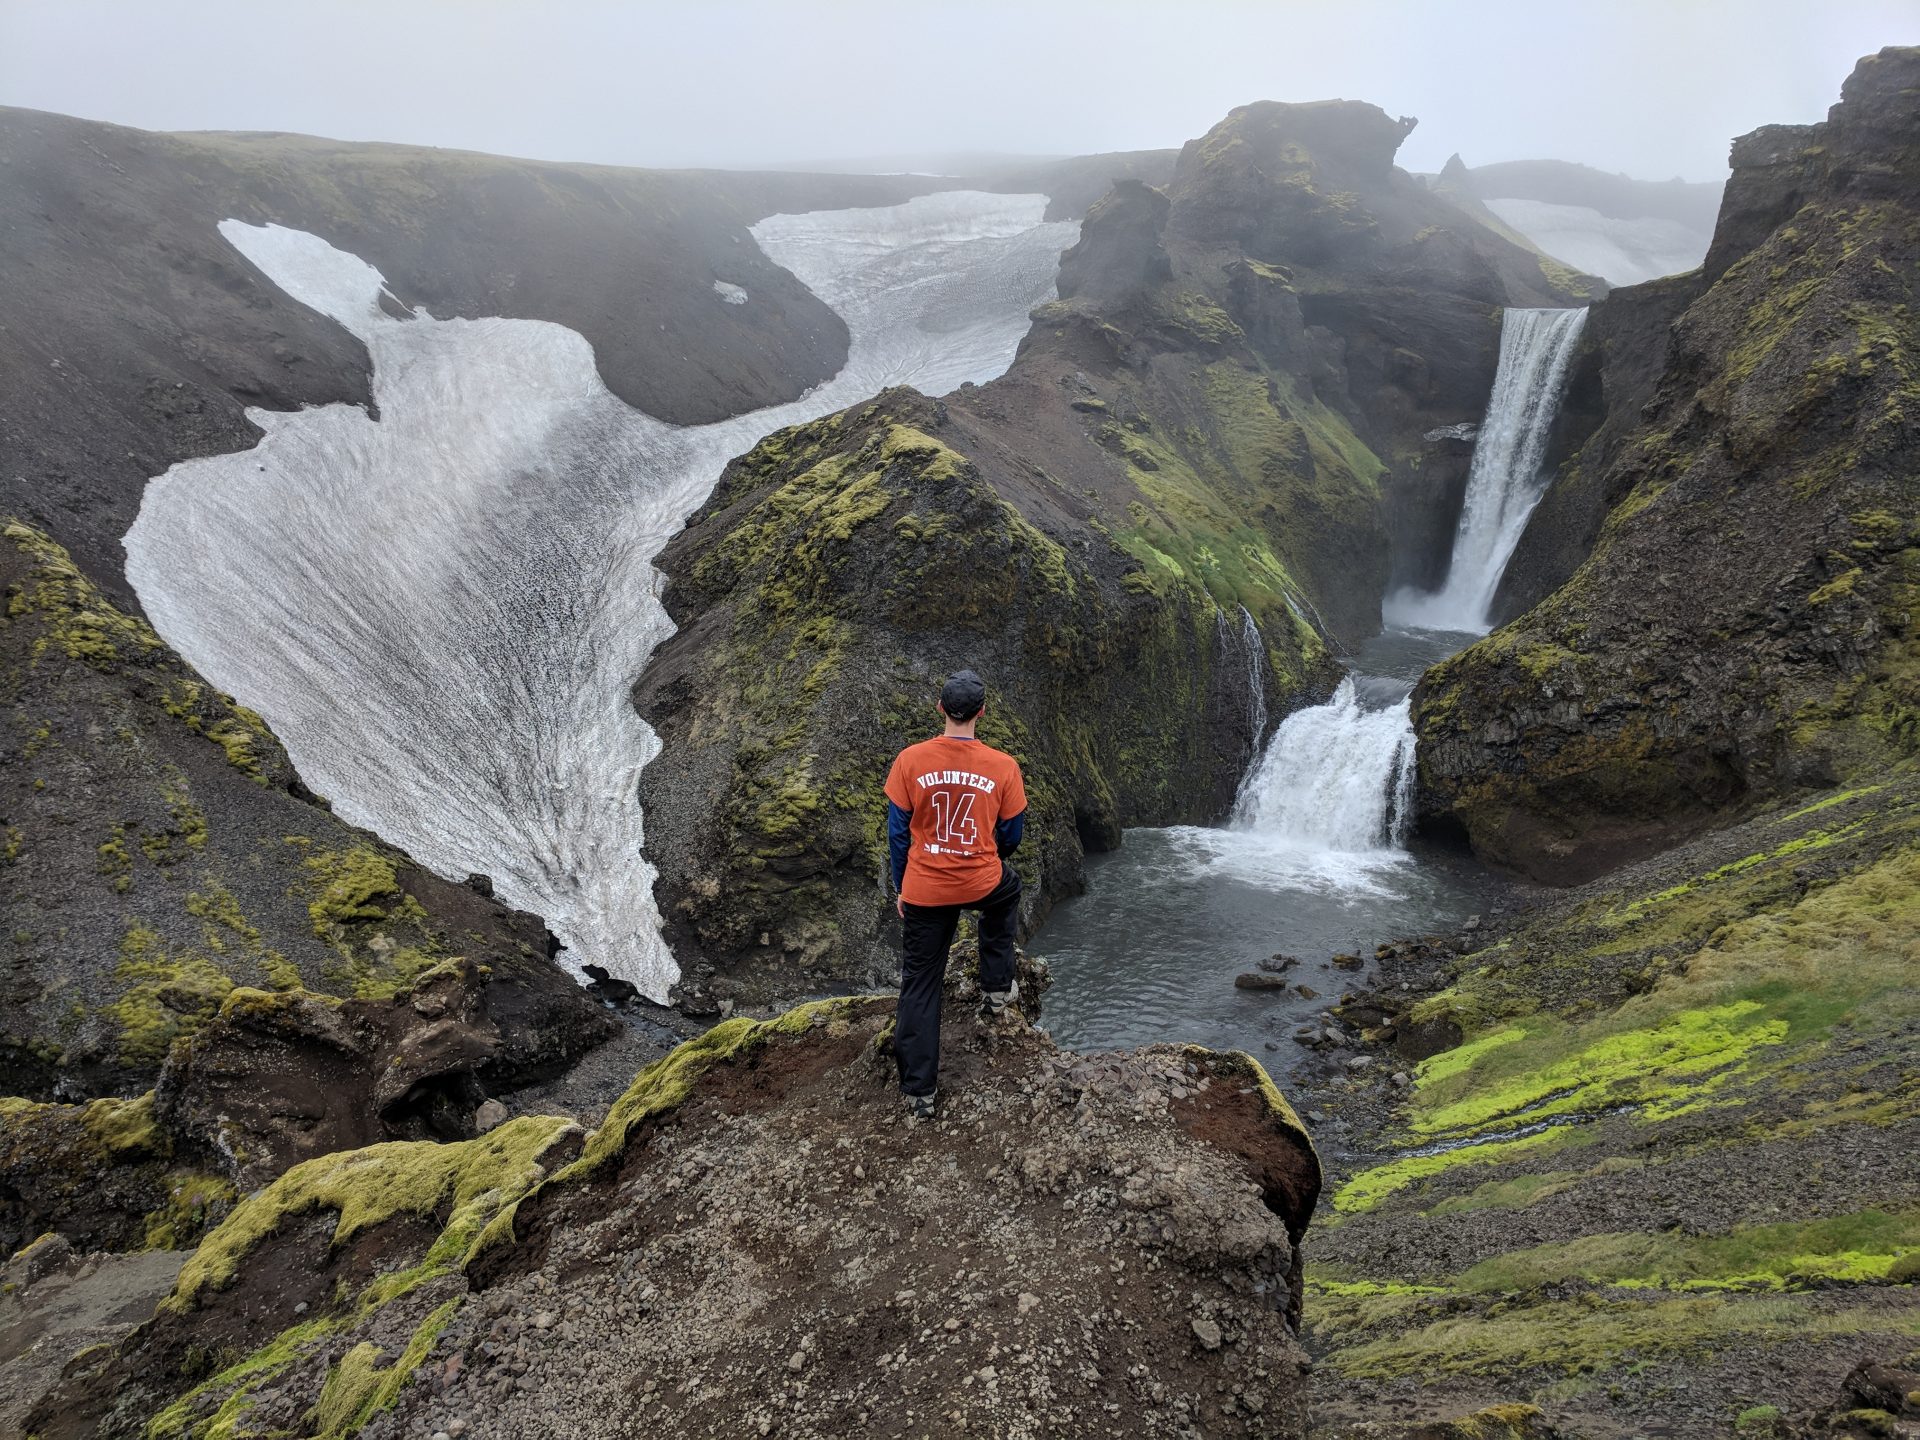
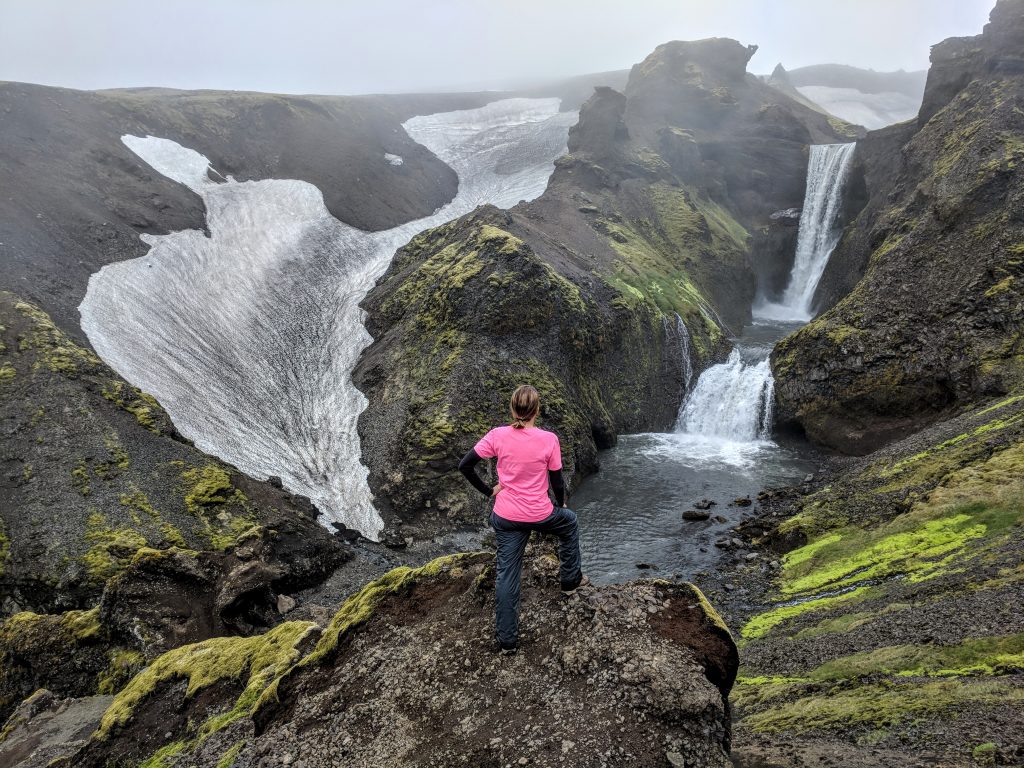
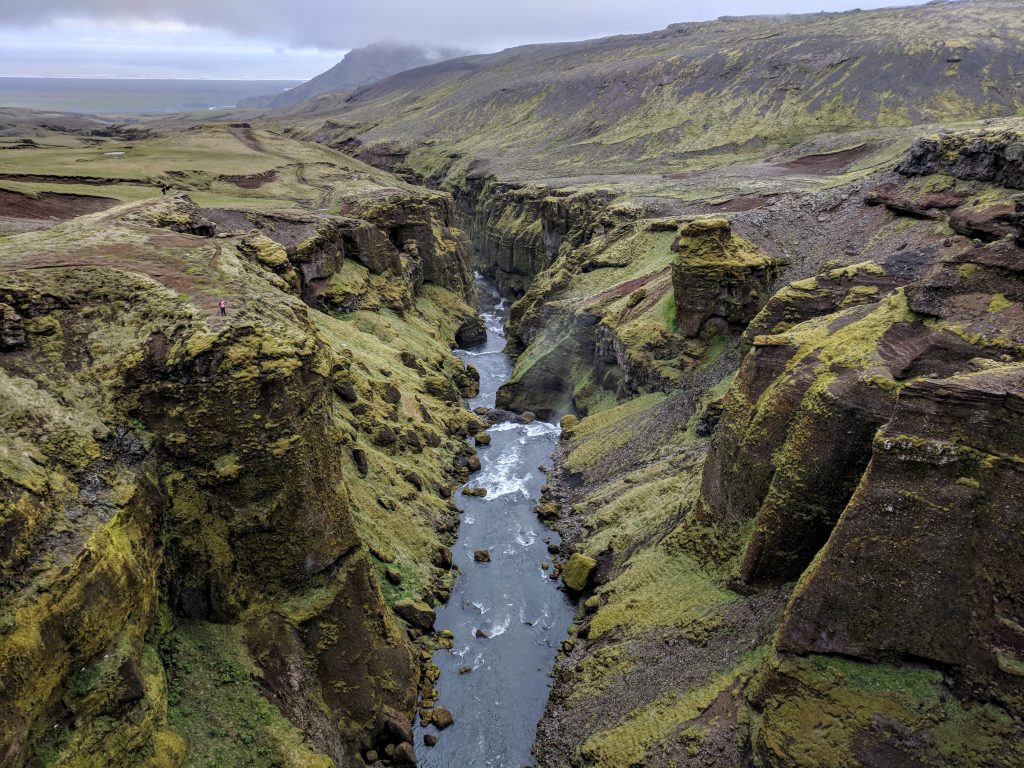
While the views were unbelievable hiking up, you can probably imagine from the top of both the photos above that the views got, well, nonexistent. It was disappointing as we didn’t get a good view looking back down to Thorsmork. The view of Hvannagil Canyon was one of the things I most wanted to see with my own eyes. Maybe next time. There was one area that was very sketchy since there was snow covering parts of the chain, and a slip would have resulted in a very long fall into an unseen abyss. This section was uphill through snow with no visibility and not the most fun.
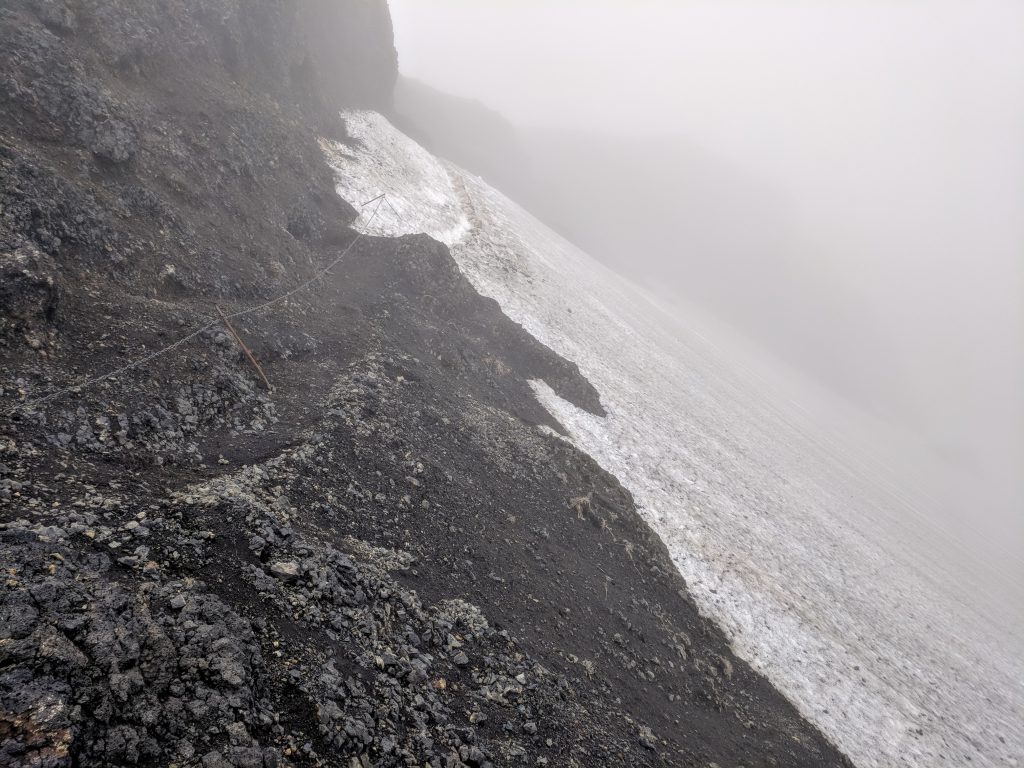
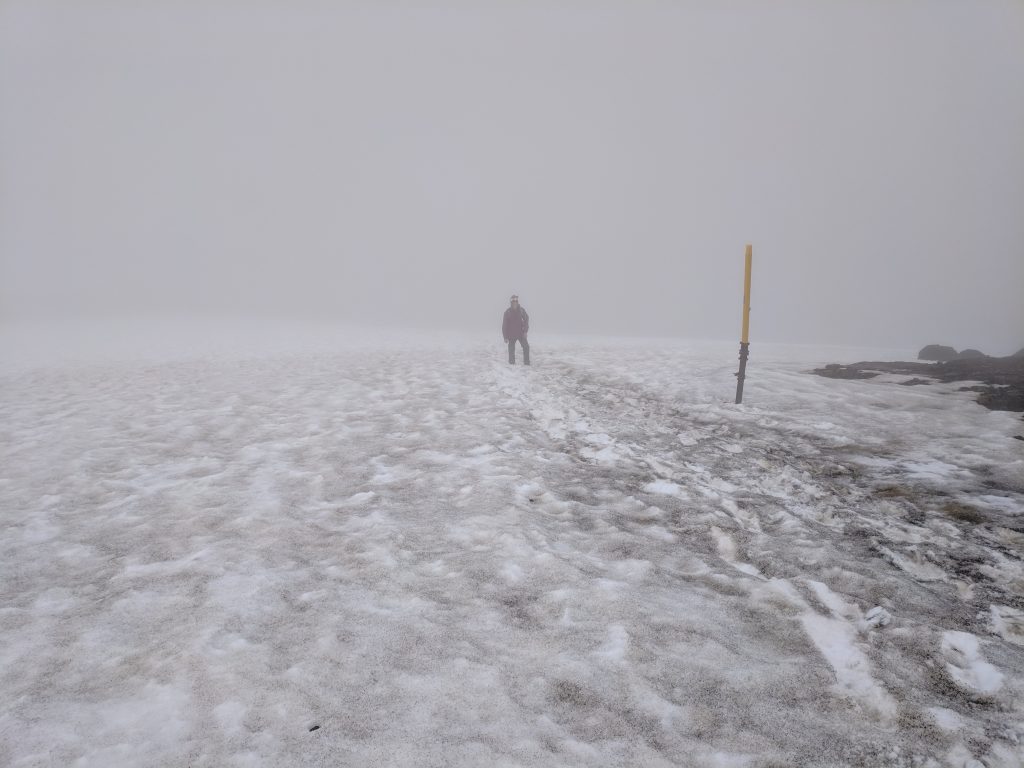
One of the things we were concerned about was visibility for Fimmvorduhals. It can be very easy to become disoriented and lose your way in this area. There are poles, as you can see in the photo. However, there were multiple times where we couldn’t see one for a while. Luckily, there were plenty of footprints to help us. That’s something we asked the ranger prior to starting. Also, the GPS kept steering us in the right way.
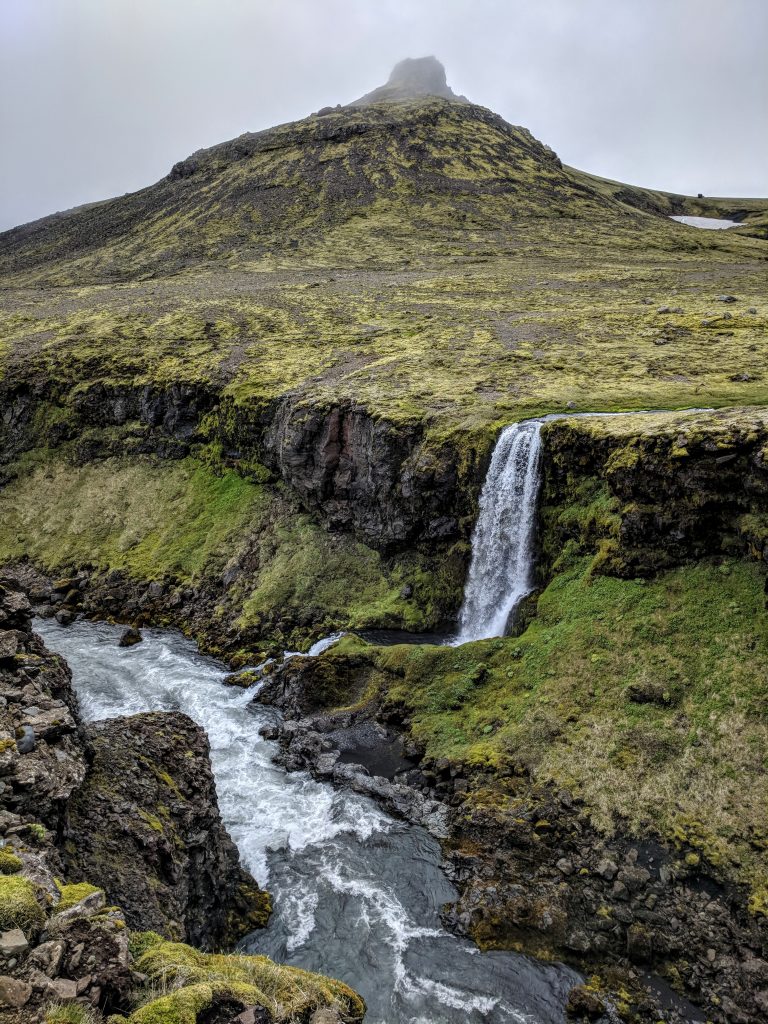
The middle: over Fimmvorduhals pass
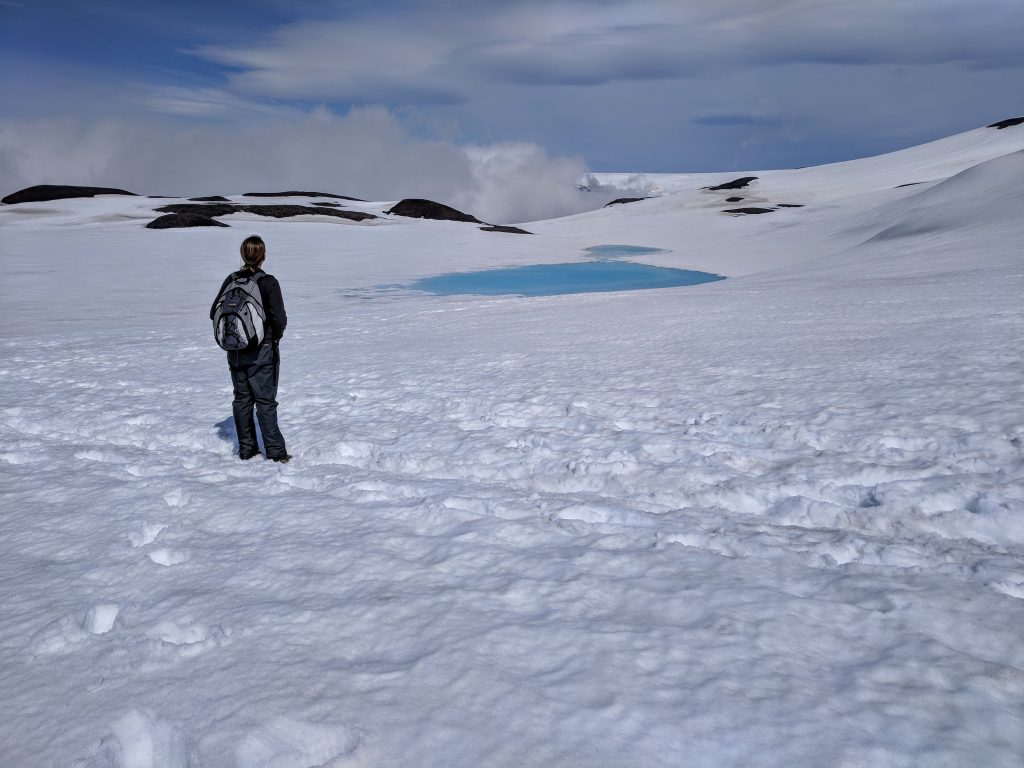
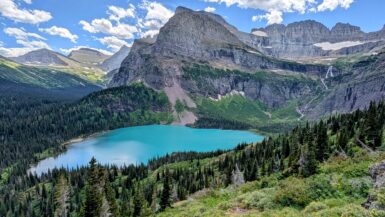
While it is the least fun part of the hike, it is very geographically interesting. You pass between 2 glaciers on what are billed as some of the newest mountains on earth. Magni and Móði were formed by the 2010 Eyjafjallajökull volcanic eruption. We were able to get above the clouds and visibility greatly improved through this part. It’s a very long slog through snow and not much else to report.
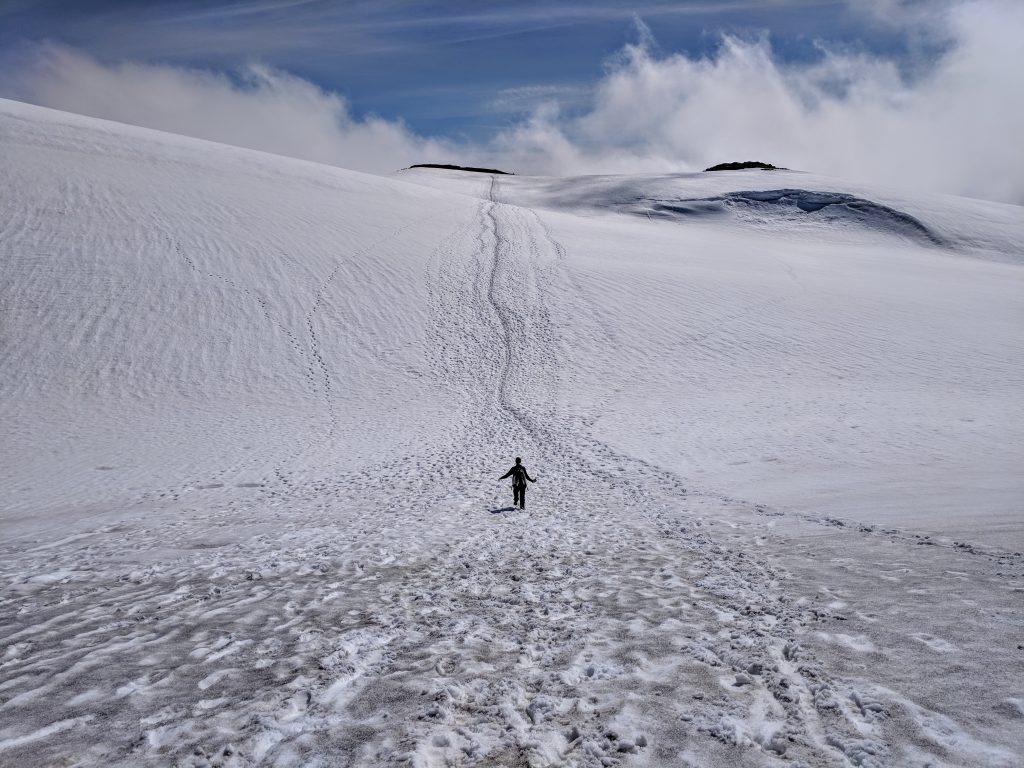
This middle section, from coming out of Thorsmork to the start of Waterfall Way, is around 7 miles. Once you get to the Baldvinskalli hut, you’re about 3 miles from the footbridge which “officially” starts Waterfall Way. Unless you are staying the night at the hut (request a booking well in advance here), just keep going. Remember there is no running water there.
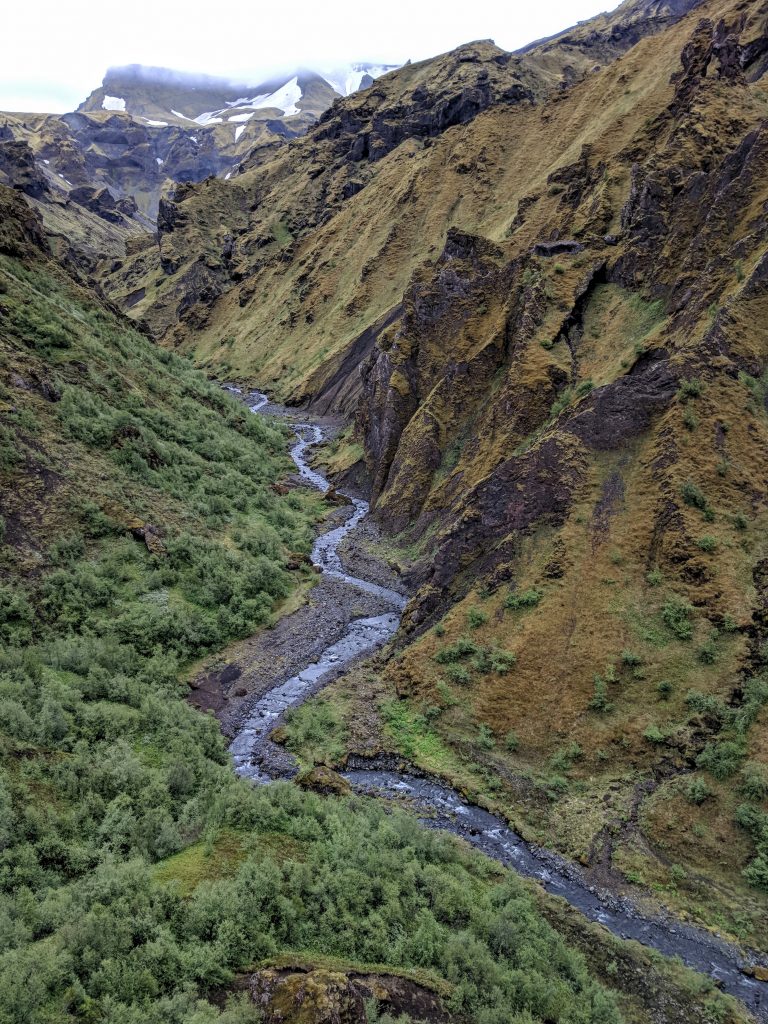
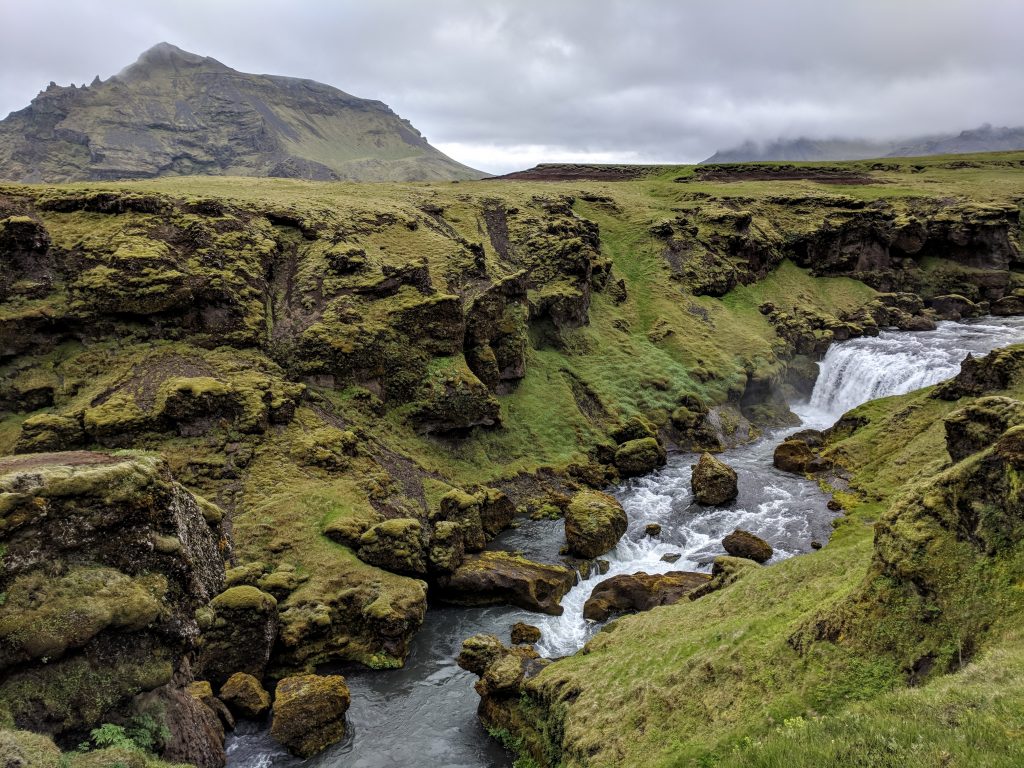
Waterfall Way
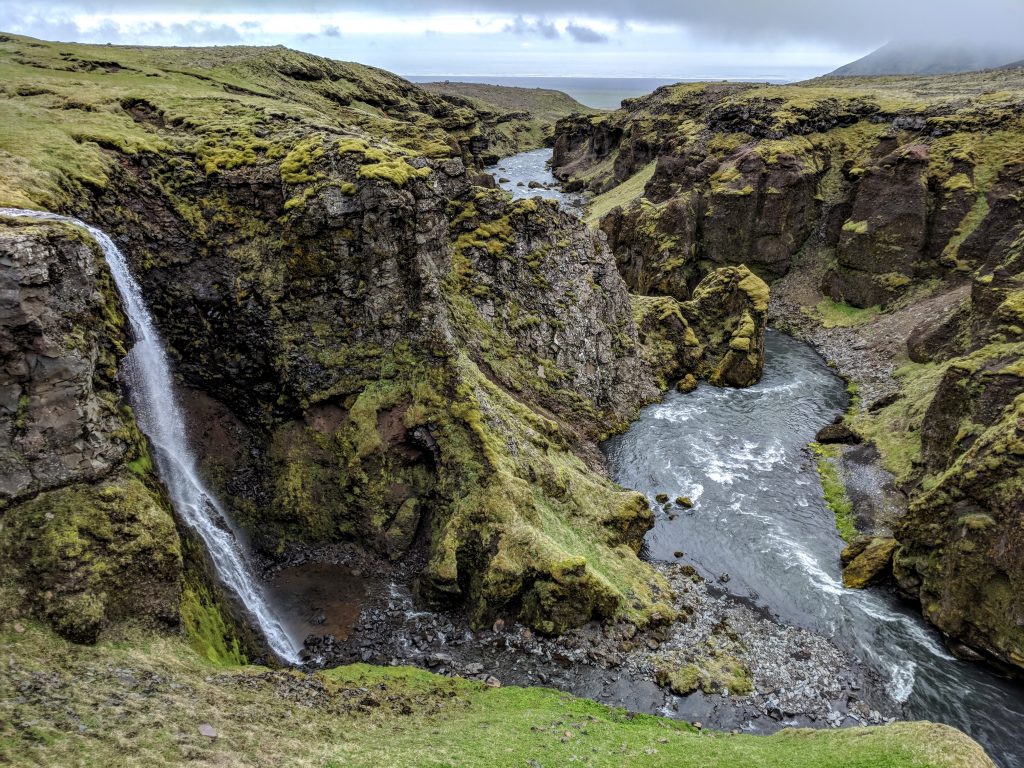
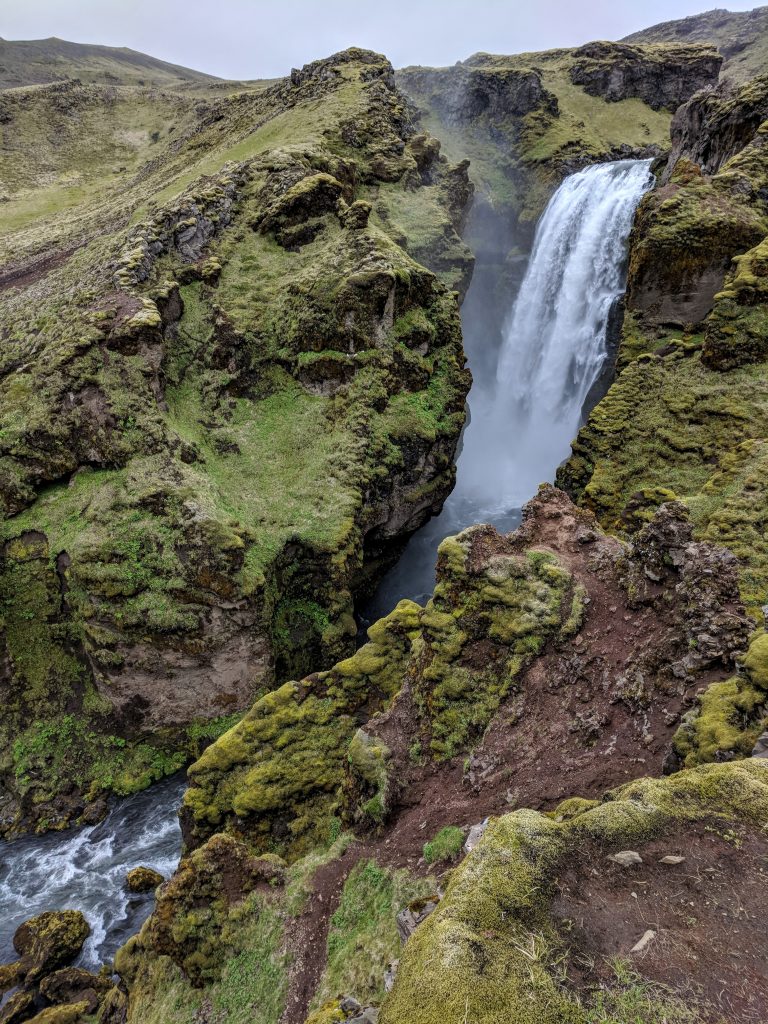
All that’s left of the Fimmvorduhals trail is passing 26 waterfalls along a gradual 5-mile descent. Unfortunately for us, it was back to low visibility for the first part.
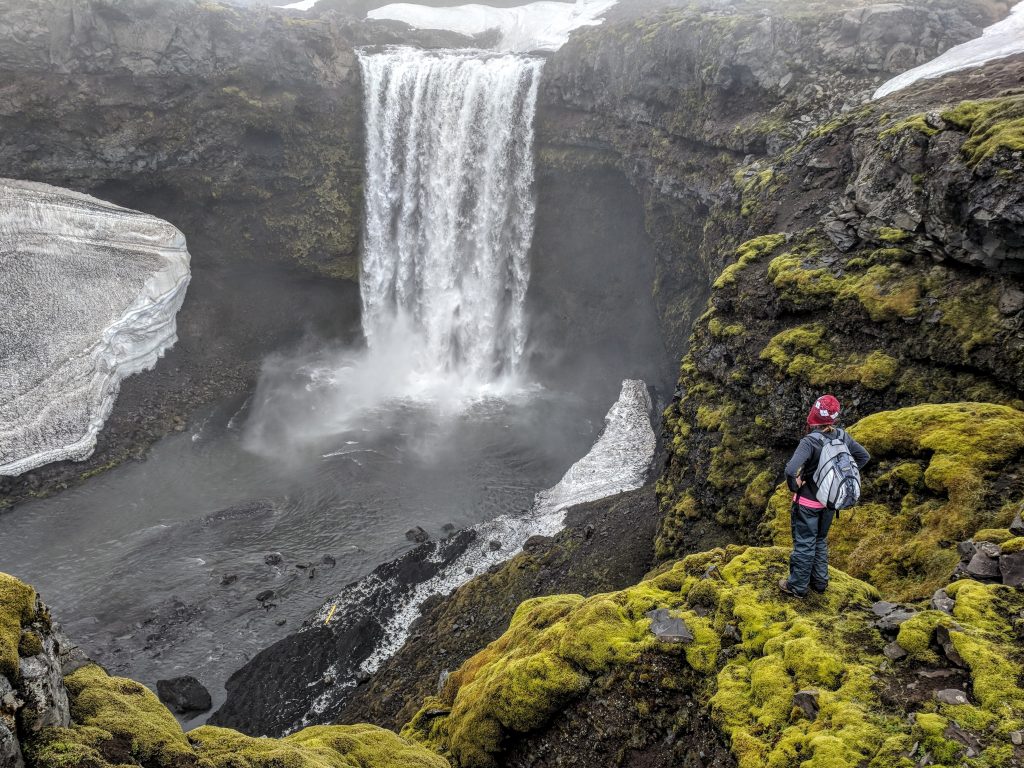
Thankfully, the views opened up as we got lower. It’s very easy to follow the path along this stretch of Fimmvorduhals, as you simply follow the left side of the river (the right side if ascending). There are so many photos I’d want to post here, but these are my favorites from this section of the hike. It’s truly sensory overload in the best way possible.
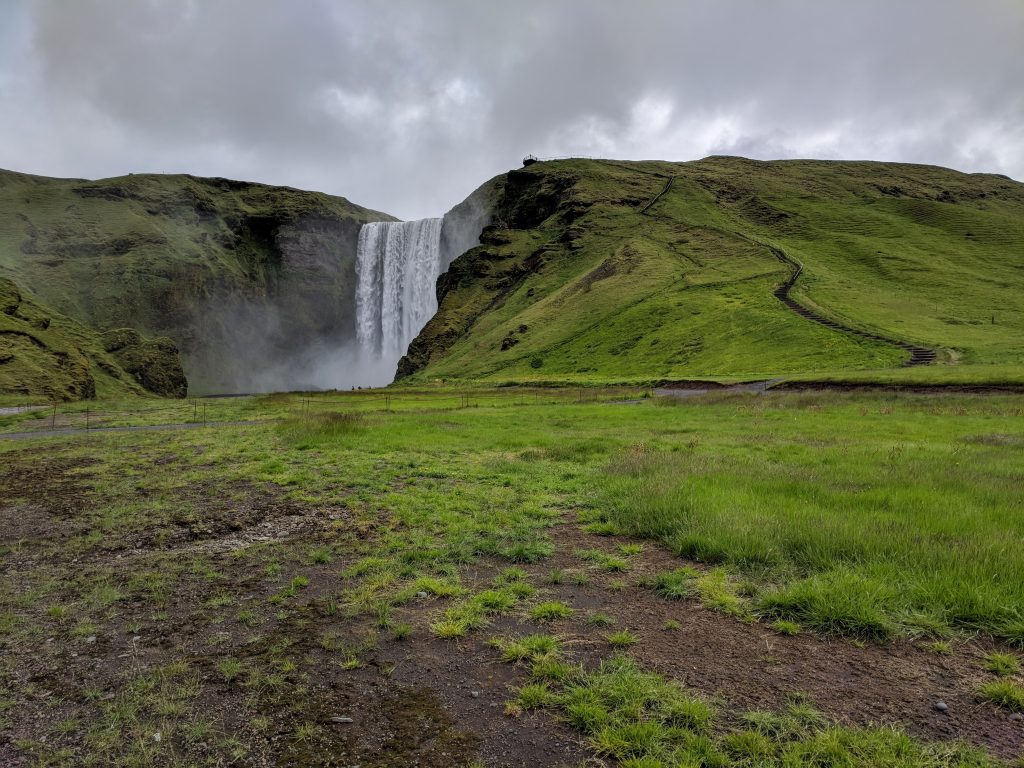
After you make the final descent down the side of Skogafoss, you’ve completed Fimmvorduhals!
Fimmvorduhals sticks out as one of the top 2 best hikes I’ve ever done. The Enchantments is the other. That is so different with all alpine mountain scenery, so it’s hard to pick a favorite.
Have you ever done this hike or have a question? Please leave a comment below!
Leave a reply