
The most important thing on this page: please follow the 7 principles of Leave No Trace whenever hiking (and all the time, actually – most are pretty good general life tips, too):
- Plan ahead and prepare
- Travel and camp on durable surfaces
- Dispose of waste properly
- Leave what you find
- Minimize campfire impacts
- Respect wildlife
- Be considerate of other visitors
Now, on to V2 and Ice and Island Lakes. Here are the quick facts:
- Where: Silverton, Colorado
- More specifically, where: the trail starts at South Mineral Campground on Route 585, about 20 minutes from the town of Silverton
- Distance and elevation: ~9 miles (14.5 km) roundtrip with 3,500 feet (1,065 meters) of elevation gain. This includes exploring around the lakeshores.
- Highest point: 13,309 feet (4,055 meters) at the summit of V2
- Why you should hike this trail: a relatively easy 13er with 2 stunning lakes that you get to see from on high and up close
- Fee or permit? no, but told by a Ranger that permit system will be put in place for 2023
- Cell service? only on the peak of V2 with Verizon
- Best time of year: mid-June – September
- Closest commercial airports: Montrose, Colorado (1.5 hours if driving straight to trailhead). Denver is about a 7-hour drive.
Tips
- You’ll be traveling along the Million Dollar Highway (Route 550) to get to the trailhead, so build in time for sights along the way.
- You can go either direction but I went counter-clockwise and recommend it. Head to V2 first then have a nice descent the rest of the way.
- Ice Lake is more popular and will be busier, but I’d consider Island Lake a must-do and V2 a definitely-should-do.
- South Mineral Campground is first-come, first-serve. Consider camping here the night before and/or after (there is a fee, details here).
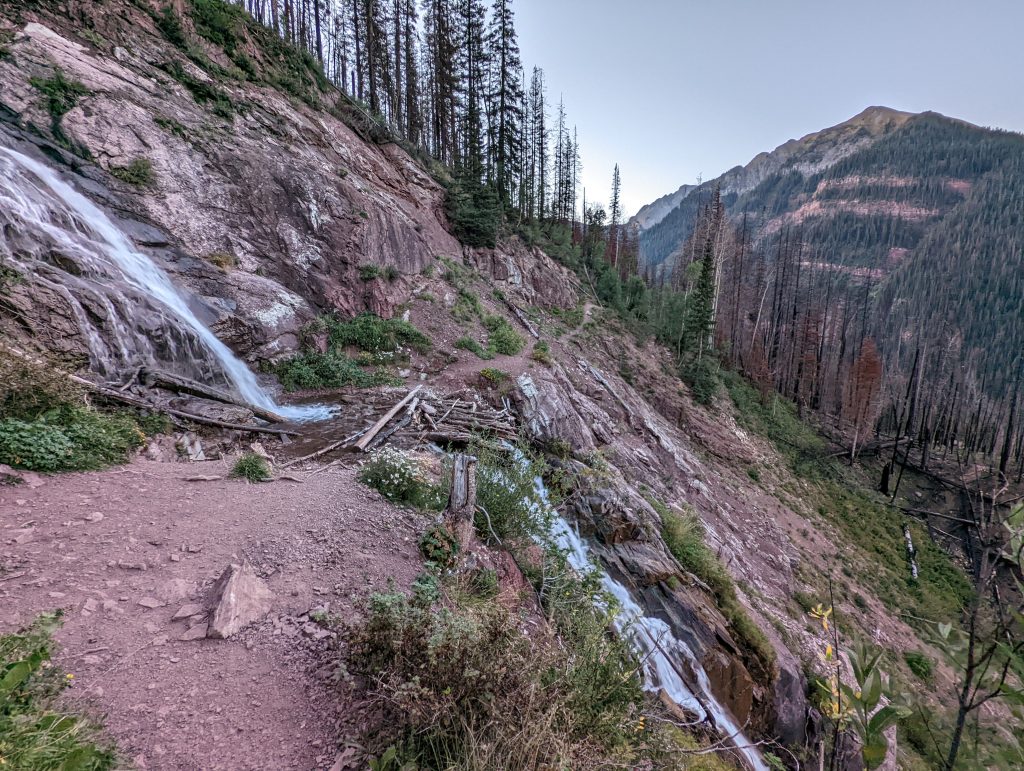
- Don’t miss the waterfalls near the parking lot (details and pictures in this trip report).
Getting there
Just north of Silverton along the Million Dollar Highway (Route 550) is a relatively easy-to-miss road with a sign for South Mineral Campground. The road only goes one direction (west) and is not paved but any car can make the 4.5 mile, 15-minute drive from the highway to the parking lot. You can do this as a day hike while staying in any of the following towns (drive time is one-way):
- Silverton: 20 minutes
- Ouray: 50 minutes
- Ridgway: 1 hour 10 minutes
- Durango: 1 hour 20 minutes
- Montrose: 1 hour 35 minutes
- Telluride: 2 hours
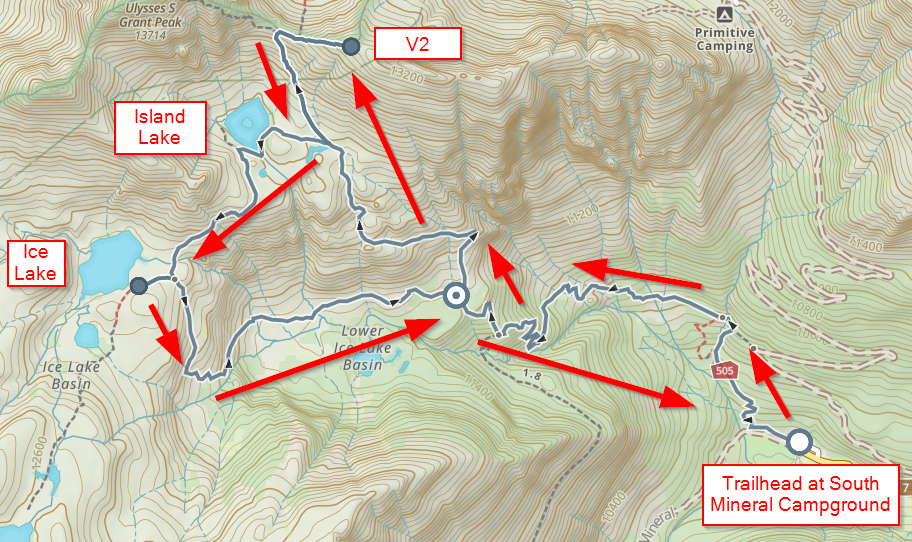
Trailhead to V2 (3.3 miles)
When you get to the campground, which will be on your left, there is a trailhead parking lot to the right with portable toilets. The lot can fill up early and you may need to park further away, although that may not be an issue when they implement the permit system in 2023.
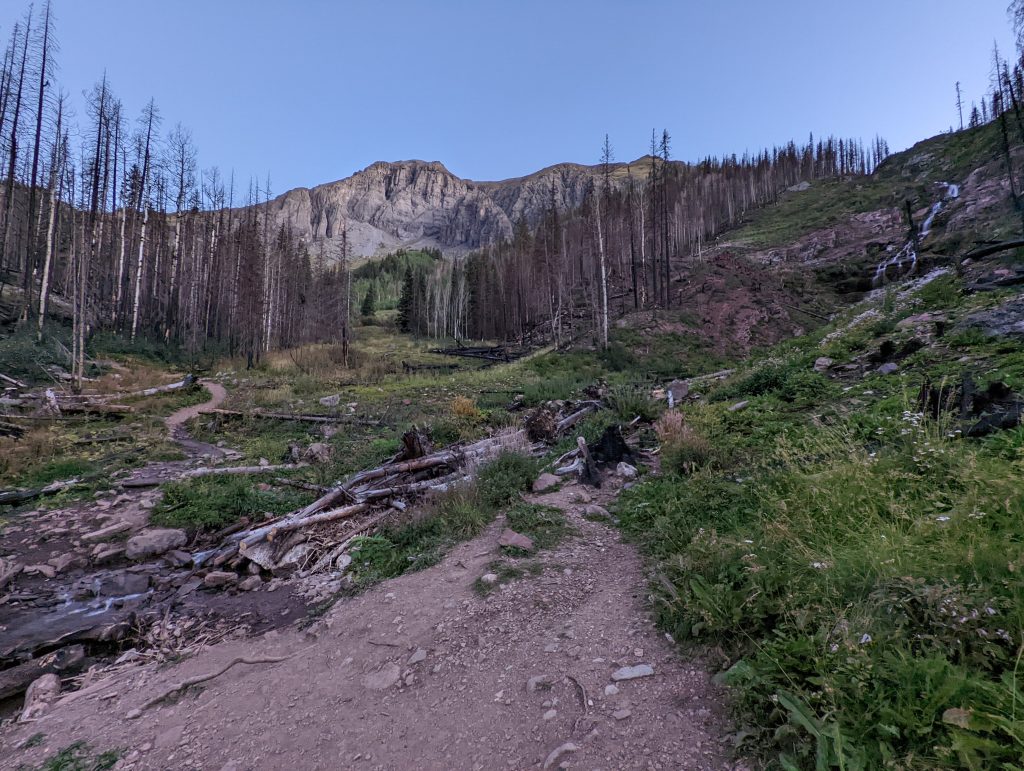
The trail starts right off with some switchbacks through the woods to get your heartrate up and you’ll instantly see the effects of the heavy damage from the 2019 wildfire. After 0.5 miles (~15-20 minutes) you’ll come across Clear Creek and Clear Creek Falls. You can cross the creek here (recommended) and take a roundabout trail through the woods or take a sharp right instead of crossing the creek and head up that way. If you do that, you’ll have to cross the creek literally through the waterfall, which wasn’t an issue in September but could be in earlier months when the water is rushing.
You’ll consistently be gaining elevation for the first 2.2 miles, which is the same 2.2 miles you’ll take to get back. Some stretches are under the canopy and some are out in the open, and the sun will be at your back for most of the ascent during the early part of the day. Keep in mind that you’ll be going over 13,00 feet and will gain 3,500 feet of elevation in less than 3.5 miles. It is a pretty aggressive, continual ascent and I recommend taking several breaks along the way.
First fork in the trail
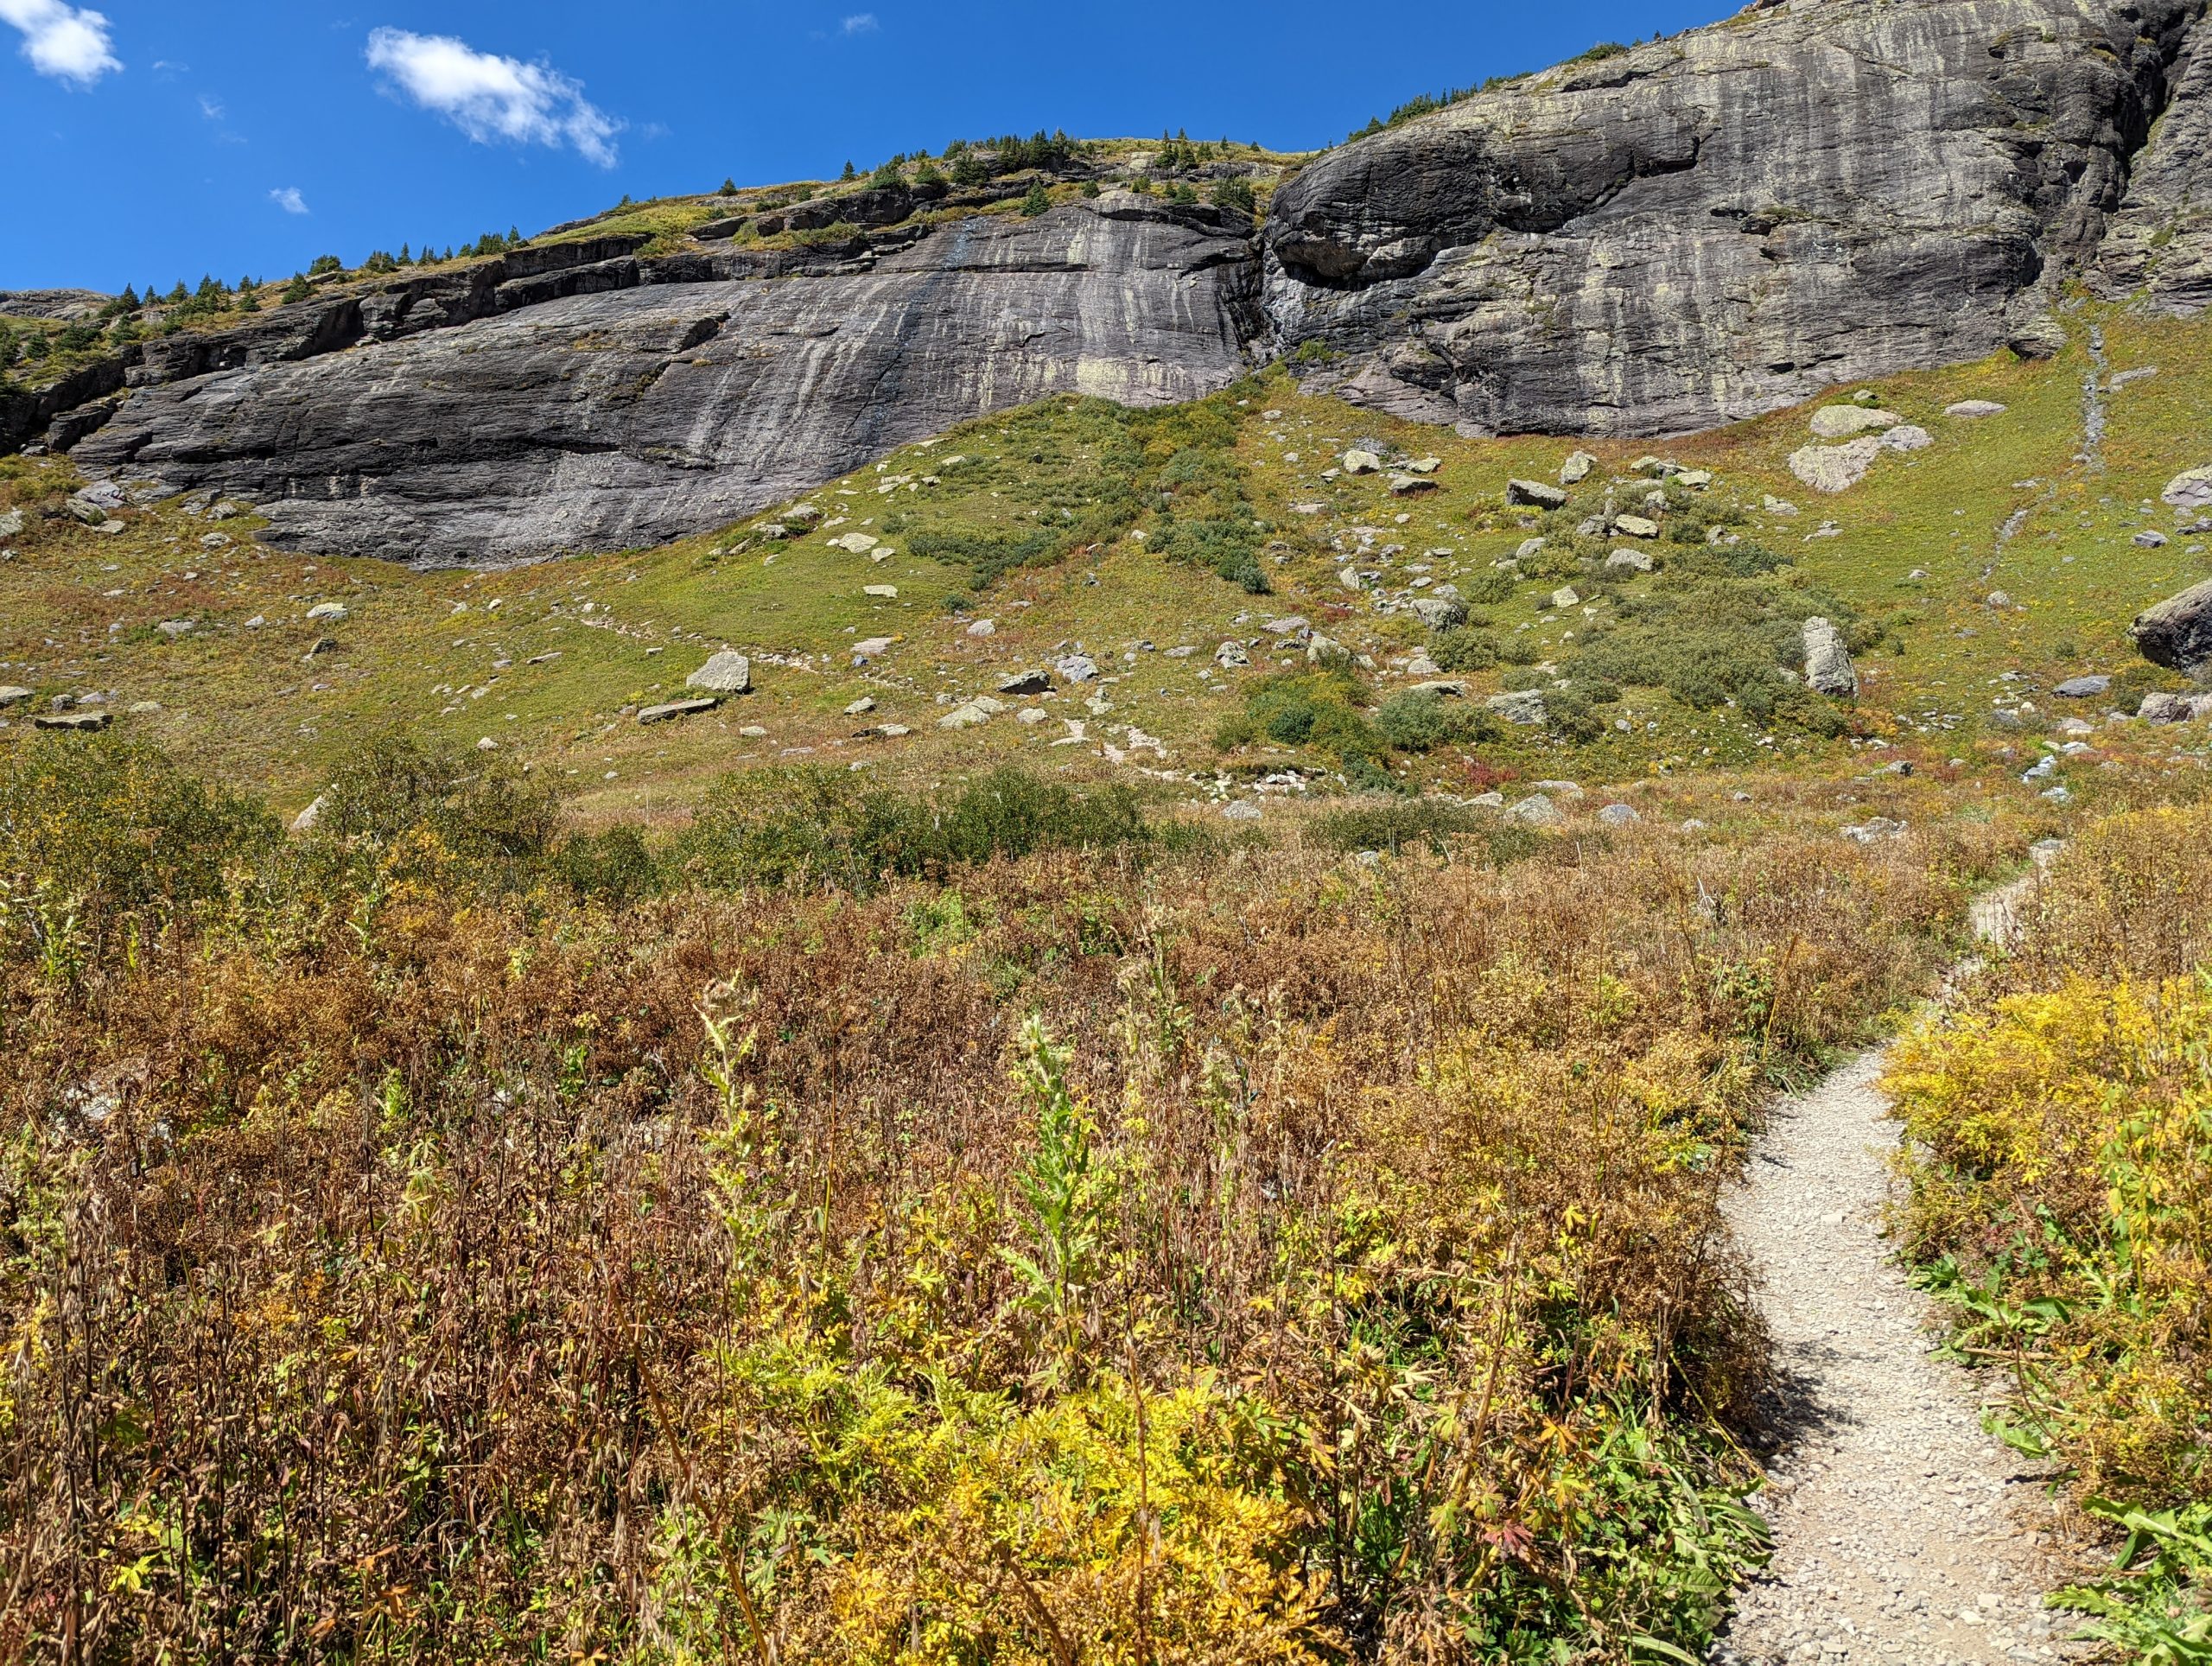
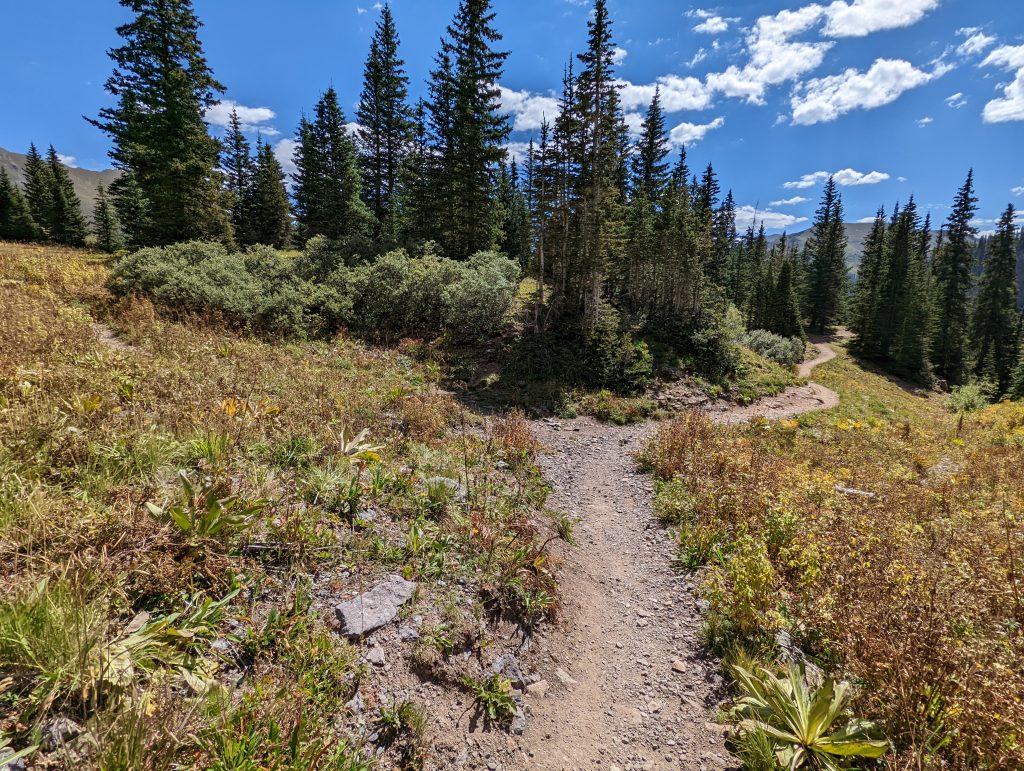
At 2.2 miles you’ll come to an unmarked fork:
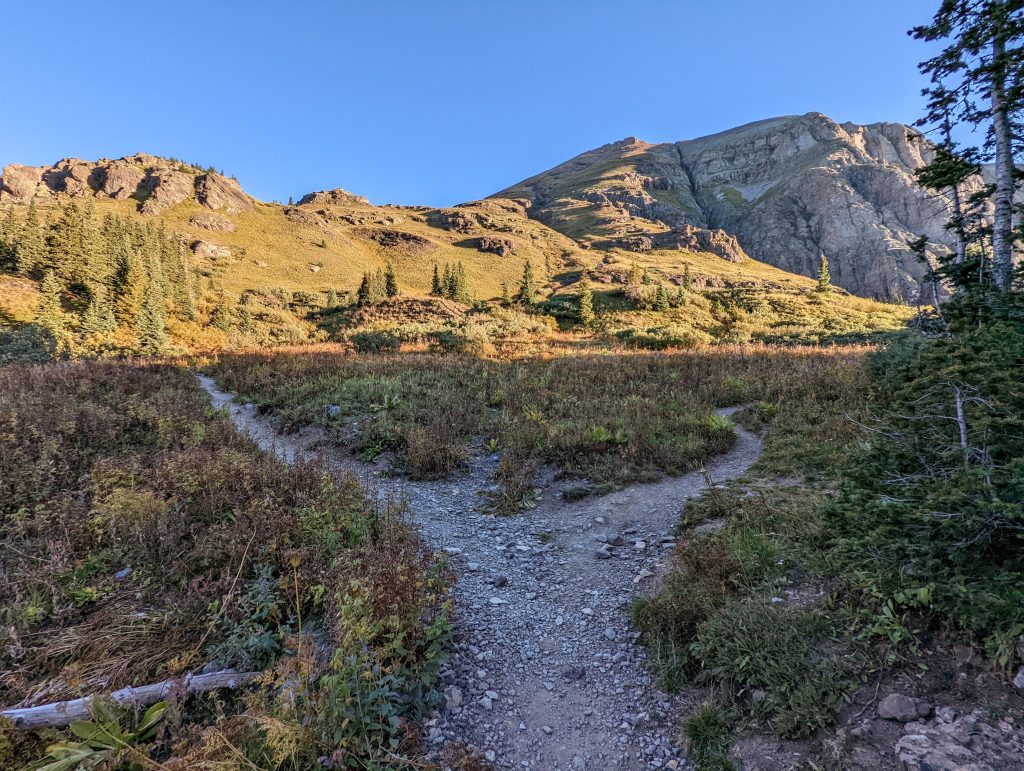
Heading to the left will lead to Ice Lake and heading to the right will lead to Island Lake. Head to the right for more of the same: up, up, up. Since you won’t be taking this trail on the way back down, make sure to turn around at times and enjoy the views.
Second fork in the trail
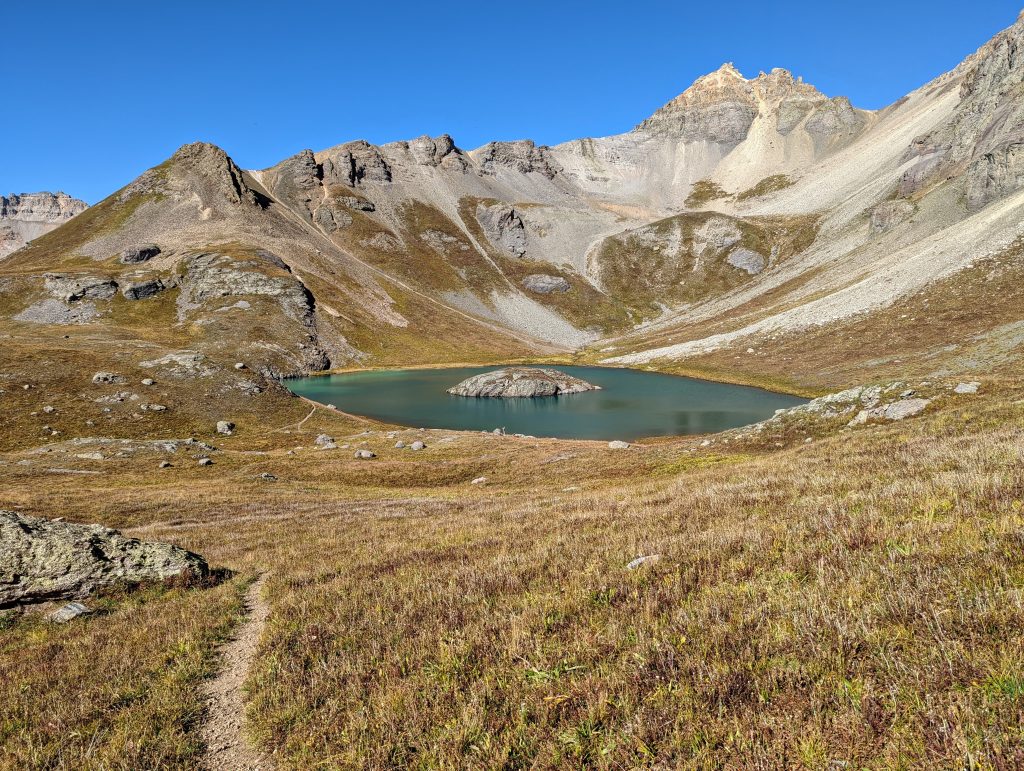
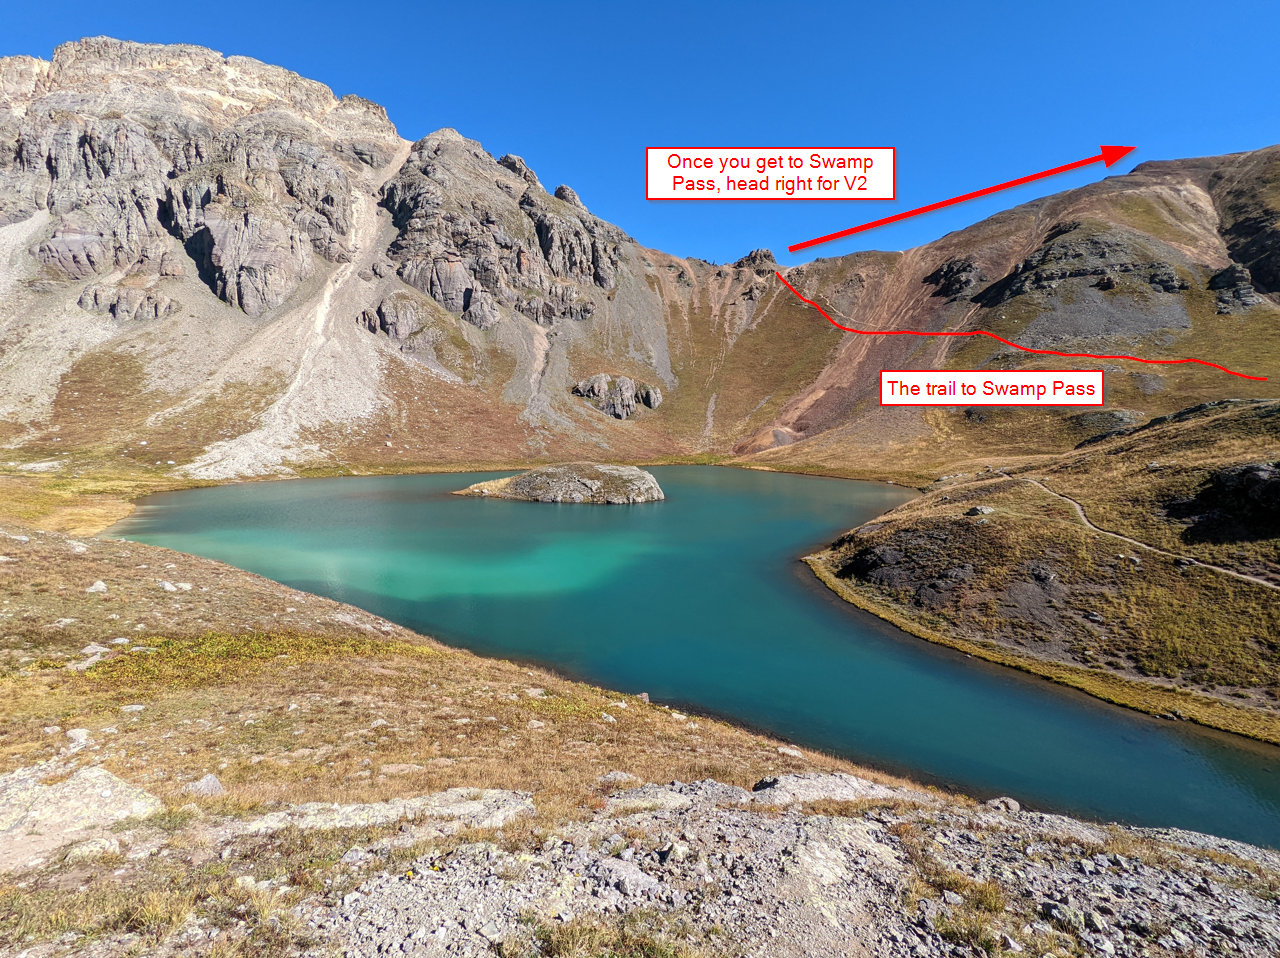
You’ll come to another fork in the trail and again will want to head to the right for V2. Heading to the left will go to Island Lake.
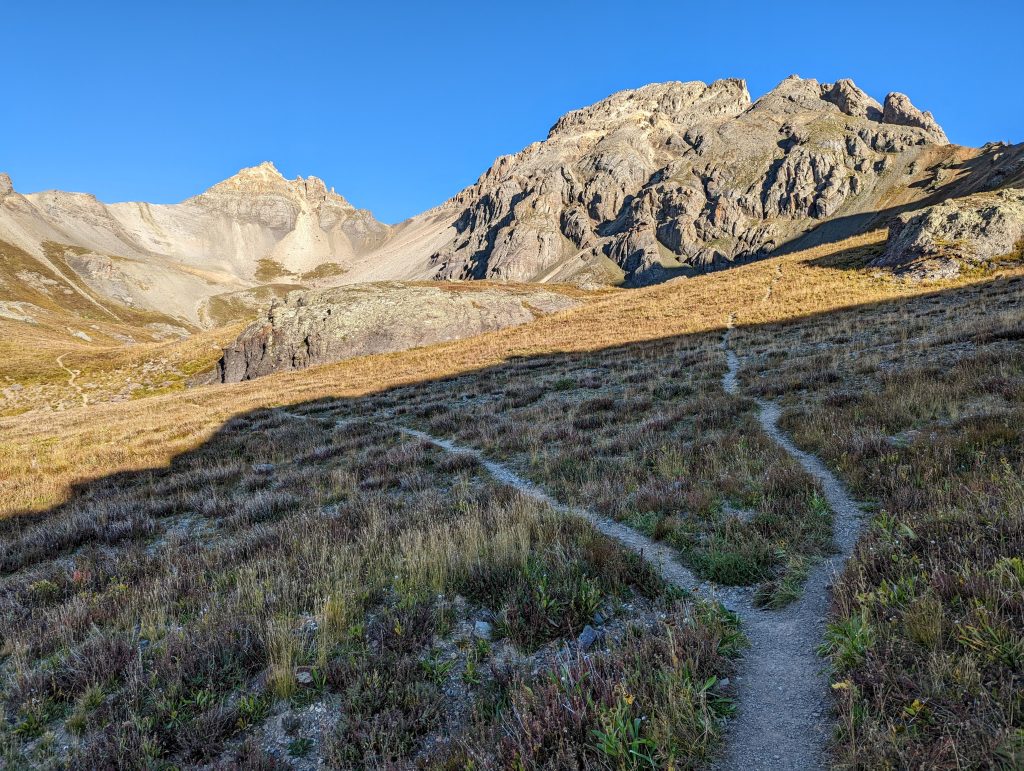
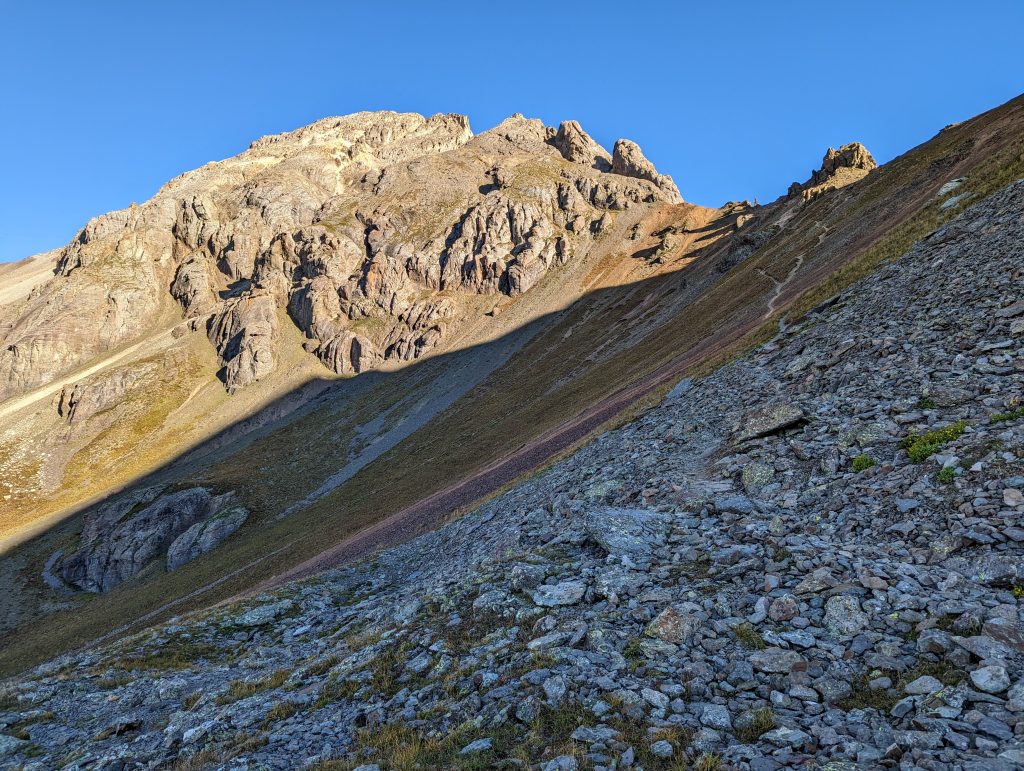
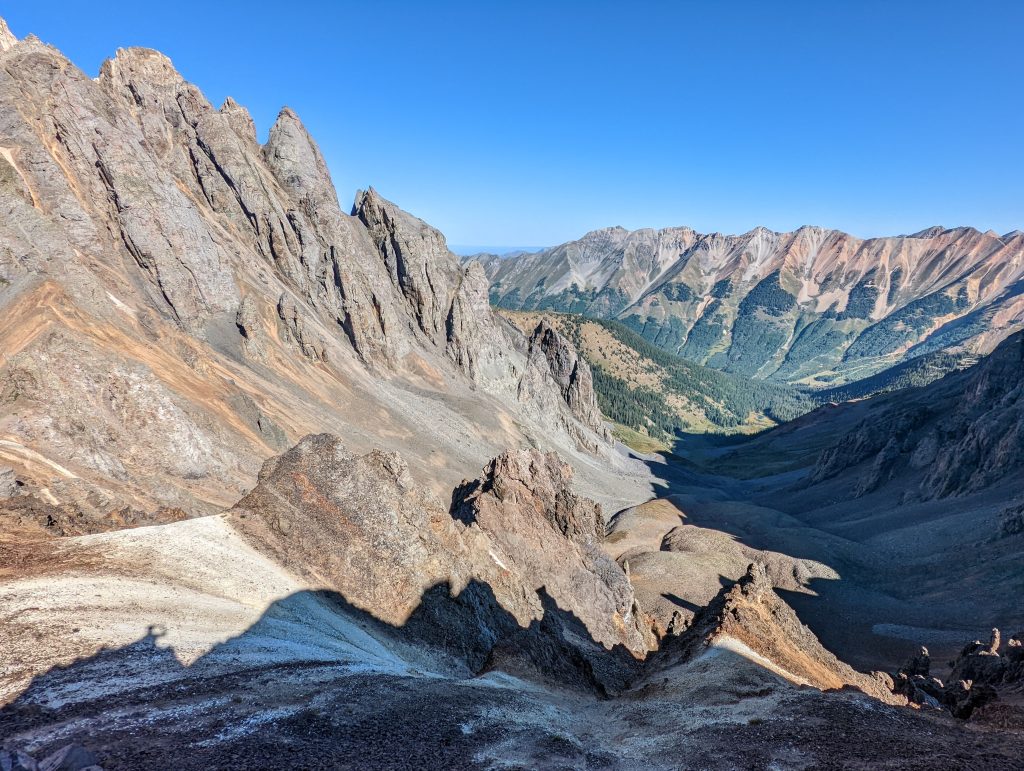
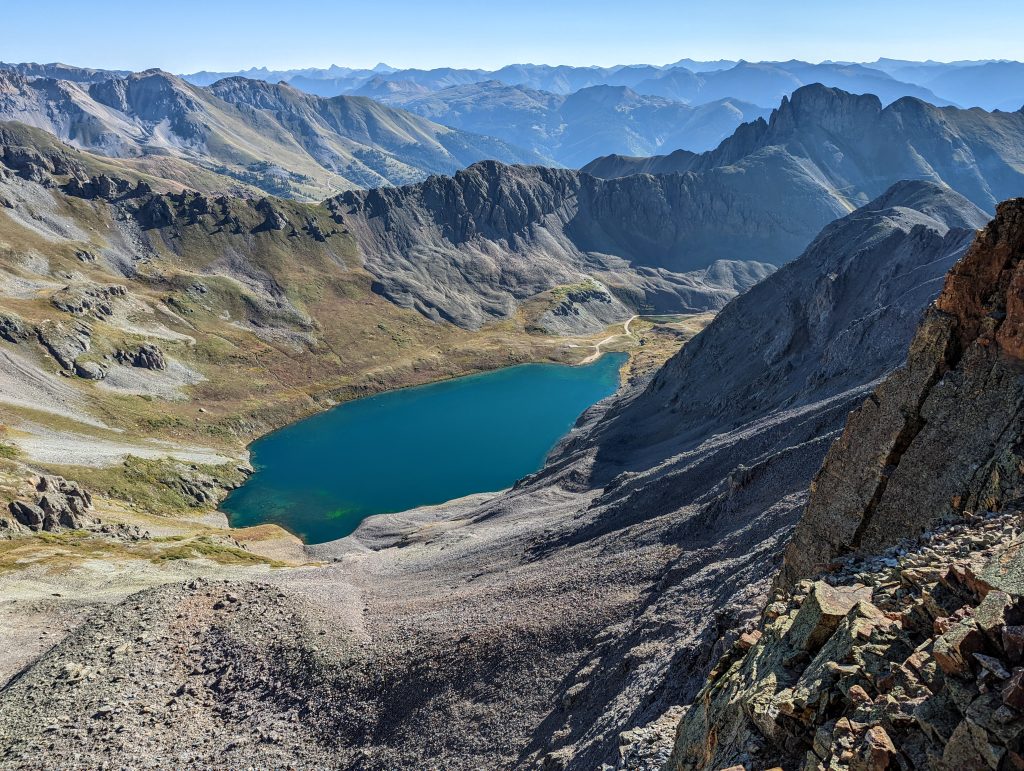
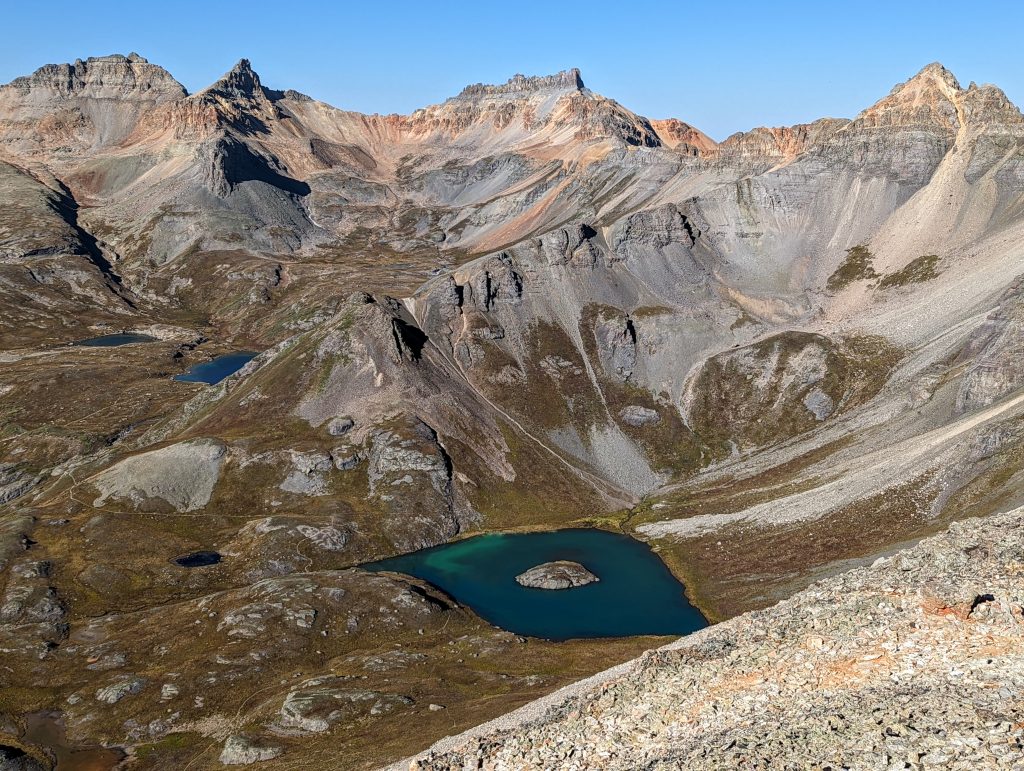
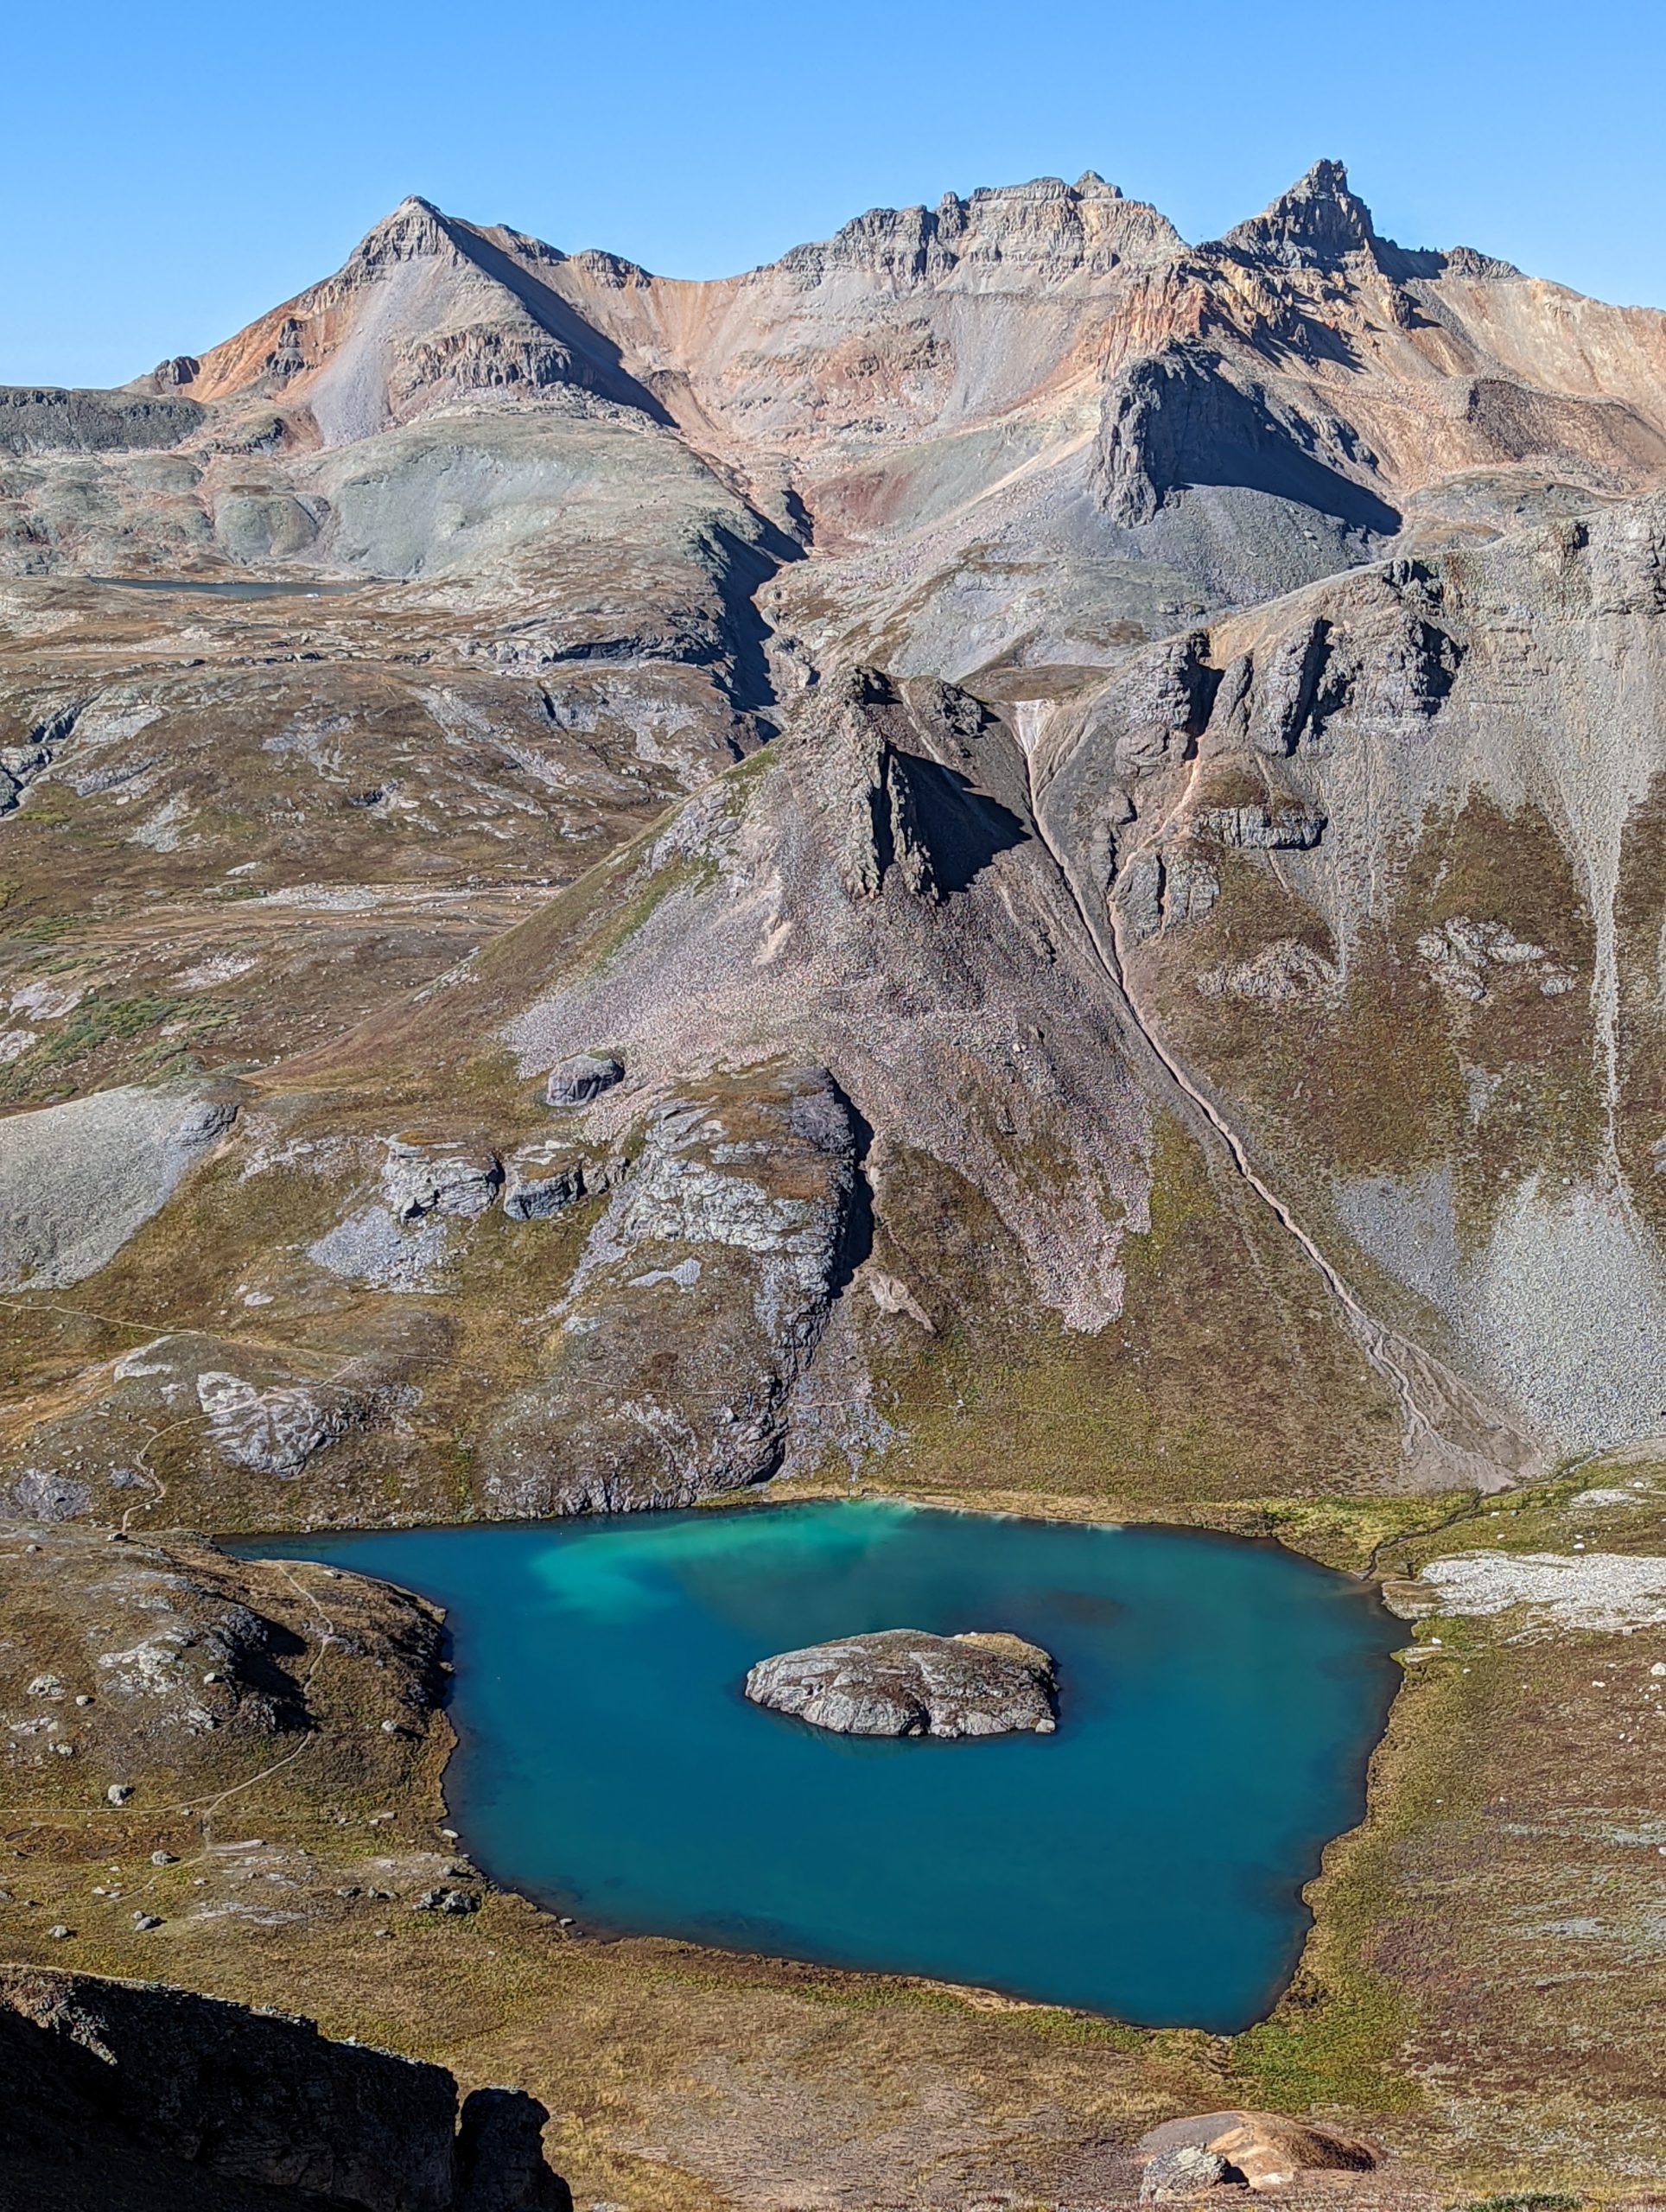
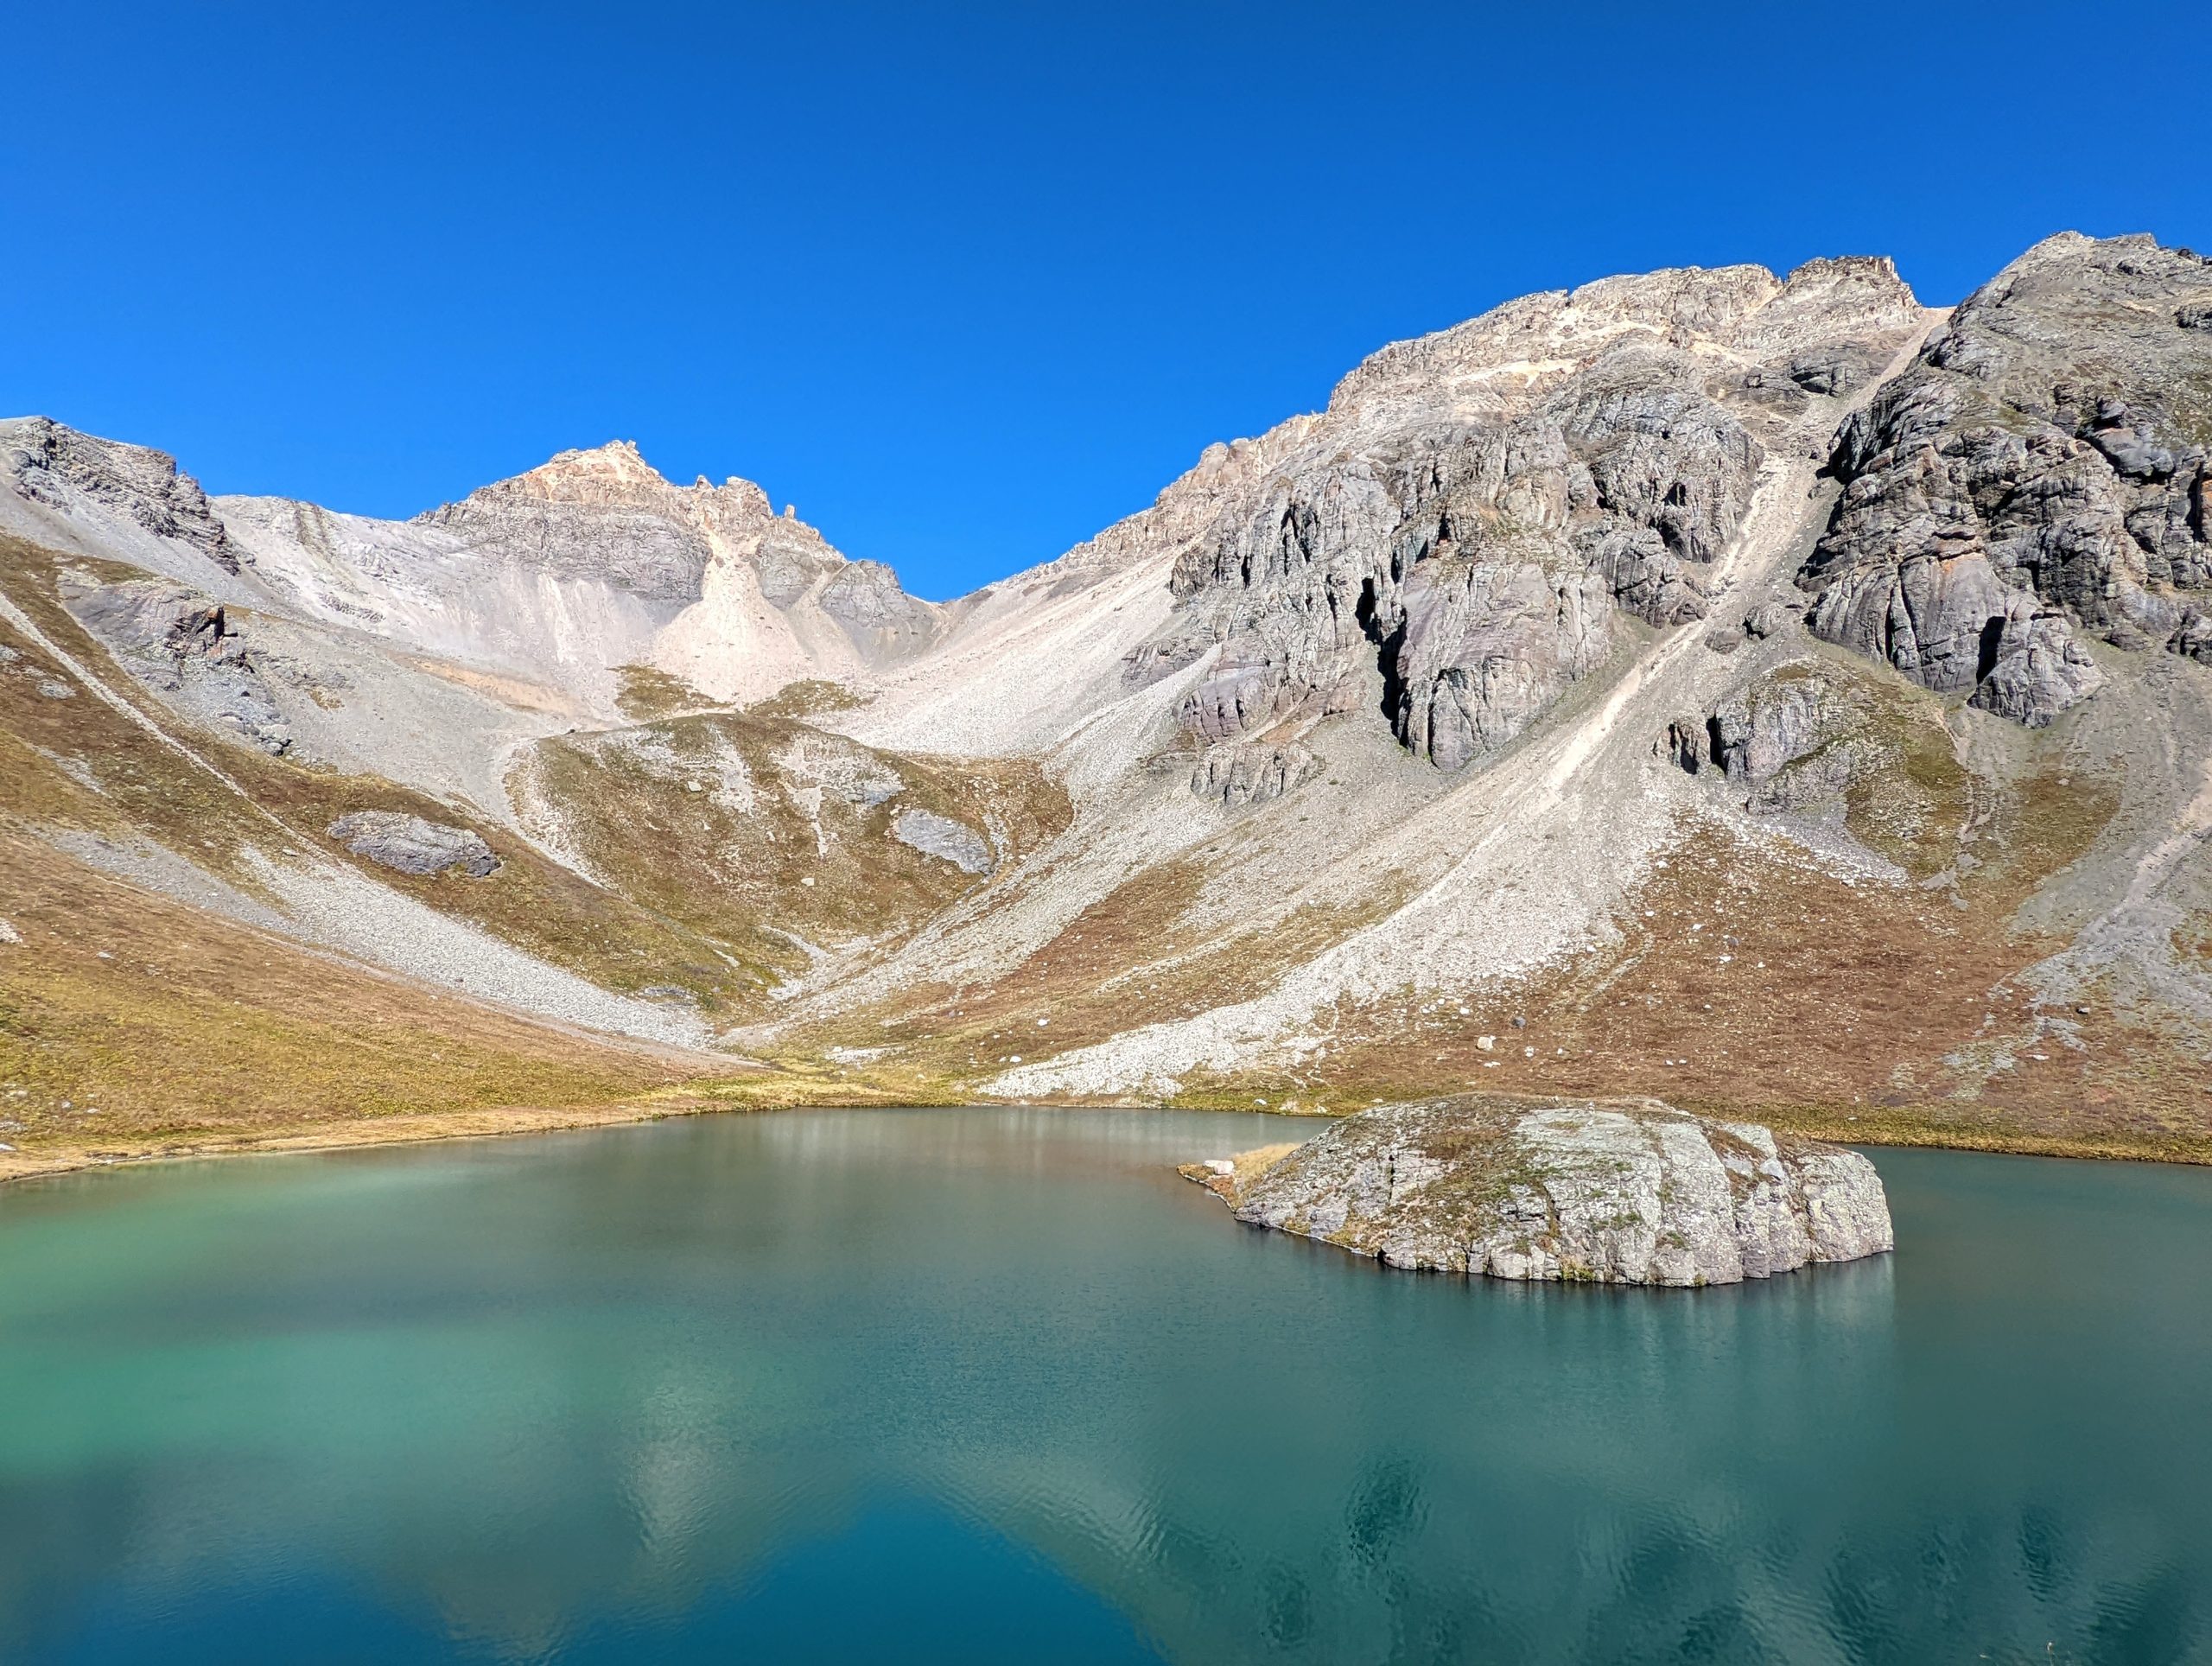
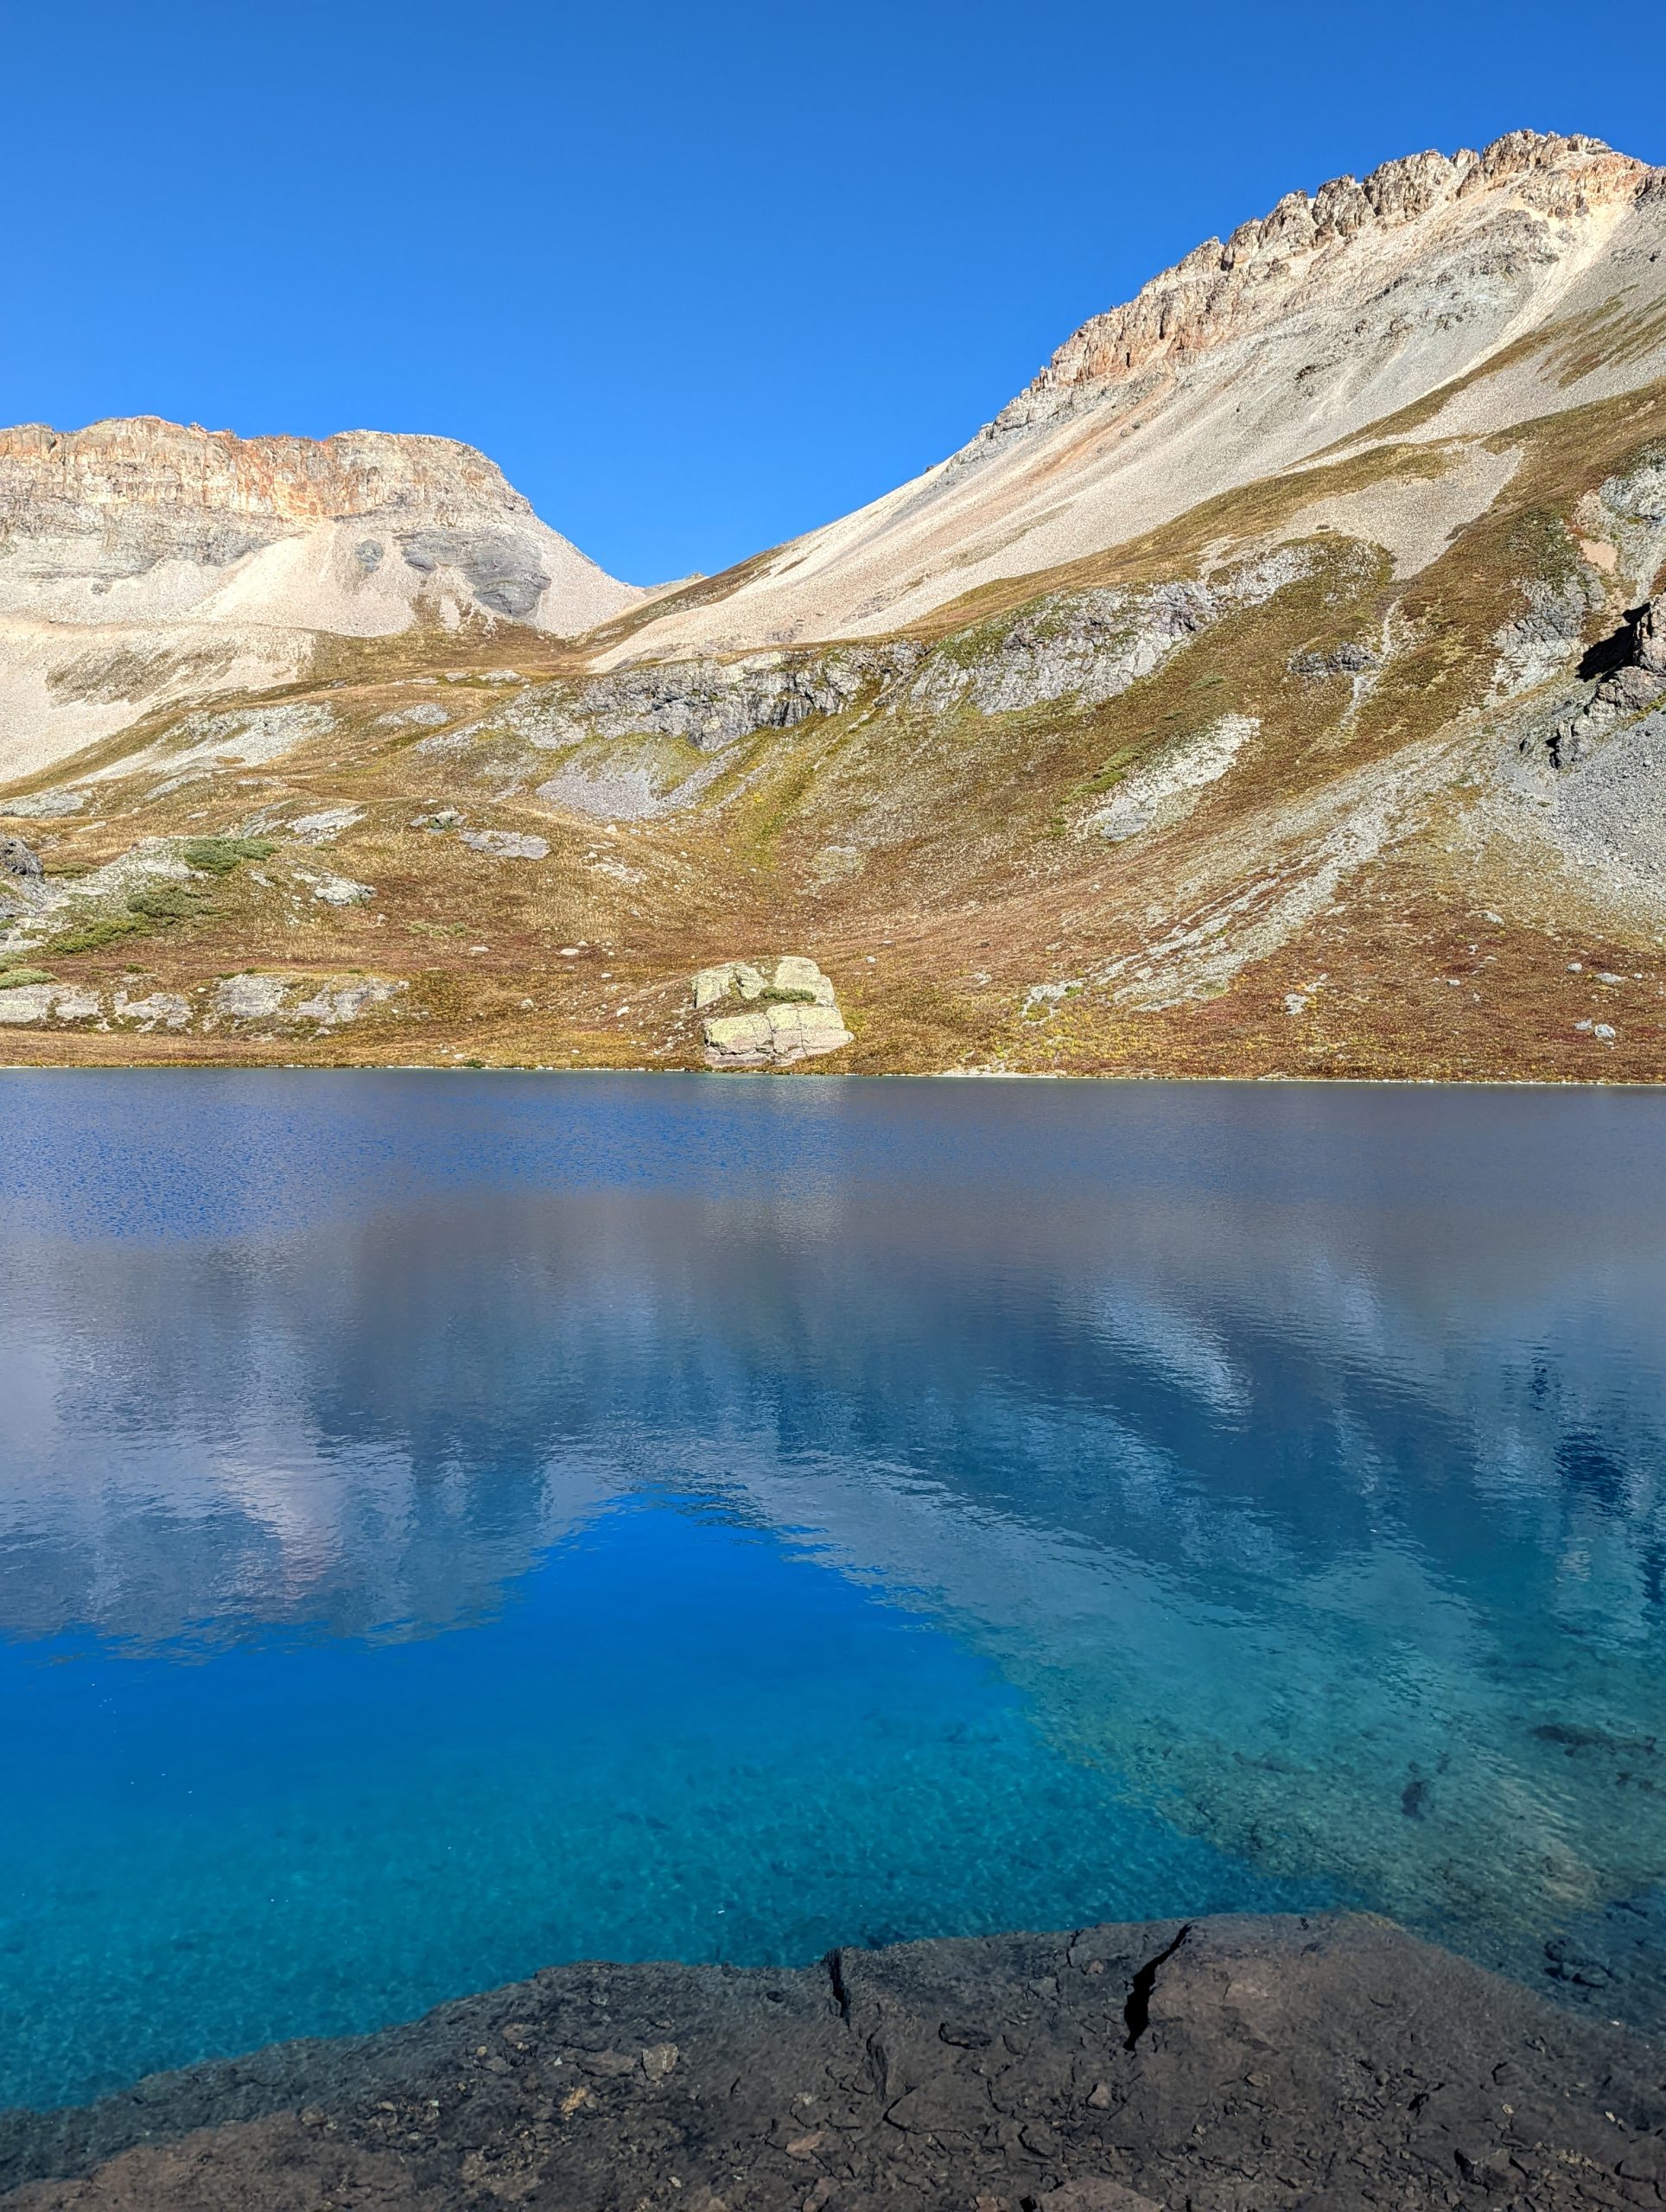
Getting up to V2 requires a relatively steep incline across the slope to get to Swamp Pass. Island Lake will be over your left shoulder during the ascent. The green in the water really comes out the higher you get. Once you get to Swamp Pass, head right to the high point along the ridge and you’ll be on V2. It’s almost exactly 1 mile from the first fork in the trail and about 3.3 miles total from the trailhead. There isn’t an obvious summit as it pretty much flattens out for a while, but walk as far as you’d like and enjoy the views. Over the other side of the ridge you’ll be able to see Clear Lake. I had V2 all to myself and did not see another person the whole hike up.

V2 to Island Lake (1 mile)
After you’ve spent enough time on V2, take the same trail back down. Now Island Lake is in front of you and the green may seem to temporarily disappear as you descend. You’ll pass by and head away from the lake for a brief time (please stay on the trail). When you get to that same second fork in the trail, take a right to head to Island Lake.
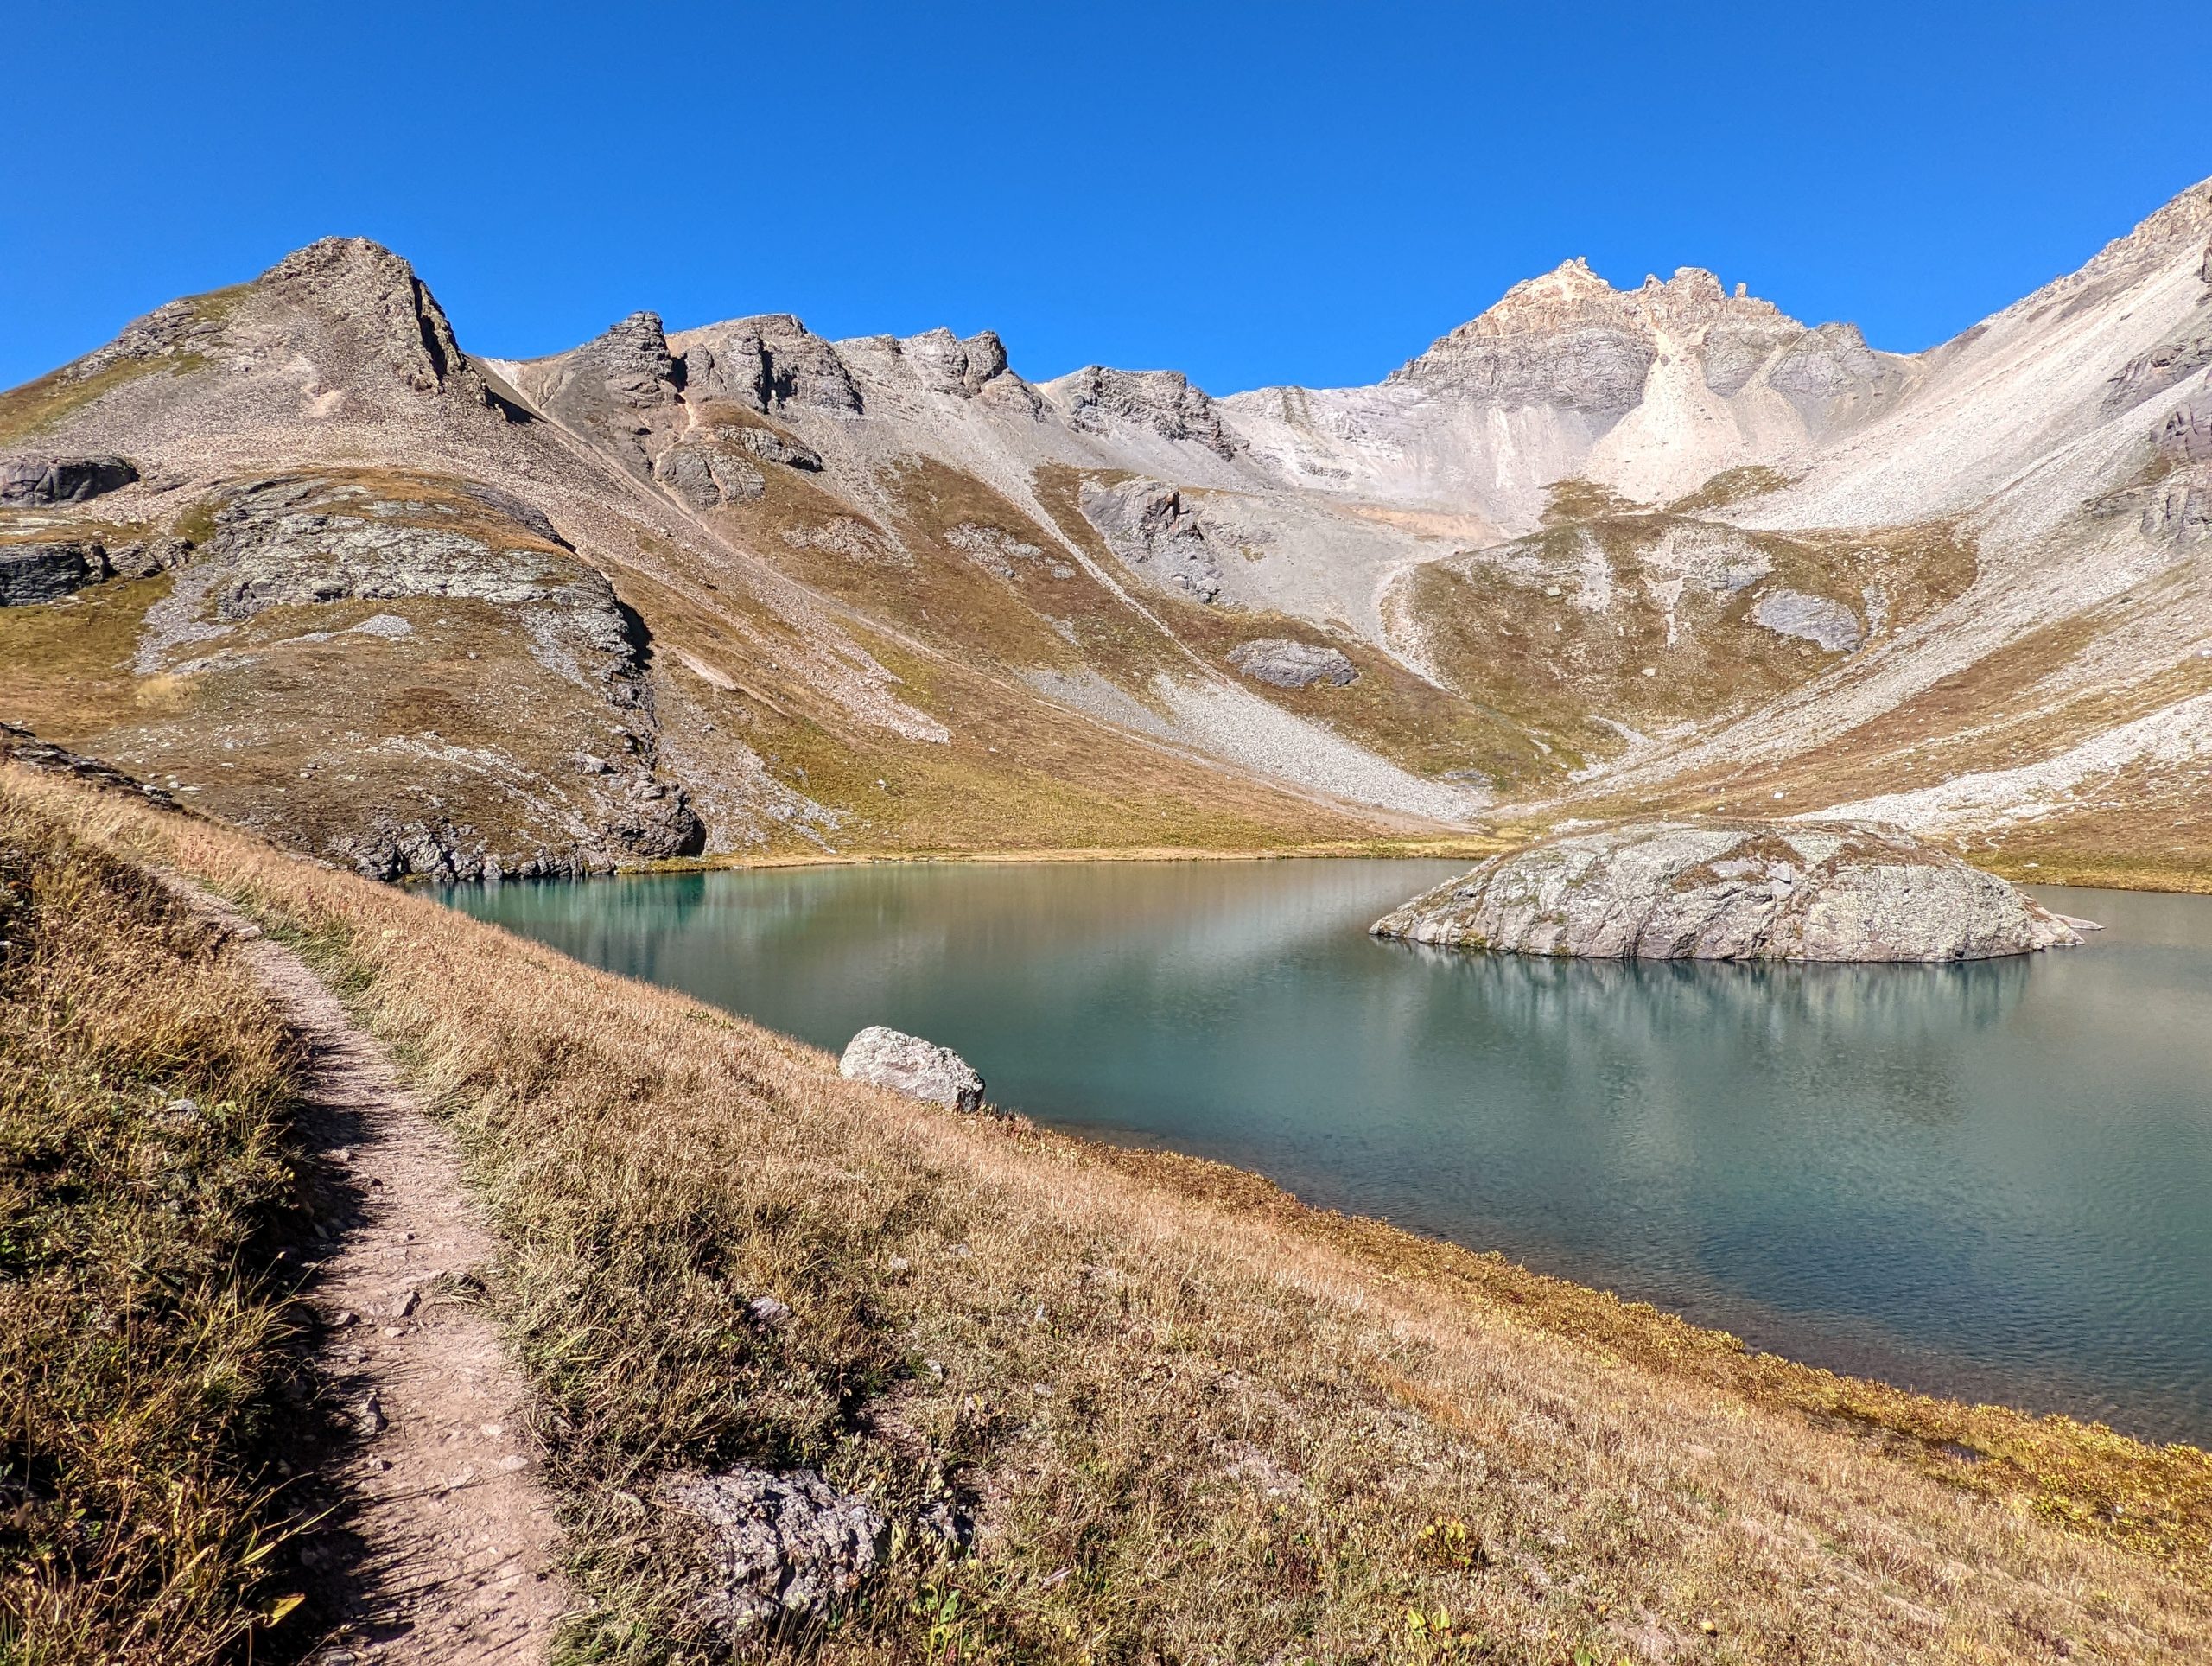
There were a couple other people at the lake while I was walking around it but it felt like I had it to myself. You can spend some time around or in the lake but eventually you’ll follow the trail clockwise around the edge of the lake, cross over a small stream leading away from it, and head towards Ice Lake. You can get a very good visual of where Ice Lake and the trail to it are in relation to Island Lake while atop V2.
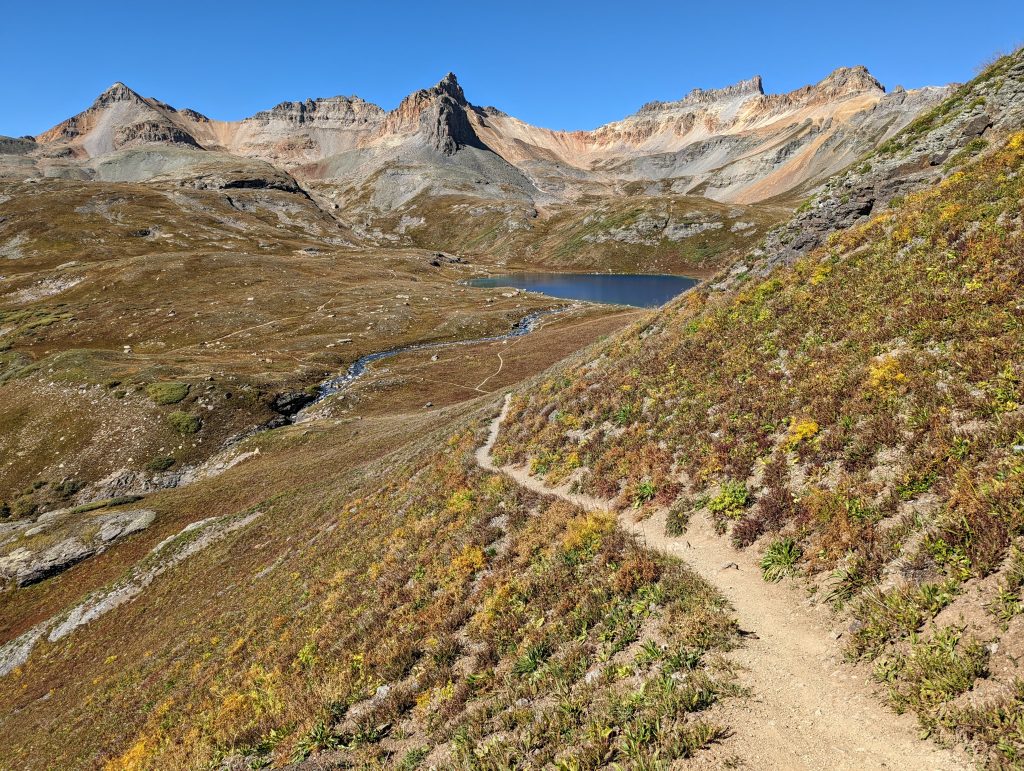
Island Lake to Ice Lake (0.8 miles)
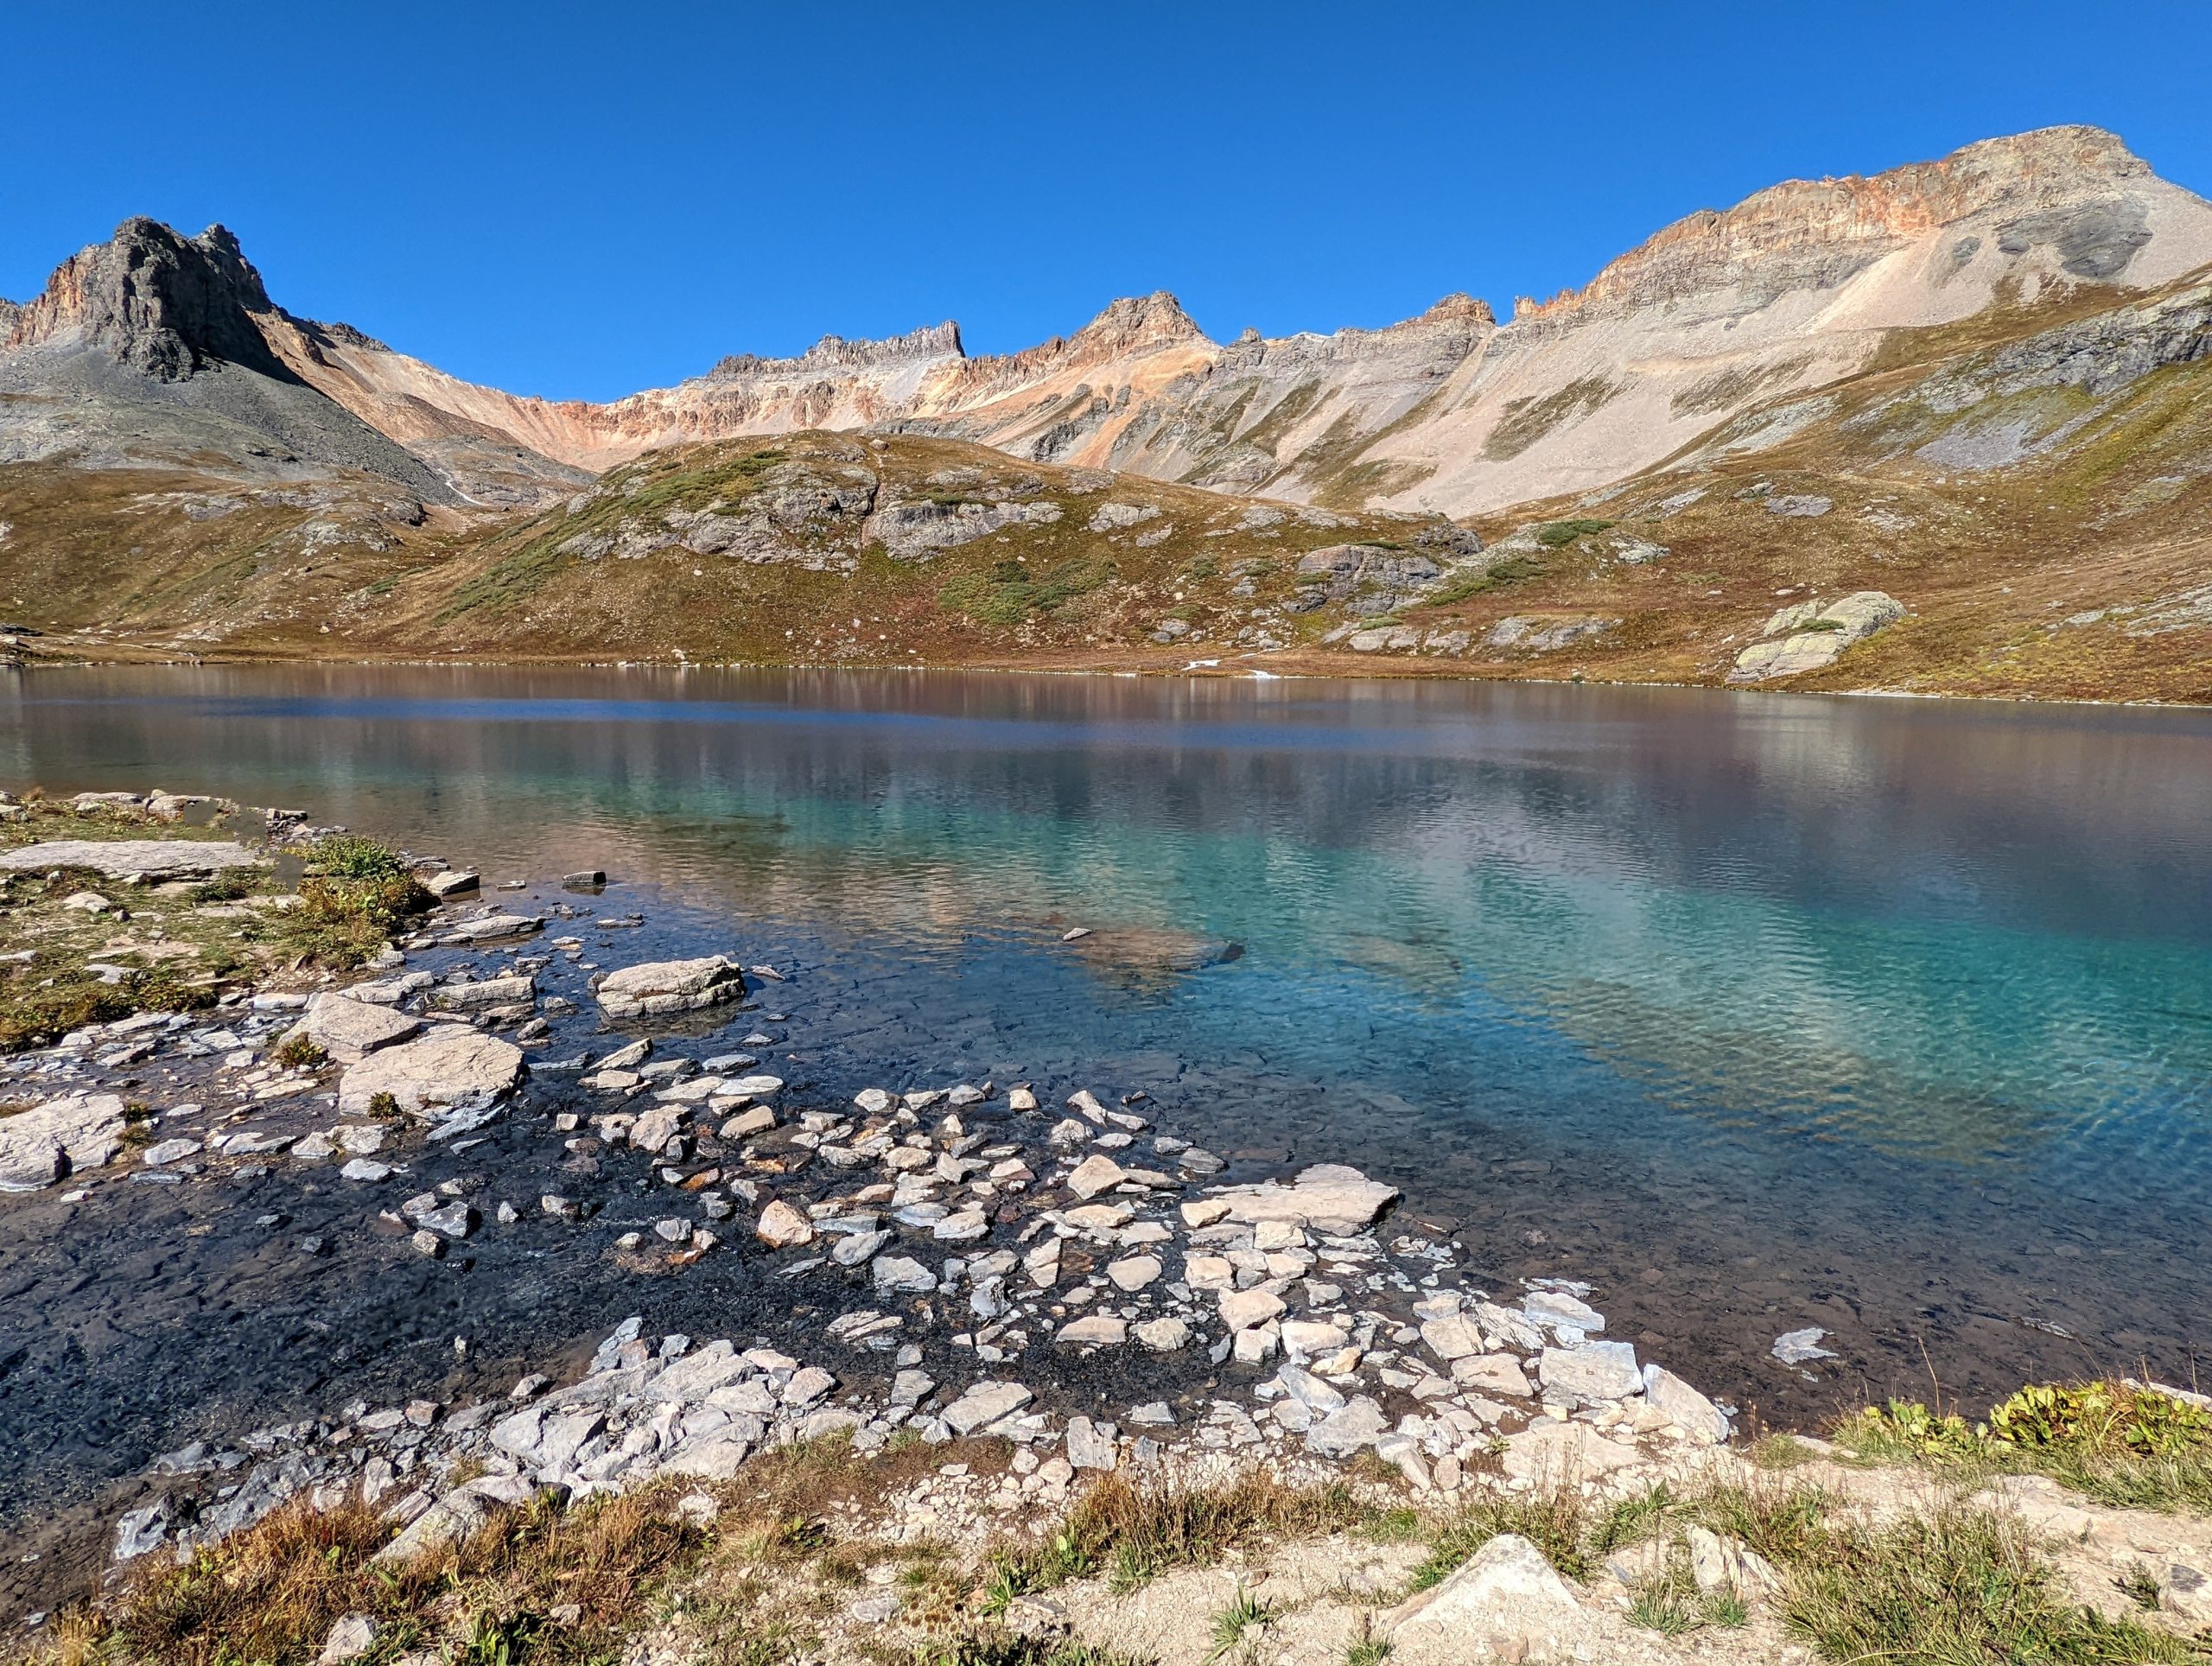
Ice Lake is just about 5 miles total from the trailhead if you’ve gone to V2 and Island Lake first. Ice Lake and the unmistakable peaks above it come into view as you curl around an incline.
You’ll be cutting across the incline with the high side to your right. There are a couple spots that are quite narrow where a fall would send you down a bit. You’ll be gently descending during this stretch. While there’s nothing too exposed, take care as there is loose rock and some steepness to your left.
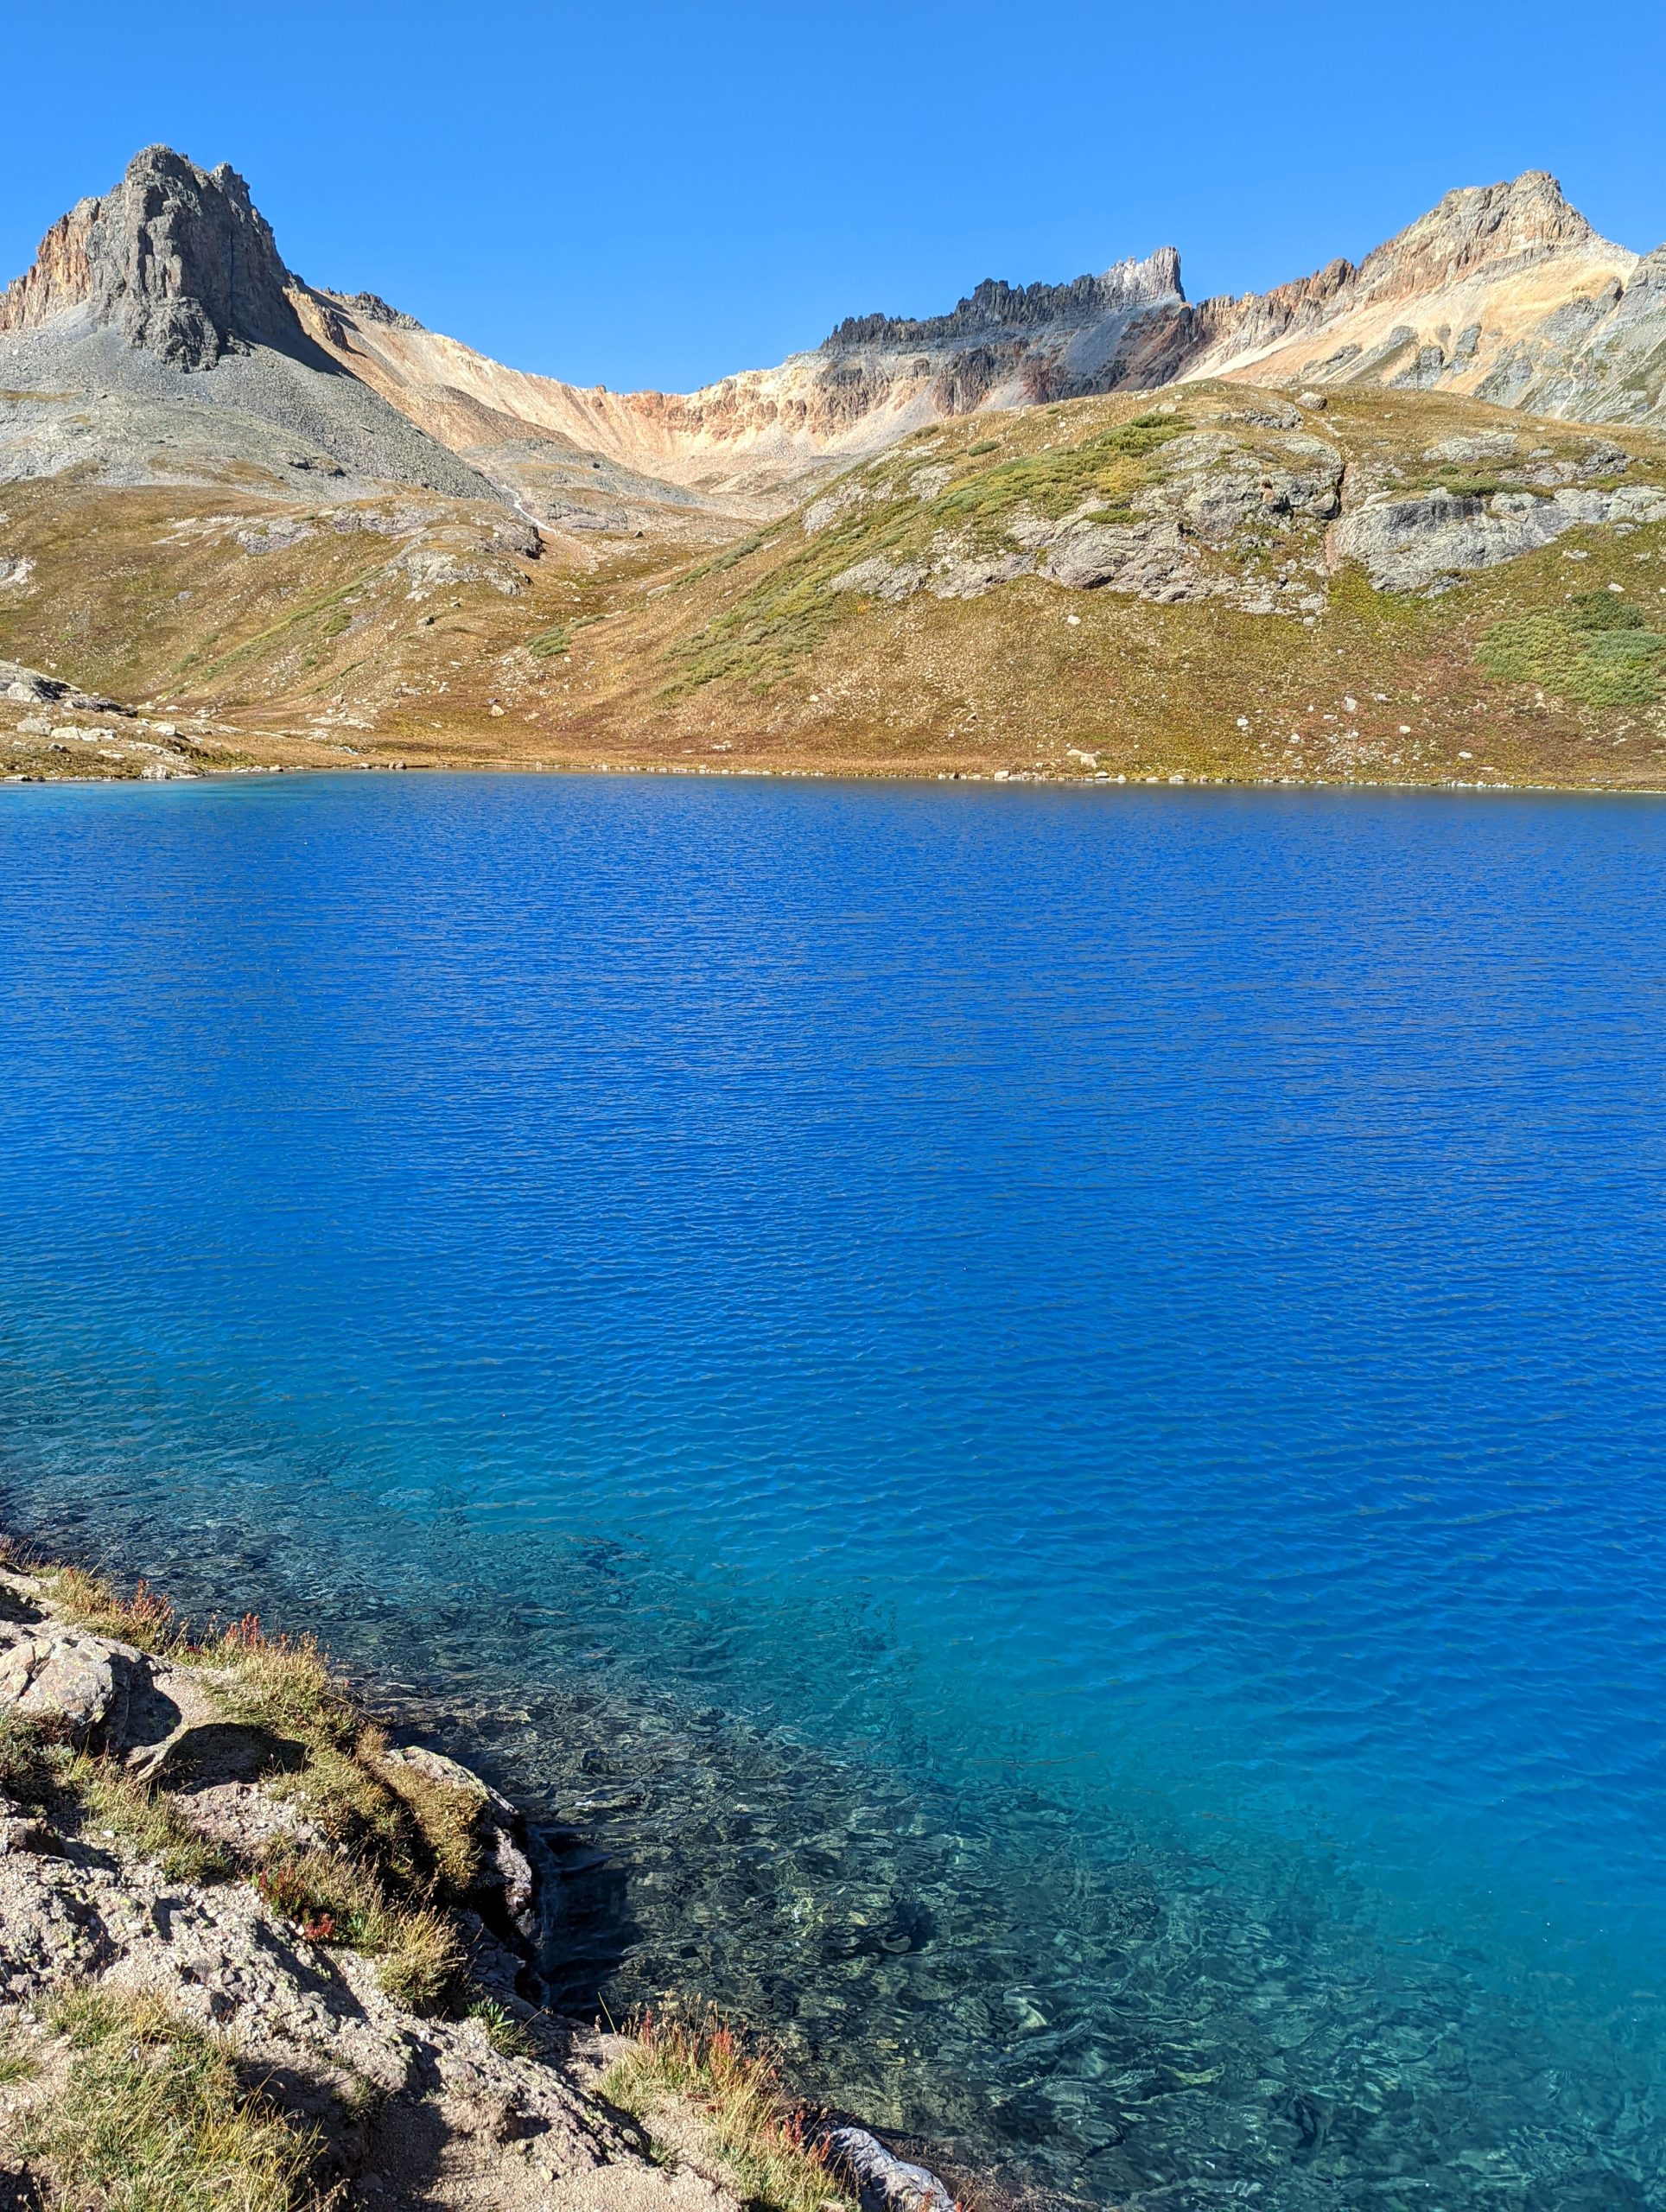
When you get to Ice Lake, make sure to walk along the shore to get different views of the peaks above. There will probably be more people here and perhaps more of a “party” vibe. Hopefully everyone is being respectful of others and the environment.
Ice Lake back to the trailhead (3.2 miles)
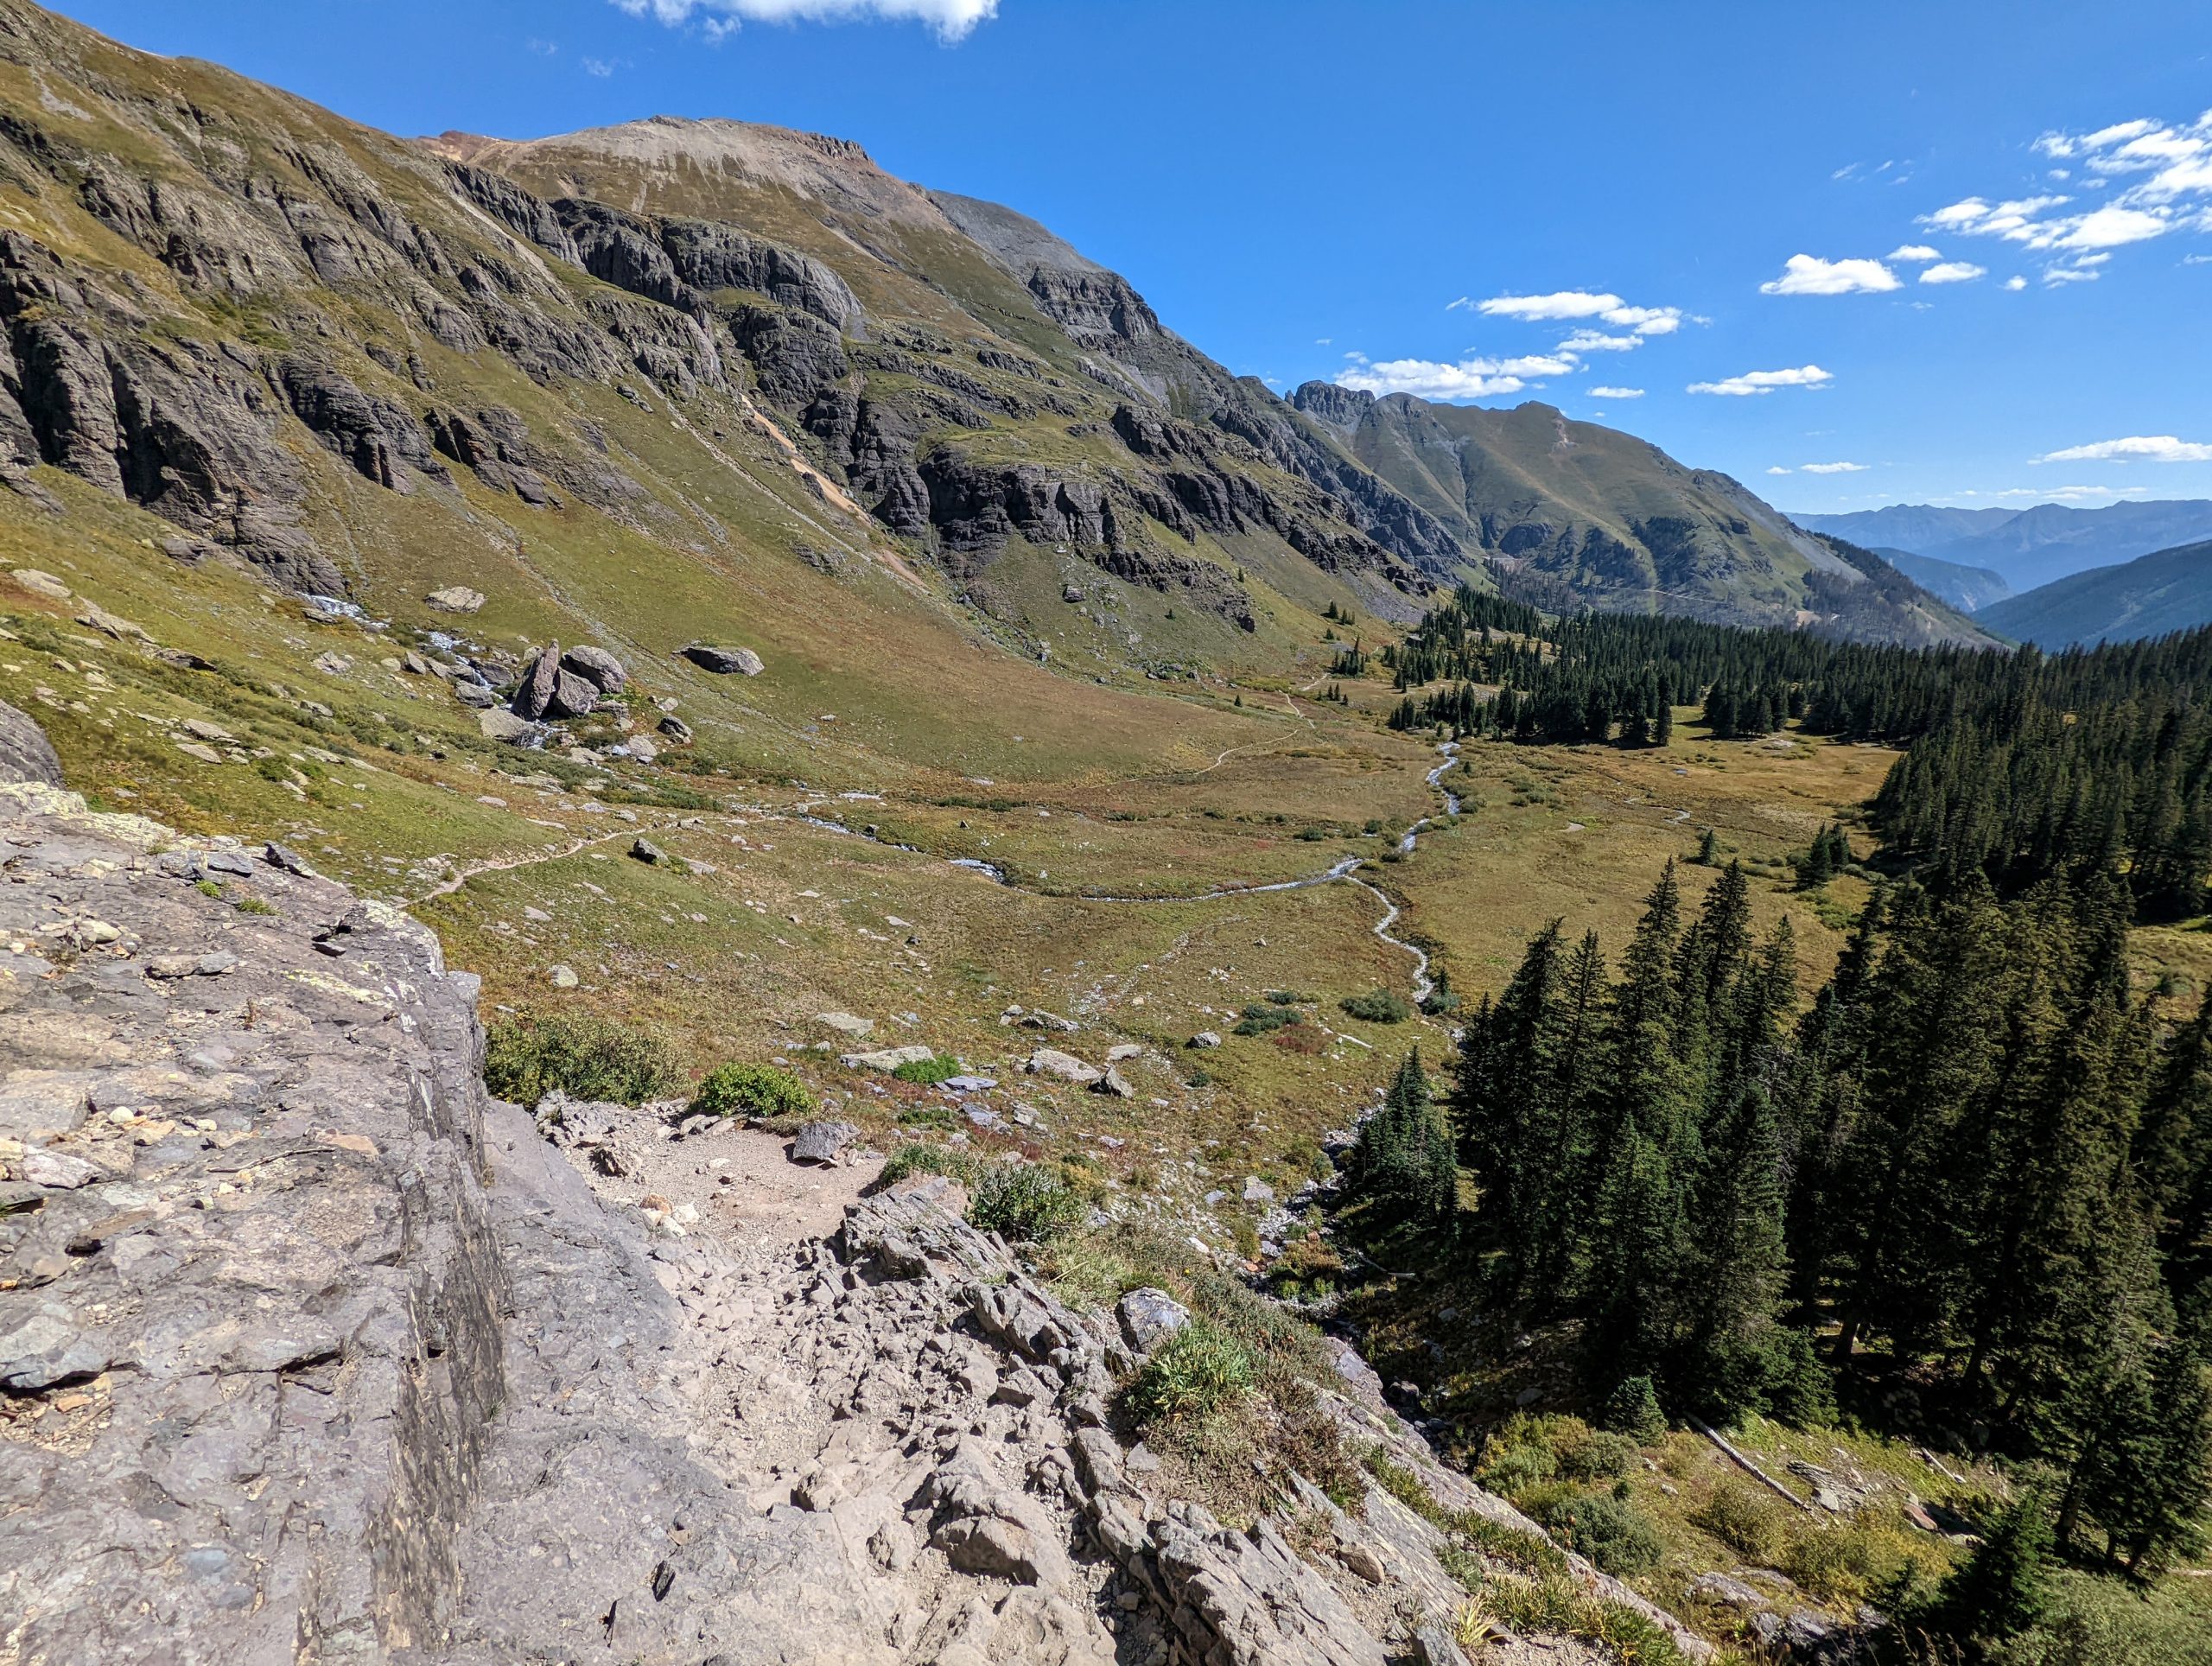
You’ll have about 1 mile of new-to-you trail before you get to the last 2.2 that take you back to the trailhead. Ice Lake to the trailhead is pretty much all a descent and the first stretch is a counter-clockwise horseshoe-shaped path that gets you around and down a rock wall. While coming down from Ice Lake, the whole valley is laid out in front of you. The views are great and it also gives you a clear picture of where you’re headed in general.

Eventually you’ll come across that first fork, which looks like this when coming from Ice Lake:
Hang a right and you’ve got the same 2.2 miles left until you’re back at the trailhead.
This was my first 13er (mountain over 13,000 feet). While I have no basis for comparison, I don’t think you’ll find too many that are easier and more scenic than this one.
Have you ever done this hike, or have questions on it? Please leave a comment below!
Leave a reply